Strawberry Fluff Salad

I’ll never forget the first time I whipped up a Strawberry Fluff Salad for a family barbecue. It was one of those scorching summer days where the kids were running through the sprinkler, and I was desperate for something quick, cool, and crowd-pleasing. I stumbled across this recipe in my mom’s old church cookbook, and let me tell you, it was a game-changer. The bowl was scraped clean in under an hour, and my picky nephew even asked for seconds (which, trust me, is a miracle)!

This Strawberry Fluff Salad is my go-to when I need a dessert that doubles as a side dish without any fuss. It’s creamy, sweet, and bursting with fresh strawberry flavor, but it’s so easy I can practically make it with my eyes closed. I’ve tweaked it over the years to get that perfect balance of fluff and fruit, and I’m spilling all my secrets here.

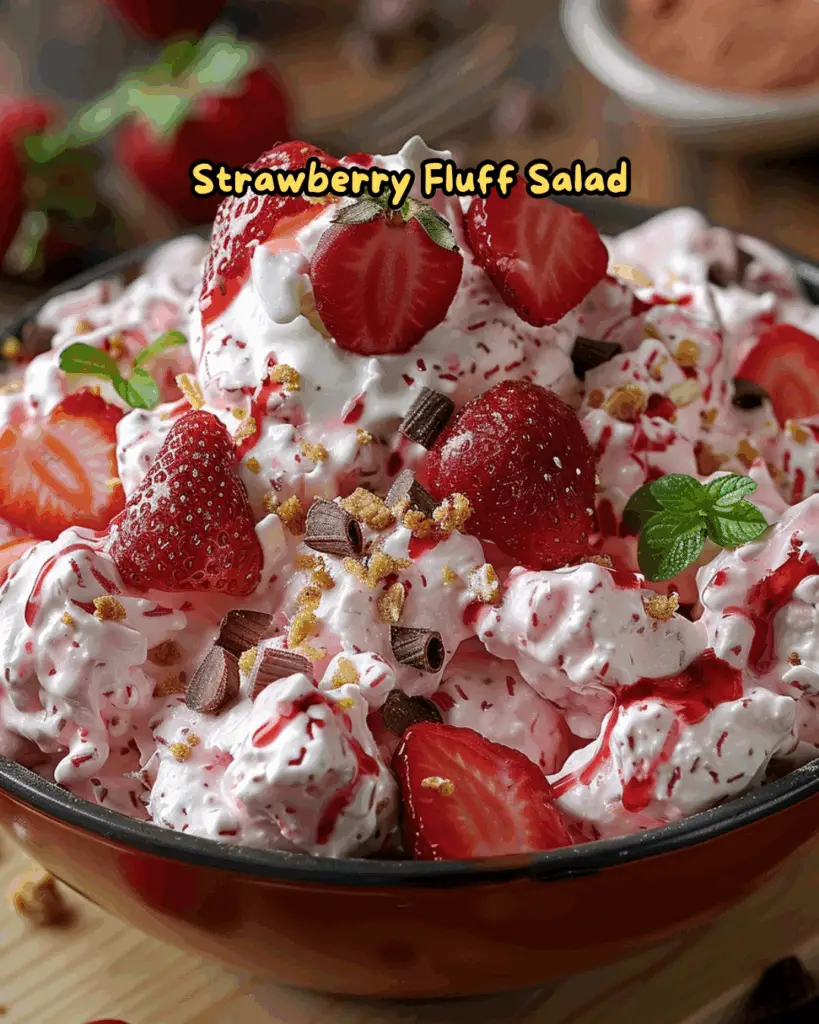
Whether you’re prepping for a potluck or just craving something nostalgic, this recipe’s got your back. Let’s dive into why this dish is a total winner and how you can make it your own!

Why You’ll Love This Recipe

This Strawberry Fluff Salad is the kind of dish that makes everyone at the table smile. It’s got that retro vibe that reminds me of my grandma’s kitchen, but it’s versatile enough to fit any modern gathering. I’ve found it’s a hit with kids and adults alike, which is no small feat!

Plus, it’s ridiculously easy to throw together. In my kitchen, where chaos often reigns (think spilled flour and a toddler “helping”), this recipe is a lifesaver. You’ll love how it comes together in minutes but tastes like you spent hours.

Ingredients List

I’m all about keeping things simple, so the ingredients for Strawberry Fluff Salad are easy to find and budget-friendly. I usually grab my strawberries fresh from the farmer’s market when they’re in season, but frozen works in a pinch. Here’s what you’ll need, with my personal picks for the best results.

For the Fluff Base

  • 1 (8 oz) tub whipped topping, thawed: I go for Cool Whip because it’s reliable, but store brands are fine too.
  • 1 (3.4 oz) package instant vanilla pudding mix: This adds sweetness and structure—don’t skip it!
  • 1 (20 oz) can crushed pineapple, drained: Drain it well to avoid a soupy mess.
  • 2 cups mini marshmallows: I prefer the white ones for that classic look, but colored ones add a fun twist.

For the Strawberry Component

  • 2 cups fresh strawberries, hulled and chopped: Pick ripe, red ones for the best flavor.
  • 1 (3 oz) package strawberry gelatin mix: This boosts the Strawberry Fluff Salad’s fruity punch.
  • 1 cup cottage cheese, small curd: I know, it sounds weird, but it adds creaminess and a slight tang—trust me.

Optional Add-Ins

  • 1/2 cup chopped pecans: I toss these in for crunch, but you can skip them for nut-free folks.

Pro tip: If your strawberries aren’t super sweet, sprinkle a teaspoon of sugar on them before mixing. It draws out their juices and makes the salad sing.

Variations

I’ve made Strawberry Fluff Salad a million different ways, depending on what’s in my pantry or who I’m feeding. Here are some twists I’ve tried (and loved) to keep things fresh. Feel free to experiment—this recipe’s forgiving!

  • Tropical Twist: Swap the crushed pineapple for diced mango and add a handful of shredded coconut. I tried this for a luau-themed party, and it was a total hit.
  • Berry Bonanza: Mix in raspberries or blueberries with the strawberries. My kids go wild for the extra colors.
  • Chocolate Dream: Fold in 1/2 cup mini chocolate chips for a dessert-like vibe. I did this once for a Valentine’s Day potluck, and people lost their minds.
  • Low-Sugar Version: Use sugar-free pudding mix and gelatin. It’s not my favorite, but it works for my diabetic uncle.
  • Citrus Zest: Add a teaspoon of orange zest for a bright, summery kick. This one’s my personal go-to for spring brunches.
  • Nutty Crunch: Swap pecans for slivered almonds or crushed pretzels. I love the salty-sweet combo pretzels bring.
  • Boozy Bliss: For adults-only gatherings, soak the strawberries in a tablespoon of Grand Marnier first. I did this for a girls’ night, and let’s just say the bowl was empty fast!

The beauty of Strawberry Fluff Salad is how adaptable it is. Play around and make it your own—I promise it’s hard to mess up.

Servings and Timing

In my experience, this Strawberry Fluff Salad serves about 8-10 people as a side or dessert, though it depends on how generous your scoops are! It’s perfect for potlucks because it stretches far. Here’s the timing breakdown:

  • Prep Time: 15 minutes
  • Chill Time: 1 hour (optional, but it helps the flavors meld)
  • Total Time: About 1 hour 15 minutes

I usually make it the morning of an event, but you can prep it the night before if you’re pressed for time.

Step-by-Step Instructions

Making Strawberry Fluff Salad is so easy, it’s almost unfair. I’ve broken it down into steps with my little tricks to ensure yours turns out perfect every time. Let’s get to it!

Step 1: Prep the Strawberries

Hull and chop your strawberries into bite-sized pieces. If they’re not super ripe, toss them with a teaspoon of sugar and let them sit for 5 minutes. I learned this trick after a batch with bland berries nearly ruined a picnic—never again!

Step 2: Mix the Dry Ingredients

In a large bowl, combine the vanilla pudding mix and strawberry gelatin mix. Whisk them together to avoid clumps. I like to do this step first because it saves me from stirring too much later (and keeps the fluff fluffy!).

Step 3: Fold in the Wet Ingredients

Add the whipped topping, drained crushed pineapple, and cottage cheese to the dry mix. Fold everything gently with a spatula—don’t stir like you’re mixing cement! I made that mistake once, and my Strawberry Fluff Salad was more like soup.

Step 4: Add Strawberries and Marshmallows

Toss in the chopped strawberries, mini marshmallows, and pecans (if using). Fold until everything’s evenly distributed. I like to sneak a taste here to check the sweetness—nobody’s judging!

Step 5: Chill and Serve

Cover the bowl and pop it in the fridge for at least an hour. This step isn’t mandatory, but I think it makes the Strawberry Fluff Salad taste better as the flavors mingle. Serve it cold in a pretty bowl to wow your guests.

Nutritional Information

I’m not one to obsess over calories, but I know some folks like to keep track. Here’s the rough nutritional breakdown for Strawberry Fluff Salad, based on 10 servings. These are estimates, so take them with a grain of salt (or sugar!).

  • Calories: 220 per serving
  • Fat: 8g
  • Protein: 4g
  • Carbohydrates: 34g
  • Sodium: 280mg

The cottage cheese adds a surprising protein boost, which I love for keeping me full at potlucks. If you’re watching your diet, check out the healthier alternatives below.

Healthier Alternatives

When I’m trying to lighten things up, I’ve swapped a few ingredients in Strawberry Fluff Salad with great results. Here are my go-to tweaks for a guilt-free version. They still taste amazing, I promise!

  • Sugar-Free Swap: Use sugar-free pudding mix and gelatin to cut down on sugar. It’s a bit less sweet, but still delicious.
  • Greek Yogurt Boost: Replace half the whipped topping with plain Greek yogurt. I did this for a brunch and nobody noticed the difference!
  • Fruit-Only Version: Skip the marshmallows and add extra strawberries or grapes. It’s fresher and naturally sweet.

These changes make Strawberry Fluff Salad a bit kinder to your waistline without sacrificing that creamy, dreamy texture.

Serving Suggestions

I love serving Strawberry Fluff Salad because it’s so versatile. It’s like the little black dress of recipes—fits any occasion! Here are my favorite ways to dish it up.

  • As a Dessert: Serve with a dollop of whipped cream and a sprinkle of crushed vanilla wafers. It’s my go-to for summer BBQs.
  • Potluck Star: Pair with savory dishes like fried chicken or coleslaw. At my last church potluck, it was gone before the main course!
  • Kid-Friendly Snack: Scoop into small cups for a fun after-school treat. My kids beg for this version.

No matter how you serve it, Strawberry Fluff Salad always steals the show.

Common Mistakes to Avoid

I’ve made my fair share of flubs with Strawberry Fluff Salad, so let me save you some trouble. Here are mistakes I learned the hard way—trust me on these!

  • Not Draining the Pineapple: If you skip this, your salad will be a watery mess. I ruined a batch for a family reunion this way, and it still haunts me.
  • Overmixing the Fluff: Stir gently to keep it light and airy. My first attempt was dense because I went at it like I was kneading bread!

Avoid these, and your Strawberry Fluff Salad will be perfect every time.

Storing Tips

I’ve found Strawberry Fluff Salad keeps surprisingly well if you store it right. Here’s how I do it to keep it fresh and tasty.

  • Refrigerator: Store in an airtight container for up to 3 days. Give it a gentle stir before serving.
  • Freezer: I don’t recommend freezing—it messes with the texture. Stick to the fridge for best results.

If you’ve got leftovers, cover them tightly to keep the strawberries from getting soggy.

FAQs

Got questions about Strawberry Fluff Salad? I’ve got answers! Here are the ones I hear most often, based on my years of making this dish.

Can I make Strawberry Fluff Salad ahead of time?

Yup, you can make it a day in advance. Just store it in the fridge and give it a quick stir before serving. I do this for parties all the time!

Can I use frozen strawberries?

Totally! Thaw them first and drain any extra liquid. I’ve used frozen in winter when fresh berries are pricey, and it’s still delish.

Is cottage cheese necessary?

It adds creaminess, but you can skip it if you’re not a fan. I’d add extra whipped topping to keep the texture right.

Can I make it nut-free?

Absolutely, just leave out the pecans. I do this for my nephew’s school events, and nobody misses them.

How do I make it less sweet?

Use sugar-free pudding or cut back on the marshmallows. I’ve done this for my health-conscious sister, and she loved it.

Can I use homemade whipped cream?

You can, but it won’t hold up as well. I stick with store-bought whipped topping for stability, especially in warm weather.

What if my salad is too runny?

You probably didn’t drain the pineapple well. Next time, press it with a strainer. I’ve saved a runny batch by adding more marshmallows to soak up the liquid!

Can I double the recipe?

Go for it! Just use a bigger bowl and keep the ratios the same. I double it for big family gatherings, and it’s always a hit.

Conclusion

I hope you’re as excited to try this Strawberry Fluff Salad as I am to share it! It’s one of those recipes that brings back memories of summer picnics and happy faces around the table. Grab your ingredients, have fun with it, and let me know how it turns out—I’d love to hear your twists! Now go make some Strawberry Fluff Salad magic happen in your kitchen.

Luscious Lemon Drizzle Cake – Moist & Easy Recipe

Introduction 

Luscious Lemon Drizzle Cake is a timeless dessert with a zesty, vibrant twist. This cake, with its moist crumb and tangy-sweet glaze, is a treat that pleases everyone. Perfect for afternoon tea, birthdays, or whenever you crave something citrusy, it’s no wonder this dessert is a beloved classic. The bright lemon flavor cuts through the sweetness, offering a refreshing dessert with just the right balance. Its simplicity in preparation yet bold flavor profile makes it an ideal choice for beginners and seasoned bakers alike.

Whether enjoyed with a cup of tea or coffee or on its own, the lemon drizzle cake embodies comfort and elegance. This cake is baked to golden perfection and doused in a lemon syrup glaze that seeps into the crumb, ensuring each bite is moist and bursting with flavor. With minimal ingredients and easy-to-follow steps, anyone can create this dessert with great results.

In the following guide, we’ll break down everything from the best ingredients to preparation techniques for achieving the perfect Luscious Lemon Drizzle Cake. Get ready to bake a cake that’s bright, flavorful, and irresistible!

Brief Description of the Recipe

The Luscious Lemon Drizzle Cake is a delightful lemon-infused sponge cake topped with a tangy lemon glaze. It begins with a simple batter made with flour, sugar, butter, eggs, and lemon zest, which is then baked until golden. Once out of the oven, the cake is pricked with a skewer and drenched in a lemon syrup that soaks into the sponge, intensifying the lemony taste. The final step often involves a drizzle of icing sugar mixed with lemon juice, forming a thin, crisp crust that enhances the texture.

This cake is known for its moist texture and intense lemon flavor. It’s perfect for any occasion, be it a weekday treat or part of a fancy dessert spread. The combination of tartness and sweetness creates a flavor profile that’s loved universally. Whether served as-is or with a dollop of whipped cream or a scoop of vanilla ice cream, it’s always a showstopper.

The beauty of this recipe lies in its simplicity and versatility. You can experiment with additional ingredients like poppy seeds or even substitute oranges for a different twist. Whether you follow the traditional recipe or give it a creative spin, you’ll end up with a cake that’s guaranteed to be the star of any gathering.

Luscious Lemon Drizzle Cake

Highlight Key Appeal: Ease of Preparation, Versatility, or Uniqueness

The Luscious Lemon Drizzle Cake is adored for its:

  • Ease of Preparation: Requires minimal ingredients and simple techniques.
  • Versatility: Suitable for all occasions, from casual to celebratory.
  • Uniqueness: The balance of tart lemon and sweet glaze creates a memorable flavor.

Why This Recipe is a Winner

This lemon drizzle cake stands out for several reasons:

  1. Better Than Store-Bought: Homemade lemon drizzle cakes are fresher and more flavorful.
  2. Texture Perfection: The syrup ensures the cake stays moist, unlike many dry store versions.
  3. Customizable: You can add toppings like candied lemon peel or mix in poppy seeds.
  4. Crowd Favorite: Its tangy, sweet flavor makes it a party hit.

Personal Anecdote or Connection to the Recipe

I remember my first taste of lemon drizzle cake during a visit to my grandmother’s house. She baked it on rainy afternoons, and the kitchen would fill with the comforting aroma of lemon zest. It’s a recipe that always brings back memories of family gatherings and cozy moments. Every time I make it, I’m reminded of those warm, nostalgic days.

Ingredients

Cake Ingredients:

  • Unsalted Butter: 1 cup (225g), softened – Provides richness and moisture.
  • Caster Sugar: 1 cup (200g) – For a fine, smooth texture and sweetness.
  • Large Eggs: 4 – Adds structure and lightness.
  • Self-Raising Flour: 2 cups (250g), sifted – Ensures proper rise and a tender crumb.
  • Lemon Zest: Zest of 2 lemons – Infuses the cake with fresh, zesty flavor.
  • Milk: 2 tbsp – Keeps the batter moist and improves texture.

Lemon Syrup:

  • Lemon Juice: Juice of 2 lemons – Provides the bold lemon flavor for soaking the cake.
  • Granulated Sugar: ½ cup (100g) – Sweetens the syrup without overpowering the tartness.

Lemon Drizzle Glaze:

  • Icing Sugar: 1 cup (125g), sifted – Ensures a smooth, lump-free glaze.
  • Lemon Juice: 2-3 tbsp – Adjust for desired glaze consistency and flavor intensity.

Optional: Variations or Substitutions

  • Citrus Alternatives: Swap lemons for oranges or limes.
  • Poppy Seeds: Add for a nutty crunch.
  • Almond Flour: Substitute a portion of the flour for almond flour for a denser texture.

Preparation Tips

Step-by-Step Detailed Instructions: How to Make Luscious Lemon Drizzle Cake

  1. Preheat and Prepare Pan

    • Preheat the oven to 350°F (175°C).
    • Grease and line a 9×5 inch loaf tin with parchment paper for easy removal.
  2. Cream Butter and Sugar

    • In a large bowl, beat the softened butter and caster sugar together using an electric mixer.
    • Mix on medium-high speed until light and fluffy (3-4 minutes). This step ensures a lighter crumb by incorporating air.
  3. Add Eggs Gradually

    • Crack eggs into a small bowl.
    • Add one egg at a time to the butter-sugar mixture, beating well after each addition.
    • Scrape down the sides of the bowl as needed to ensure even mixing.
  4. Incorporate Flour and Lemon Zest

    • Sift the self-raising flour to remove lumps.
    • Gently fold the flour into the wet ingredients using a spatula or large spoon. Do this in batches to avoid overmixing, which can cause a dense cake.
    • Add the lemon zest and fold gently to distribute.
  5. Add Milk

    • Stir in 2 tbsp of milk to loosen the batter slightly for a smoother texture.
  6. Transfer to Tin and Bake

    • Pour the batter into the prepared loaf tin. Smooth the surface with a spatula.
    • Bake for 40-50 minutes, or until a skewer inserted into the center comes out clean.
  7. Prepare Lemon Syrup

    • While the cake is baking, prepare the lemon syrup.
    • Combine lemon juice and granulated sugar in a small saucepan over medium heat. Stir until the sugar dissolves completely. Set aside to cool.
  8. Soak the Cake

    • Once the cake is baked, remove it from the oven but leave it in the tin.
    • Use a skewer or fork to poke holes all over the surface of the cake.
    • Slowly pour the lemon syrup over the warm cake, allowing it to soak through the holes. This step keeps the cake moist and ensures every bite bursts with lemon flavor.
  9. Cool Completely

    • Let the cake cool in the tin for 10-15 minutes before transferring it to a wire rack. Allow it to cool completely before applying the drizzle.
  10. Prepare Lemon Drizzle Glaze

    • In a bowl, sift icing sugar to remove any lumps.
    • Add lemon juice, one tablespoon at a time, stirring until a smooth, pourable consistency is achieved. The glaze should coat the back of a spoon but not be too runny.
  11. Drizzle and Set

    • Once the cake has cooled, drizzle the lemon glaze over the top. You can use a spoon or piping bag for a neater drizzle effect.
    • Let the glaze set for 15-20 minutes before slicing.

Highlight Key Techniques for Best Results

  • Creaming: Ensure butter and sugar are fully creamed for a lighter texture.
  • Poking Holes: This helps the lemon syrup absorb evenly.
  • Drizzle Timing: Drizzle when the cake is still warm for maximum soakage.

Serving Suggestions

Serve with whipped cream, a dusting of icing sugar, or alongside tea or coffee. It pairs beautifully with fresh berries or vanilla ice cream.


Helpful Tips

  • Room Temperature Ingredients: Ensures even mixing.
  • Cooling: Allow the cake to cool fully before slicing to maintain shape.
  • Storage: Keep in an airtight container for up to 4 days.

Substitutions and Variations

  • Gluten-Free: Use a gluten-free flour blend instead of self-raising flour.
  • Vegan: Swap butter for vegan margarine and use flax eggs (1 tbsp flaxseed + 3 tbsp water per egg).
  • Healthier Option: Reduce sugar or use coconut sugar for a milder sweetness.
  • Flavor Enhancements: Add lavender for a floral note or ginger for warmth.

Frequently Asked Questions

  1. Can I freeze lemon drizzle cake? Yes, wrap it tightly and freeze for up to 3 months.
  2. How long does it last? It stays fresh for 4 days in an airtight container.
  3. Can I double the recipe? Yes, use a larger pan and adjust baking time.
  4. What can I use instead of self-raising flour? Use plain flour with 1 ½ tsp baking powder per cup.
  5. Can I make it dairy-free? Substitute dairy-free butter.
  6. How do I know it’s cooked? Insert a skewer; it should come out clean.
  7. Can I add other fruits? Yes, blueberries work well.
  8. Why is my cake dense? Overmixing or not creaming the butter properly.
  9. How do I get a crisp drizzle? Let the cake cool slightly before drizzling.
  10. Is lemon zest necessary? Yes, it intensifies the lemon flavor.

Ideas for Repurposing Leftovers into New Dishes

  • Trifle Base: Use leftover cake for a lemon trifle.
  • Cake Crumbs: Make cake pops or sprinkle over yogurt.
  • French Toast: Use thick slices for a unique lemon-flavored French toast.

List Similar or Complementary Recipes

Details:

  • Prep Time: 20 minutes
  • Cook Time: 45 minutes
  • Total Time: 1 hour 5 minutes
  • Yield: 1 loaf (8 servings)
  • Category: Dessert
  • Method: Baking
  • Cuisine: British
  • Diet: Vegetarian
  • Keywords: lemon drizzle cake, moist lemon cake, easy dessert, citrus cake

Nutrition:

  • Serving Size: 1 slice
  • Calories: 280
  • Sugar: 24g
  • Sodium: 100mg
  • Fat: 12g
  • Saturated Fat: 7g
  • Unsaturated Fat: 5g
  • Trans Fat: 0g
  • Carbohydrates: 38g
  • Fiber: 1g
  • Protein: 4g
  • Cholesterol: 50mg

Popular Lemon Recipes:

Print

Luscious Lemon Drizzle Cake – Moist & Easy Recipe

5 Stars 4 Stars 3 Stars 2 Stars 1 Star

No reviews

The Luscious Lemon Drizzle Cake is a delightful lemon-infused sponge cake topped with a tangy lemon glaze. It begins with a simple batter made with flour, sugar, butter, eggs, and lemon zest, which is then baked until golden. Once out of the oven, the cake is pricked with a skewer and drenched in a lemon syrup that soaks into the sponge, intensifying the lemony taste. The final step often involves a drizzle of icing sugar mixed with lemon juice, forming a thin, crisp crust that enhances the texture.

  • Author: Emilia

Ingredients

Ingredients

Cake Ingredients:

  • Unsalted Butter: 1 cup (225g), softened – Provides richness and moisture.
  • Caster Sugar: 1 cup (200g) – For a fine, smooth texture and sweetness.
  • Large Eggs: 4 – Adds structure and lightness.
  • Self-Raising Flour: 2 cups (250g), sifted – Ensures proper rise and a tender crumb.
  • Lemon Zest: Zest of 2 lemons – Infuses the cake with fresh, zesty flavor.
  • Milk: 2 tbsp – Keeps the batter moist and improves texture.

Lemon Syrup:

  • Lemon Juice: Juice of 2 lemons – Provides the bold lemon flavor for soaking the cake.
  • Granulated Sugar: ½ cup (100g) – Sweetens the syrup without overpowering the tartness.

Lemon Drizzle Glaze:

  • Icing Sugar: 1 cup (125g), sifted – Ensures a smooth, lump-free glaze.
  • Lemon Juice: 2-3 tbsp – Adjust for desired glaze consistency and flavor intensity.

Instructions

Preparation Tips

Step-by-Step Detailed Instructions: How to Make Luscious Lemon Drizzle Cake

  1. Preheat and Prepare Pan

    • Preheat the oven to 350°F (175°C).
    • Grease and line a 9×5 inch loaf tin with parchment paper for easy removal.
  2. Cream Butter and Sugar

    • In a large bowl, beat the softened butter and caster sugar together using an electric mixer.
    • Mix on medium-high speed until light and fluffy (3-4 minutes). This step ensures a lighter crumb by incorporating air.
  3. Add Eggs Gradually

    • Crack eggs into a small bowl.
    • Add one egg at a time to the butter-sugar mixture, beating well after each addition.
    • Scrape down the sides of the bowl as needed to ensure even mixing.
  4. Incorporate Flour and Lemon Zest

    • Sift the self-raising flour to remove lumps.
    • Gently fold the flour into the wet ingredients using a spatula or large spoon. Do this in batches to avoid overmixing, which can cause a dense cake.
    • Add the lemon zest and fold gently to distribute.
  5. Add Milk

    • Stir in 2 tbsp of milk to loosen the batter slightly for a smoother texture.
  6. Transfer to Tin and Bake

    • Pour the batter into the prepared loaf tin. Smooth the surface with a spatula.
    • Bake for 40-50 minutes, or until a skewer inserted into the center comes out clean.
  7. Prepare Lemon Syrup

    • While the cake is baking, prepare the lemon syrup.
    • Combine lemon juice and granulated sugar in a small saucepan over medium heat. Stir until the sugar dissolves completely. Set aside to cool.
  8. Soak the Cake

    • Once the cake is baked, remove it from the oven but leave it in the tin.
    • Use a skewer or fork to poke holes all over the surface of the cake.
    • Slowly pour the lemon syrup over the warm cake, allowing it to soak through the holes. This step keeps the cake moist and ensures every bite bursts with lemon flavor.
  9. Cool Completely

    • Let the cake cool in the tin for 10-15 minutes before transferring it to a wire rack. Allow it to cool completely before applying the drizzle.
  10. Prepare Lemon Drizzle Glaze

    • In a bowl, sift icing sugar to remove any lumps.
    • Add lemon juice, one tablespoon at a time, stirring until a smooth, pourable consistency is achieved. The glaze should coat the back of a spoon but not be too runny.
  11. Drizzle and Set

    • Once the cake has cooled, drizzle the lemon glaze over the top. You can use a spoon or piping bag for a neater drizzle effect.
    • Let the glaze set for 15-20 minutes before slicing.

Notes

Notes:

Details:

  • Prep Time: 20 minutes
  • Cook Time: 45 minutes
  • Total Time: 1 hour 5 minutes
  • Yield: 1 loaf (8 servings)
  • Category: Dessert
  • Method: Baking
  • Cuisine: British
  • Diet: Vegetarian
  • Keywords: lemon drizzle cake, moist lemon cake, easy dessert, citrus cake

Nutrition:

  • Serving Size: 1 slice
  • Calories: 280
  • Sugar: 24g
  • Sodium: 100mg
  • Fat: 12g
  • Saturated Fat: 7g
  • Unsaturated Fat: 5g
  • Trans Fat: 0g
  • Carbohydrates: 38g
  • Fiber: 1g
  • Protein: 4g
  • Cholesterol: 50mg

Did you make this recipe?

Share a photo and tag us — we can't wait to see what you've made!

Zesty Lemon Raspberry Cake – Fresh and Easy Dessert Recipe

Introduction: Zesty Lemon Raspberry Cake

This Zesty Lemon Raspberry Cake is the perfect balance of tart and sweet, delivering a fresh and fruity dessert that will brighten any occasion. Bursting with the citrusy zing of fresh lemons and the juicy sweetness of raspberries, this cake is as light as it is moist. Whether for a summer picnic, a birthday celebration, or just a cozy afternoon treat, this cake feels like a celebration on a plate. Its moist crumb is complemented by a raspberry-lemon glaze that seeps into every layer, enhancing the flavor profile even more.

What makes this cake truly special is its versatility. You can bake it as a loaf, round cake, or even cupcakes for individual servings. The recipe is straightforward and forgiving, making it suitable for beginners but still sophisticated enough to impress seasoned bakers. The combination of flavors is a nod to summer, but this cake is delicious year-round. Pair it with tea, coffee, or a scoop of vanilla ice cream for an extra indulgence.

With its vibrant, natural colors and fresh ingredients, the Zesty Lemon Raspberry Cake doesn’t just taste amazing; it’s also visually stunning. Decorate with fresh raspberries and lemon zest for that bakery-worthy presentation. Get ready to fall in love with every tart, sweet, and buttery bite!

Brief Description of the Recipe: Zesty Lemon Raspberry Cake

The Zesty Lemon Raspberry Cake blends the freshness of lemons with bursts of raspberry for a dessert that’s as vibrant as it is delicious. The base of the cake is a buttery, lemon-infused batter that creates a light and tender crumb. Fresh or frozen raspberries are folded into the batter before baking, creating pockets of tart sweetness that balance beautifully with the lemon.

To elevate the flavor, a tangy lemon glaze is poured over the cake once it’s baked. The glaze seeps into the cake, adding moisture and enhancing the lemony goodness. For added elegance, top with lemon zest and a few fresh raspberries for garnish.

The beauty of this recipe is in its simplicity and adaptability. Bake it as a loaf for a casual dessert or in a bundt pan for a more formal presentation. You can also adapt it to make cupcakes for individual servings. It’s equally delicious served warm from the oven or after being chilled in the fridge for a more refreshing dessert.

Perfect for any skill level, this cake is easy to whip up with basic pantry ingredients. Whether you’re baking for a family gathering, a holiday event, or just to satisfy a sweet craving, the Zesty Lemon Raspberry Cake is bound to be a hit. Its vibrant flavor and moist texture make it a standout dessert that people will ask for again and again.


Zesty Lemon Raspberry Cake

Highlight Key Appeal: Ease of Preparation, Versatility, or Uniqueness

  1. Ease of Preparation: This recipe doesn’t require advanced baking skills, making it accessible for beginners.
  2. Versatility: Bake it as a loaf, bundt, or cupcakes. It’s perfect for any occasion!
  3. Uniqueness: The combination of tart lemon and sweet raspberry creates a balanced, fresh, and unexpected flavor that stands out.

Why This Recipe is a Winner

The Zesty Lemon Raspberry Cake is a winner because it strikes the perfect balance between flavors and textures. The moist lemony crumb is punctuated by bursts of juicy raspberries, providing just the right amount of sweetness to complement the tart citrus. The glaze not only adds a visual appeal but also boosts the cake’s flavor, making each bite tangy and refreshing.

What sets it apart from store-bought options is its freshness. Made with real lemon juice, lemon zest, and raspberries, this cake tastes homemade in the best possible way. Plus, it’s far more customizable—swap raspberries for blueberries or strawberries, or add a touch of vanilla for a different flavor profile.

This cake is also a crowd-pleaser. It’s perfect for holidays, parties, or casual get-togethers, and because it’s not overly sweet, even those who aren’t big on dessert can enjoy it. It can also be stored and enjoyed over several days, maintaining its moisture and flavor beautifully. Whether you’re baking for family or friends, it’s bound to leave a lasting impression.

Personal Anecdote or Connection to the Recipe

I first baked this Zesty Lemon Raspberry Cake for a family brunch, and it quickly became a staple. The fresh lemony aroma filled the kitchen, and everyone loved the contrast between the tart lemon and sweet raspberries. Since then, it’s been my go-to dessert whenever I want something fresh yet comforting.

Ingredients

Cake Ingredients

  • All-Purpose Flour: 2 ½ cups – Provides structure and stability for the cake.
  • Granulated Sugar: 1 ½ cups – Sweetens the cake and helps it brown slightly.
  • Unsalted Butter: ¾ cup (1 ½ sticks) at room temperature – Adds richness and a moist, tender crumb.
  • Eggs: 3 large, at room temperature – Provides structure, moisture, and richness to the cake.
  • Whole Milk: ¾ cup, room temperature – Balances the batter’s thickness and keeps the cake soft.
  • Fresh Lemon Juice: ¼ cup – Adds a burst of citrus flavor to the cake.
  • Lemon Zest: 2 tablespoons (about 2 lemons) – Intensifies the lemony aroma and flavor.
  • Fresh Raspberries: 1 ½ cups – Provides natural sweetness and bursts of tartness throughout the cake.
  • Baking Powder: 1 ½ teaspoons – Helps the cake rise and gives it a light texture.
  • Salt: ½ teaspoon – Enhances all flavors and balances sweetness.
  • Vanilla Extract: 1 teaspoon – Adds a hint of warmth and depth to the flavor.

Lemon Glaze Ingredients

  • Powdered Sugar: 1 cup – Creates a smooth, sweet glaze.
  • Lemon Juice: 2 tablespoons – Provides a tart balance to the sweetness of the glaze.
  • Lemon Zest: 1 teaspoon – Adds visual appeal and extra lemon flavor to the glaze.

Zesty Lemon Raspberry Cake

Preparation Tips: Step-by-Step Instructions (Detailed)

How to Make the Zesty Lemon Raspberry Cake

  1. Preheat the Oven
    Preheat your oven to 350°F (175°C). Grease a loaf pan or bundt pan thoroughly with butter or non-stick spray. Optionally, line the pan with parchment paper for easy removal.

  2. Prepare the Dry Ingredients
    In a large mixing bowl, sift together 2 ½ cups of all-purpose flour, 1 ½ teaspoons of baking powder, and ½ teaspoon of salt. This ensures an even distribution of leavening agents and prevents lumps in the batter.

  3. Cream the Butter and Sugar
    In a separate large bowl, add ¾ cup of room-temperature butter and 1 ½ cups of granulated sugar. Using an electric mixer on medium speed, beat for about 3-4 minutes until the mixture is light, pale, and fluffy. This step incorporates air into the batter, ensuring a light crumb.

  4. Add the Eggs One at a Time
    Add the eggs, one at a time, to the butter-sugar mixture. Beat well after each addition to fully incorporate the eggs and create a smooth mixture. Scrape down the sides of the bowl as needed to ensure even mixing.

  5. Incorporate Lemon Zest and Vanilla
    Add the 2 tablespoons of lemon zest and 1 teaspoon of vanilla extract to the mixture. Beat for another 30 seconds to combine. This infuses the batter with bold lemon flavor.

  6. Mix the Lemon Juice and Milk
    In a small bowl or measuring cup, combine ¾ cup of milk and ¼ cup of fresh lemon juice. The mixture may curdle slightly, which is normal.

  7. Combine Wet and Dry Ingredients
    Alternate adding the flour mixture and the lemon-milk mixture to the butter mixture. Start by adding ⅓ of the dry ingredients and mix on low speed just until incorporated. Add ½ of the lemon-milk mixture and mix again. Repeat this process until all ingredients are combined. Be careful not to overmix to avoid a dense cake.

  8. Fold in the Raspberries
    Gently toss the raspberries with 1 tablespoon of flour to prevent them from sinking to the bottom of the cake. Using a spatula, fold the floured raspberries into the batter. Be gentle to avoid breaking the berries.

  9. Pour the Batter into the Pan
    Pour the batter into your prepared loaf or bundt pan. Smooth the top with a spatula to ensure even baking.

  10. Bake
    Place the pan in the preheated oven and bake for 50-60 minutes, or until a toothpick inserted into the center comes out clean. If using a bundt pan, start checking at the 45-minute mark.

  11. Cool the Cake
    Allow the cake to cool in the pan for 10-15 minutes before transferring it to a wire rack. Let the cake cool completely before glazing to ensure the glaze sets properly.

How to Make the Lemon Glaze

  1. Mix Glaze Ingredients
    In a small bowl, combine 1 cup of powdered sugar and 2 tablespoons of lemon juice. Whisk until smooth. If the glaze is too thick, add more lemon juice 1 teaspoon at a time. For a thicker glaze, add more powdered sugar.

  2. Add Lemon Zest
    Stir in 1 teaspoon of lemon zest for added flavor and texture.

  3. Glaze the Cake
    Once the cake has cooled completely, place it on a serving plate or wire rack with parchment paper underneath. Drizzle the glaze over the cake, allowing it to run down the sides for a rustic look.

Key Techniques for Best Results

  • Room Temperature Ingredients: Always bring butter, eggs, and milk to room temperature before starting. This ensures better incorporation and a smooth batter.
  • Gentle Folding: When folding in raspberries, be delicate to avoid breaking the berries.
  • Avoid Overbaking: Test for doneness early to prevent a dry cake.
  • Flouring Berries: Tossing raspberries with flour helps distribute them evenly and prevents sinking.

Highlight Key Techniques for Best Results

  • Room Temperature Ingredients: Ensure butter and eggs are at room temperature for smooth mixing.
  • Gently fold berries: Prevent berries from sinking or breaking by folding gently.
  • Do not overbake: Check with a toothpick to avoid dryness.

Serving Suggestions

Serve with whipped cream, fresh raspberries, or a dollop of lemon curd for extra indulgence.

Helpful Tips

  • Prevent Sinking Berries: Toss raspberries in a tablespoon of flour before folding in.
  • Glazing: Poke holes in the cake before glazing to let it seep in.
  • Storage: Store in an airtight container at room temperature for up to 3 days or in the fridge for a week.
  • Make Ahead: Prepare a day in advance for enhanced flavor.

Substitutions and Variations

  1. Flour: Swap with almond flour for a nuttier flavor.
  2. Sweeteners: Use honey or maple syrup for a more natural sweetness.
  3. Citrus: Substitute lemon with orange or lime for a new twist.
  4. Berry Swaps: Try blueberries, blackberries, or even dried cranberries.
  5. Vegan: Use flax eggs and plant-based butter.
  6. Nutty Add-ins: Add slivered almonds for texture.

Frequently Asked Questions

  1. Can I use frozen raspberries? Yes, but do not thaw them.
  2. Can I make it gluten-free? Yes, use a 1:1 gluten-free flour substitute.
  3. How do I store leftovers? Store in an airtight container for up to a week.
  4. Can I freeze the cake? Yes, wrap tightly and freeze for up to 3 months.
  5. How long does it stay fresh? 3-4 days at room temperature.
  6. Can I reduce the sugar? Yes, reduce by up to 25%.
  7. How do I prevent the cake from drying? Do not overbake and use enough glaze.
  8. Can I add nuts? Yes, slivered almonds work well.
  9. Do I need to refrigerate it? Not necessary, but it will last longer.
  10. What’s the best pan to use? A loaf or bundt pan is ideal.

Ideas for Repurposing Leftovers into New Dishes

  1. Lemon Raspberry Trifle: Layer cake slices with whipped cream and raspberries.
  2. Cake Croutons: Toast small cubes and use as a topping for yogurt or ice cream.
  3. Cake Pops: Crumble leftover cake, mix with frosting, and shape into pops.

Zesty Lemon Raspberry Cake

Related Recipes

These recipes will complement your lemon and raspberry dessert cravings and provide endless inspiration for your next baking project!

Print

Zesty Lemon Raspberry Cake – Fresh and Easy Dessert Recipe

5 Stars 4 Stars 3 Stars 2 Stars 1 Star

No reviews

The Zesty Lemon Raspberry Cake blends the freshness of lemons with bursts of raspberry for a dessert that’s as vibrant as it is delicious. The base of the cake is a buttery, lemon-infused batter that creates a light and tender crumb. Fresh or frozen raspberries are folded into the batter before baking, creating pockets of tart sweetness that balance beautifully with the lemon.

  • Author: Emilia
  • Prep Time: 15 minutes
  • Cook Time: 50 minutes
  • Total Time: 1 hour 5 minutes
  • Yield: 8-10 slices
  • Category: Dessert
  • Method: Baking
  • Cuisine: American
  • Diet: Vegetarian

Ingredients

Ingredients

Cake Ingredients

  • All-Purpose Flour: 2 ½ cups – Provides structure and stability for the cake.
  • Granulated Sugar: 1 ½ cups – Sweetens the cake and helps it brown slightly.
  • Unsalted Butter: ¾ cup (1 ½ sticks) at room temperature – Adds richness and a moist, tender crumb.
  • Eggs: 3 large, at room temperature – Provides structure, moisture, and richness to the cake.
  • Whole Milk: ¾ cup, room temperature – Balances the batter’s thickness and keeps the cake soft.
  • Fresh Lemon Juice: ¼ cup – Adds a burst of citrus flavor to the cake.
  • Lemon Zest: 2 tablespoons (about 2 lemons) – Intensifies the lemony aroma and flavor.
  • Fresh Raspberries: 1 ½ cups – Provides natural sweetness and bursts of tartness throughout the cake.
  • Baking Powder: 1 ½ teaspoons – Helps the cake rise and gives it a light texture.
  • Salt: ½ teaspoon – Enhances all flavors and balances sweetness.
  • Vanilla Extract: 1 teaspoon – Adds a hint of warmth and depth to the flavor.

Lemon Glaze Ingredients

  • Powdered Sugar: 1 cup – Creates a smooth, sweet glaze.
  • Lemon Juice: 2 tablespoons – Provides a tart balance to the sweetness of the glaze.
  • Lemon Zest: 1 teaspoon – Adds visual appeal and extra lemon flavor to the glaze.

Instructions

Preparation Tips: Step-by-Step Instructions (Detailed)

How to Make the Zesty Lemon Raspberry Cake

  1. Preheat the Oven
    Preheat your oven to 350°F (175°C). Grease a loaf pan or bundt pan thoroughly with butter or non-stick spray. Optionally, line the pan with parchment paper for easy removal.

  2. Prepare the Dry Ingredients
    In a large mixing bowl, sift together 2 ½ cups of all-purpose flour, 1 ½ teaspoons of baking powder, and ½ teaspoon of salt. This ensures an even distribution of leavening agents and prevents lumps in the batter.

  3. Cream the Butter and Sugar
    In a separate large bowl, add ¾ cup of room-temperature butter and 1 ½ cups of granulated sugar. Using an electric mixer on medium speed, beat for about 3-4 minutes until the mixture is light, pale, and fluffy. This step incorporates air into the batter, ensuring a light crumb.

  4. Add the Eggs One at a Time
    Add the eggs, one at a time, to the butter-sugar mixture. Beat well after each addition to fully incorporate the eggs and create a smooth mixture. Scrape down the sides of the bowl as needed to ensure even mixing.

  5. Incorporate Lemon Zest and Vanilla
    Add the 2 tablespoons of lemon zest and 1 teaspoon of vanilla extract to the mixture. Beat for another 30 seconds to combine. This infuses the batter with bold lemon flavor.

  6. Mix the Lemon Juice and Milk
    In a small bowl or measuring cup, combine ¾ cup of milk and ¼ cup of fresh lemon juice. The mixture may curdle slightly, which is normal.

  7. Combine Wet and Dry Ingredients
    Alternate adding the flour mixture and the lemon-milk mixture to the butter mixture. Start by adding ⅓ of the dry ingredients and mix on low speed just until incorporated. Add ½ of the lemon-milk mixture and mix again. Repeat this process until all ingredients are combined. Be careful not to overmix to avoid a dense cake.

  8. Fold in the Raspberries
    Gently toss the raspberries with 1 tablespoon of flour to prevent them from sinking to the bottom of the cake. Using a spatula, fold the floured raspberries into the batter. Be gentle to avoid breaking the berries.

  9. Pour the Batter into the Pan
    Pour the batter into your prepared loaf or bundt pan. Smooth the top with a spatula to ensure even baking.

  10. Bake
    Place the pan in the preheated oven and bake for 50-60 minutes, or until a toothpick inserted into the center comes out clean. If using a bundt pan, start checking at the 45-minute mark.

  11. Cool the Cake
    Allow the cake to cool in the pan for 10-15 minutes before transferring it to a wire rack. Let the cake cool completely before glazing to ensure the glaze sets properly.

Notes

Equipment:

  • Mixing bowls
  • Electric mixer
  • Loaf or bundt pan
  • Cooling rack

Nutrition

  • Serving Size: 1 sclice
  • Calories: 350
  • Sugar: 30g
  • Sodium: 200mg
  • Fat: 14g
  • Saturated Fat: 9g
  • Unsaturated Fat: 5g
  • Trans Fat: 0g
  • Carbohydrates: 45g
  • Fiber: 2g
  • Protein: 5g
  • Cholesterol: 60mg

Did you make this recipe?

Share a photo and tag us — we can't wait to see what you've made!

Zesty Lemon Poppy Muffins Recipe – Moist and Easy

Introduction: Zesty Lemon Poppy Muffins

Zesty Lemon Poppy Muffins are a bright and delicious treat that brings a burst of citrusy freshness to any time of day. Whether it’s a breakfast staple or an afternoon snack, these muffins will surprise your taste buds with their perfectly balanced sweetness and tartness. What sets these muffins apart is the delicate crunch from poppy seeds, blending beautifully with the tangy flavor of freshly squeezed lemon juice and lemon zest. This easy-to-make recipe is ideal for home bakers of any level. You’ll get moist, fluffy muffins with every bite, infused with vibrant citrus flavors and a slightly nutty poppy texture. Not only are these muffins quick to prepare, but they can also be stored or frozen, making them versatile for meal prep or spontaneous cravings. Let’s dive into creating these bakery-style muffins in your own kitchen.

Brief Description of the Recipe: Zesty Lemon Poppy Muffins

This recipe is a simple and foolproof method for making bakery-quality muffins with a lemony twist. You’ll start by preparing a rich batter with ingredients such as lemon zest, fresh lemon juice, butter, eggs, sugar, flour, and baking powder. Poppy seeds are folded in for an extra textural element that enhances the muffins. A pinch of salt helps to balance out the citrus, and a touch of vanilla extract rounds out the flavors. Once baked to golden perfection, these muffins are light, moist, and flavorful. They are perfect on their own or with a dusting of powdered sugar or glaze. These muffins store well in an airtight container or can be frozen for later enjoyment.

Highlight Key Appeal: Ease of Preparation, Versatility, or Uniqueness

One of the key appeals of these Zesty Lemon Poppy Muffins is their simplicity. They come together in just a few simple steps using pantry staples. The recipe is highly adaptable—if you don’t have poppy seeds, swap them out for chia seeds. They can also be made gluten-free or dairy-free with a few substitutions. Their unique flavor profile makes them stand out, while their versatility ensures they fit almost any occasion, from brunches to picnics.

Zesty Lemon Poppy Muffins

Why This Recipe is a Winner

What makes this recipe a standout is the balance of flavors and textures. The combination of sweet and tart creates an irresistible muffin with layers of flavor. The poppy seeds add a unique crunch without overpowering the lemon essence. These muffins are better than store-bought options because they’re made with fresh, quality ingredients, ensuring superior taste and texture. They’re a crowd-pleaser at gatherings and make a great gift or potluck addition. Plus, they can be adjusted to suit dietary needs or personal preferences.

Personal Anecdote or Connection to the Recipe

Lemon poppy muffins were a nostalgic favorite in my household growing up. Every Sunday, my mom would bake a batch, and the aroma would fill the kitchen with lemony goodness. The poppy seeds were a fun texture surprise that I came to love. As an adult, I’ve tweaked her recipe slightly for a more robust lemon flavor, but every bite still takes me back to those cozy mornings with family. Now, it’s my go-to recipe when I need a pick-me-up or something special for weekend guests.

Ingredients

  • 1 ½ cups all-purpose flour (provides structure)
  • 1 teaspoon baking powder (for rising)
  • ½ teaspoon baking soda
  • ¼ teaspoon salt (balances flavor)
  • 2 tablespoons poppy seeds (adds crunch)
  • ¾ cup granulated sugar (sweetens)
  • Zest of 2 lemons (intensifies lemon flavor)
  • ½ cup unsalted butter, melted (adds moisture and richness)
  • 2 large eggs (binds the batter)
  • ½ cup fresh lemon juice (for tartness)
  • ½ cup whole milk or buttermilk
  • 1 teaspoon vanilla extract

Optional: Variations or Substitutions

  • Dairy-Free Option: Use almond or coconut milk instead of whole milk and substitute butter with coconut oil.
  • Gluten-Free: Swap out all-purpose flour for a gluten-free 1:1 baking flour.
  • Chia Seeds: Use chia seeds instead of poppy seeds for a similar texture.
  • Extra Lemon: Add lemon glaze by mixing powdered sugar and lemon juice for a tangy topping.

Zesty Lemon Poppy Muffins

Preparation Tips

Details of how to make the recipe

  1. Preheat the Oven: Set your oven to 375°F (190°C). Line a 12-cup muffin tin with paper liners or grease lightly.
  2. Mix Dry Ingredients: In a medium bowl, whisk together the flour, baking powder, baking soda, salt, and poppy seeds.
  3. Prepare Wet Ingredients: In a large bowl, combine the sugar and lemon zest, rubbing them together to release the lemon oils. Add melted butter, eggs, lemon juice, milk, and vanilla extract. Whisk until smooth.
  4. Combine: Gradually add the dry ingredients to the wet mixture, folding gently until just combined. Do not overmix.
  5. Scoop Batter: Fill each muffin cup about ¾ full with the batter.
  6. Bake: Place in the preheated oven and bake for 18-22 minutes or until a toothpick inserted in the center comes out clean.
  7. Cool: Allow muffins to cool in the tin for 5 minutes, then transfer to a wire rack to cool completely.

Highlight Key Techniques for Best Results

  • Zesting: Use a microplane for fine lemon zest without bitter pith.
  • Mixing: Gently fold ingredients to avoid dense muffins.
  • Storage: Store in an airtight container at room temperature for up to 3 days or freeze for up to a month.

Serving Suggestions

  • Simple: Dust muffins with powdered sugar for a quick finish.
  • Glazed: Drizzle with lemon glaze for extra flavor.
  • With Butter: Serve warm with a pat of butter for a rich breakfast treat.
  • Tea Pairing: Pair with chamomile or green tea for a perfect afternoon snack.

Zesty Lemon Poppy Muffins

Helpful Tips

  • Room Temperature Ingredients: Ensure eggs and milk are at room temperature for a smoother batter.
  • Muffin Liners: Use quality liners to prevent sticking.
  • Cooling Time: Allow muffins to cool fully before glazing or storing.
  • Double Batch: This recipe can easily be doubled if serving a large group.

Substitutions and Variations

  1. Lemon-Lime Muffins: Substitute half the lemon juice with lime juice for a citrus blend.
  2. Berry Addition: Fold in ½ cup fresh blueberries or raspberries for extra flavor.
  3. Almond Flour: Substitute a portion of all-purpose flour with almond flour for nuttier notes.
  4. Honey Sweetened: Use honey instead of granulated sugar for a natural sweetness.
  5. Egg Substitutes: Use flaxseed egg for a vegan version (1 tablespoon flaxseed + 3 tablespoons water per egg).
  6. Whole Wheat: Replace half the flour with whole wheat for a fiber boost.
  7. Orange Variation: Swap lemon with orange for a sweeter, orange-poppy muffin.

Frequently Asked Questions

  1. Can I use bottled lemon juice? Fresh lemon juice is best, but bottled works in a pinch.
  2. How can I tell when muffins are done? Insert a toothpick—if it comes out clean, they’re done.
  3. Can I freeze muffins? Yes, store in a freezer-safe bag for up to one month.
  4. Why are my muffins dense? Overmixing the batter can cause dense muffins.
  5. How do I make them extra moist? Use buttermilk or add a spoonful of Greek yogurt.
  6. Can I add nuts? Yes, chopped walnuts or almonds add texture.
  7. How long will they last? Store in an airtight container for up to 3 days.
  8. Can I make mini muffins? Yes, reduce the baking time to 10-12 minutes.
  9. How do I glaze them? Mix 1 cup powdered sugar with 2 tablespoons lemon juice.
  10. Can I use other citrus fruits? Yes, oranges or limes make great variations.

Ideas for Repurposing Leftovers into New Dishes

  • Muffin Croutons: Cube and toast muffins to use as croutons on fruit salads.
  • Muffin Bread Pudding: Use leftover muffins to make a lemony bread pudding.
  • Muffin Parfait: Layer crumbled muffins with yogurt and berries for breakfast.
  • French Toast Muffins: Dip halved muffins in egg and pan-fry for a fun twist on French toast.

List Similar or Complementary Recipes with Links or Brief Descriptions

  • Blueberry Lemon Muffins: A sweet-tart muffin with juicy blueberries.
  • Chia Lemon Loaf: A dense, chia-packed lemon loaf for dessert or snacks.
  • Almond Poppy Muffins: Swap lemon with almond extract for a nutty variation.
  • Lemon Drizzle Cake: A rich cake with tangy lemon syrup.
  • Citrus Scones: Buttery scones with a hint of lemon and orange zest.

Zesty Lemon Poppy Muffins

Related Recipes

  1. Lemon-Based Recipes:
  2. Poppy Seed or Similar Muffin Recipes:
  3. Quick and Easy Baked Goods:
  4. Other Citrus and Comfort Desserts:


Print

Zesty Lemon Poppy Muffins Recipe – Moist and Easy

5 Stars 4 Stars 3 Stars 2 Stars 1 Star

No reviews

  • Author: Emilia

Ingredients

Scale
  • 1 ½ cups all-purpose flour (provides structure)
  • 1 teaspoon baking powder (for rising)
  • ½ teaspoon baking soda
  • ¼ teaspoon salt (balances flavor)
  • 2 tablespoons poppy seeds (adds crunch)
  • ¾ cup granulated sugar (sweetens)
  • Zest of 2 lemons (intensifies lemon flavor)
  • ½ cup unsalted butter, melted (adds moisture and richness)
  • 2 large eggs (binds the batter)
  • ½ cup fresh lemon juice (for tartness)
  • ½ cup whole milk or buttermilk
  • 1 teaspoon vanilla extract

Instructions

Preparation Tips

Details of how to make the recipe

  1. Preheat the Oven: Set your oven to 375°F (190°C). Line a 12-cup muffin tin with paper liners or grease lightly.
  2. Mix Dry Ingredients: In a medium bowl, whisk together the flour, baking powder, baking soda, salt, and poppy seeds.
  3. Prepare Wet Ingredients: In a large bowl, combine the sugar and lemon zest, rubbing them together to release the lemon oils. Add melted butter, eggs, lemon juice, milk, and vanilla extract. Whisk until smooth.
  4. Combine: Gradually add the dry ingredients to the wet mixture, folding gently until just combined. Do not overmix.
  5. Scoop Batter: Fill each muffin cup about ¾ full with the batter.
  6. Bake: Place in the preheated oven and bake for 18-22 minutes or until a toothpick inserted in the center comes out clean.
  7. Cool: Allow muffins to cool in the tin for 5 minutes, then transfer to a wire rack to cool completely.

Highlight Key Techniques for Best Results

  • Zesting: Use a microplane for fine lemon zest without bitter pith.
  • Mixing: Gently fold ingredients to avoid dense muffins.
  • Storage: Store in an airtight container at room temperature for up to 3 days or freeze for up to a month.

Notes

Details:
Prep Time: 10 minutes
Cook Time: 20 minutes
Total Time: 30 minutes
Yield: 12 muffins
Category: Breakfast or Snack
Method: Baking
Cuisine: American
Diet: Vegetarian
Keywords: Lemon poppy muffins, easy lemon muffins, citrus muffins

Video URL: [Optional]
Equipment: Muffin tin, mixing bowls, whisk, zester, oven
Nutrition:
Serving Size: 1 muffin
Calories: 180
Sugar: 12g
Sodium: 180mg
Fat: 7g
Saturated Fat: 4g
Unsaturated Fat: 2g
Trans Fat: 0g
Carbohydrates: 24g
Fiber: 1g
Protein: 3g
Cholesterol: 35mg

Did you make this recipe?

Share a photo and tag us — we can't wait to see what you've made!

Lemon Curd Cake Delight

Introduction :

Lemon Curd Cake Delight is a perfect dessert for those who appreciate a sweet yet tangy treat. This cake combines the light, fluffy texture of a homemade cake with the rich, citrusy flavor of lemon curd, making it a refreshing choice for any occasion. Whether you’re celebrating a special event or simply indulging in a delicious dessert after dinner, this cake will surely impress both your taste buds and your guests. The bright and zesty lemon flavor is complemented by the creamy frosting, creating a perfect balance of sweetness and tartness that will leave everyone craving more.

What makes Lemon Curd Cake Delight so special is the vibrant lemon curd filling, which infuses the cake with a burst of fresh citrus flavor. The homemade lemon curd is made from scratch using simple ingredients like fresh lemon juice, eggs, sugar, and butter, giving it an indulgent richness that store-bought versions just can’t match. The curd not only enhances the cake’s flavor but also adds a smooth, velvety texture that contrasts beautifully with the light crumb of the cake.

This dessert is ideal for spring and summer, where the bright, citrus flavors perfectly match the sunny weather and lighter fare. However, its delightful taste and striking appearance make it a wonderful year-round treat. Whether you’re hosting a brunch, a birthday party, or just looking for a way to satisfy your sweet tooth, this Lemon Curd Cake Delight is a showstopper.

Lemon Curd Cake Delight

Ingredients:

  • For the Cake:
    • 2 cups all-purpose flour
    • 1 ½ teaspoons baking powder
    • ½ teaspoon baking soda
    • ¼ teaspoon salt
    • 1 cup unsalted butter, softened
    • 1 cup granulated sugar
    • 3 large eggs
    • 1 teaspoon vanilla extract
    • ¾ cup buttermilk
    • Zest of 1 lemon
  • For the Lemon Curd:
    • 3 large eggs
    • ¾ cup granulated sugar
    • 1 teaspoon lemon zest
    • ½ cup fresh lemon juice (about 2-3 lemons)
    • 6 tablespoons unsalted butter, cubed
  • For the Frosting:
    • 1 cup heavy cream
    • 1 tablespoon powdered sugar
    • 1 teaspoon vanilla extract

Lemon Curd Cake Delight

Instructions:

  1. Make the Cake:

    • Preheat your oven to 350°F (175°C). Grease and flour two 8-inch round cake pans.
    • In a bowl, whisk together flour, baking powder, baking soda, and salt.
    • In a separate large bowl, beat the butter and sugar until light and fluffy. Add eggs one at a time, followed by vanilla extract and lemon zest.
    • Alternately add the dry ingredients and buttermilk to the butter mixture, beginning and ending with the dry ingredients. Mix until just combined.
    • Divide the batter evenly between the prepared pans and bake for 25-30 minutes, or until a toothpick comes out clean. Let the cakes cool in the pans for 10 minutes before transferring them to a wire rack to cool completely.
  2. Make the Lemon Curd:

    • In a heatproof bowl, whisk together eggs, sugar, lemon zest, and lemon juice. Set the bowl over a pot of simmering water (double boiler).
    • Stir constantly until the mixture thickens, about 10 minutes. Once thickened, remove from heat and whisk in the butter until smooth.
    • Let the curd cool to room temperature.
  3. Make the Frosting:

    • In a chilled bowl, whip the heavy cream, powdered sugar, and vanilla extract until stiff peaks form.
  4. Assemble the Cake:

    • Place one cake layer on a serving plate and spread a generous amount of lemon curd on top. Add the second cake layer on top.
    • Frost the entire cake with whipped cream frosting. Garnish with extra lemon zest or fresh berries if desired.

Lemon Curd Cake Delight

FAQ’S About Lemon Curd Cake Delight

1. Can I make this cake ahead of time?

Yes, you can prepare the cake layers and lemon curd in advance. Store the cake layers in an airtight container at room temperature for up to 2 days, or freeze them for longer storage. The lemon curd can be made up to a week ahead and kept in the refrigerator. Frost the cake just before serving for the best texture and freshness.

2. Can I use store-bought lemon curd?

While homemade lemon curd provides the best flavor and texture, you can use store-bought lemon curd in a pinch. However, for the best results, I recommend making it from scratch for a richer, fresher taste.

3. What can I substitute for buttermilk?

If you don’t have buttermilk on hand, you can substitute it with ¾ cup of milk mixed with 1 tablespoon of lemon juice or vinegar. Let it sit for about 5 minutes to thicken before using it in the cake batter.

4. Can I add other fruits to the cake?

Yes! Fresh berries, such as raspberries or blueberries, would pair wonderfully with the lemon flavor. You can either incorporate them into the cake batter or use them as a topping for the frosted cake.

5. How do I store the Lemon Curd Cake Delight?

To store, cover the cake with plastic wrap or place it in an airtight container and refrigerate it for up to 3-4 days. If you have leftover lemon curd, store it in a sealed jar in the refrigerator for up to a week.

6. Can I freeze this cake?

Yes, you can freeze the cake! Allow the cake layers to cool completely, then wrap them tightly in plastic wrap or foil. Store them in the freezer for up to 3 months. When ready to serve, let the cake thaw in the refrigerator overnight before assembling and frosting.

7. Is there a dairy-free option for this cake?

To make this cake dairy-free, you can substitute the butter with a dairy-free alternative like margarine or coconut oil. For the buttermilk, use a non-dairy milk such as almond or soy milk, mixed with lemon juice or vinegar. Ensure that the frosting is also made with dairy-free whipped cream alternatives.

8. How can I make the frosting thicker?

If your frosting is too thin, you can add a little more powdered sugar, one tablespoon at a time, until it reaches your desired consistency. Alternatively, you can chill the whipped cream in the refrigerator for 10-15 minutes before whipping it again to help it firm up.

9. Can I use a different flavor of curd?

Absolutely! You can experiment with different fruit curds, such as orange, lime, or raspberry, to give the cake a unique twist. The method of making the curd remains the same, just substitute the lemon juice for the fruit juice of your choice.

10. What kind of cake pans should I use?

For this recipe, 8-inch round cake pans work best, but you can also use 9-inch pans for slightly thinner layers. Just adjust the baking time accordingly, checking for doneness by inserting a toothpick into the center of the cake.

Print

Lemon Curd Cake Delight

5 Stars 4 Stars 3 Stars 2 Stars 1 Star

No reviews

Lemon Curd Cake Delight is a perfect dessert for those who appreciate a sweet yet tangy treat. This cake combines the light, fluffy texture of a homemade cake with the rich, citrusy flavor of lemon curd, making it a refreshing choice for any occasion. Whether you’re celebrating a special event or simply indulging in a delicious dessert after dinner, this cake will surely impress both your taste buds and your guests. The bright and zesty lemon flavor is complemented by the creamy frosting, creating a perfect balance of sweetness and tartness that will leave everyone craving more.

  • Author: Emilia
  • Prep Time: 20 minutes
  • Cook Time: 30 minutes
  • Total Time: 50 minutes
  • Yield: 1 two-layer 8-inch cake (serves 8-10 people) 1x
  • Category: Dessert, Cake
  • Method: Baking, Stovetop (for lemon curd)
  • Cuisine: American, British (with lemon curd)
  • Diet: Gluten Free

Ingredients

Scale

Ingredients:

  • For the Cake:
    • 2 cups all-purpose flour
    • 1 ½ teaspoons baking powder
    • ½ teaspoon baking soda
    • ¼ teaspoon salt
    • 1 cup unsalted butter, softened
    • 1 cup granulated sugar
    • 3 large eggs
    • 1 teaspoon vanilla extract
    • ¾ cup buttermilk
    • Zest of 1 lemon
  • For the Lemon Curd:
    • 3 large eggs
    • ¾ cup granulated sugar
    • 1 teaspoon lemon zest
    • ½ cup fresh lemon juice (about 23 lemons)
    • 6 tablespoons unsalted butter, cubed
  • For the Frosting:
    • 1 cup heavy cream
    • 1 tablespoon powdered sugar
    • 1 teaspoon vanilla extract

Instructions

Instructions:

  1. Make the Cake:

    • Preheat your oven to 350°F (175°C). Grease and flour two 8-inch round cake pans.
    • In a bowl, whisk together flour, baking powder, baking soda, and salt.
    • In a separate large bowl, beat the butter and sugar until light and fluffy. Add eggs one at a time, followed by vanilla extract and lemon zest.
    • Alternately add the dry ingredients and buttermilk to the butter mixture, beginning and ending with the dry ingredients. Mix until just combined.
    • Divide the batter evenly between the prepared pans and bake for 25-30 minutes, or until a toothpick comes out clean. Let the cakes cool in the pans for 10 minutes before transferring them to a wire rack to cool completely.
  2. Make the Lemon Curd:

    • In a heatproof bowl, whisk together eggs, sugar, lemon zest, and lemon juice. Set the bowl over a pot of simmering water (double boiler).
    • Stir constantly until the mixture thickens, about 10 minutes. Once thickened, remove from heat and whisk in the butter until smooth.
    • Let the curd cool to room temperature.
  3. Make the Frosting:

    • In a chilled bowl, whip the heavy cream, powdered sugar, and vanilla extract until stiff peaks form.
  4. Assemble the Cake:

    • Place one cake layer on a serving plate and spread a generous amount of lemon curd on top. Add the second cake layer on top.
    • Frost the entire cake with whipped cream frosting. Garnish with extra lemon zest or fresh berries if desired.

Nutrition

  • Serving Size: 1 slice (based on 10 servings per cake)
  • Calories: 320 kcal
  • Sugar: 32g
  • Sodium: 150mg
  • Fat: 18g
  • Saturated Fat: 8g
  • Unsaturated Fat: 7g
  • Trans Fat: 0g
  • Carbohydrates: 38g
  • Fiber: 1g
  • Protein: 3g
  • Cholesterol: 60mg

Did you make this recipe?

Share a photo and tag us — we can't wait to see what you've made!

Best Zesty Lemon Meringue Cupcakes – 5 Easy Steps !

Introduction

Zesty Lemon Meringue Cupcakes are a delightful twist on the classic lemon meringue pie. These cupcakes combine moist lemon-infused cake with a luscious lemon curd filling, topped with light and airy meringue that’s toasted to golden perfection. Each bite is a balance of tart lemon and sweet meringue, creating an explosion of flavor and texture. This recipe is perfect for spring gatherings, birthdays, or any occasion that calls for a show-stopping dessert. If you’re a lemon dessert lover, these cupcakes are a must-try. Let’s dive into the detailed process to create these stunning cupcakes!

Zesty Lemon Meringue Cupcakes

Ingredients for Zesty Lemon Meringue Cupcakes

For the Cupcakes:

  • 1 ½ cups all-purpose flour: The base structure for the cupcakes.
  • 1 cup granulated sugar: Provides sweetness and helps with browning.
  • ½ cup unsalted butter, softened: Adds moisture and richness.
  • 2 large eggs: Helps bind the ingredients and adds structure.
  • ½ cup whole milk: Adds moisture and tenderness to the crumb.
  • 2 teaspoons baking powder: Leavens the cupcakes for a light, fluffy texture.
  • 1 teaspoon vanilla extract: Adds a hint of warmth to balance the lemon.
  • ½ teaspoon salt: Enhances flavor.
  • Zest of 1 lemon: Intensifies the lemon flavor.
  • 2 tablespoons fresh lemon juice: Adds brightness and tartness.

For the Lemon Curd:

  • ½ cup granulated sugar: Sweetens the curd and balances the tartness.
  • 2 large eggs: Thickens the lemon curd.
  • ½ cup fresh lemon juice: Provides a tangy, citrusy base.
  • 2 tablespoons lemon zest: Adds extra lemon flavor and aroma.
  • 4 tablespoons unsalted butter, cut into pieces: Makes the curd smooth and rich.

For the Meringue Topping:

  • 3 large egg whites: Forms the base of the meringue.
  • ¾ cup granulated sugar: Sweetens and stabilizes the meringue.
  • ½ teaspoon cream of tartar: Helps stabilize the egg whites.
  • 1 teaspoon vanilla extract: Adds flavor to the meringue.

Zesty Lemon Meringue Cupcakes

Detailed Instructions for Making Zesty Lemon Meringue Cupcakes

Step 1: Preheat the Oven

  • Preheat your oven to 350°F (175°C).
  • Line a cupcake pan with paper liners. The liners will help the cupcakes release easily and make them easier to handle after baking.

Step 2: Make the Cupcake Batter

  1. Cream Butter and Sugar:
    • In a large bowl, cream together the softened butter and sugar using an electric mixer on medium speed. Beat until the mixture is light and fluffy—about 2-3 minutes. This step incorporates air, ensuring soft and tender cupcakes.
  2. Add Eggs One at a Time:
    • Add the eggs one at a time, mixing well after each addition. This helps the batter stay smooth and emulsified.
  3. Incorporate Liquids:
    • Stir in the milk, vanilla extract, lemon zest, and lemon juice. The lemon zest provides bold lemon flavor, while the juice adds tartness and moisture.

Step 3: Combine Dry Ingredients

  1. Whisk Dry Ingredients:
    • In a separate bowl, whisk together the all-purpose flour, baking powder, and salt. Ensure the baking powder is evenly distributed to avoid uneven rising.
  2. Combine Wet and Dry Mixtures:
    • Gradually add the dry mixture to the wet ingredients, mixing on low speed until just combined. Avoid overmixing, as it can make the cupcakes dense.

Step 4: Fill the Cupcake Liners and Bake

  1. Fill Liners:
    • Divide the batter evenly among the cupcake liners, filling each about two-thirds full. Overfilling can cause the cupcakes to overflow.
  2. Bake:
    • Bake in the preheated oven for 18-20 minutes, or until a toothpick inserted into the center comes out clean.
  3. Cool:
    • Let the cupcakes cool in the pan for 5 minutes before transferring them to a wire rack to cool completely.

Step 5: Prepare the Lemon Curd

  1. Mix Ingredients:
    • In a medium saucepan, whisk together the sugar, eggs, lemon juice, and lemon zest.
  2. Cook the Curd:
    • Cook over low heat, stirring constantly with a wooden spoon or rubber spatula to prevent curdling. The mixture will thicken as it cooks—about 8-10 minutes. It’s ready when it coats the back of a spoon.
  3. Add Butter:
    • Remove from heat and stir in the butter pieces until fully melted and smooth. The butter gives the curd its rich texture.
  4. Cool:
    • Let the lemon curd cool to room temperature before filling the cupcakes.

Step 6: Fill the Cupcakes

  1. Core the Cupcakes:
    • Once the cupcakes are completely cooled, use a small knife or cupcake corer to cut out a small section from the center of each cupcake.
  2. Fill with Lemon Curd:
    • Spoon a generous amount of lemon curd into each cavity.

Step 7: Make the Meringue

  1. Beat Egg Whites:
    • In a clean, dry mixing bowl, beat the egg whites with an electric mixer on medium speed until frothy.
  2. Stabilize with Cream of Tartar:
    • Add the cream of tartar and continue beating until soft peaks form (when the tips of the peaks curl over).
  3. Add Sugar Gradually:
    • Gradually add the sugar, one tablespoon at a time, beating until stiff peaks form. The meringue should be glossy and hold its shape when the beaters are lifted.
  4. Mix in Vanilla:
    • Add the vanilla extract and beat just until combined.

Step 8: Top the Cupcakes with Meringue

  1. Pipe or Spread:
    • Using a piping bag with a large round or star tip, pipe the meringue onto each cupcake. Alternatively, use a spoon or spatula to spread the meringue, creating decorative peaks and swirls.

Step 9: Toast the Meringue

  1. Preheat Broiler:
    • Preheat your broiler to high.
  2. Toast Carefully:
    • Place the cupcakes under the broiler for 1-2 minutes, watching closely. The meringue will toast quickly—remove as soon as it turns golden brown.

Optional: Use a kitchen torch for more control over browning the meringue.

Step 10: Serve

  • Allow the cupcakes to cool slightly before serving. These cupcakes pair beautifully with tea or coffee and are perfect for any occasion.

Zesty Lemon Meringue Cupcakes

Helpful Tips for Best Zesty Lemon Meringue Cupcakes

  • Room Temperature Ingredients: Ensure butter and eggs are at room temperature for smooth batter and even baking.
  • Prevent Weeping Meringue: Make sure the lemon curd is cool before topping with meringue, and avoid over-whipping the egg whites.
  • Storage: Store leftover cupcakes in an airtight container in the refrigerator for up to 2 days.

Enjoy your Zesty Lemon Meringue Cupcakes—each bite is a delicious combination of bright lemon and sweet, fluffy meringue!

The Origins and Inspiration Behind Lemon Meringue Cupcakes

Lemon desserts have a long and beloved history. Lemon meringue pie, one of the most iconic citrus desserts, dates back to the 18th century. Inspired by this timeless favorite, lemon meringue cupcakes offer a modern twist, transforming the traditional pie into handheld treats. The cupcake format is not only convenient but also allows for creative presentation with beautiful swirls of meringue. These cupcakes have become a popular choice for spring and summer celebrations, thanks to their bright, citrusy flavors and visually stunning appearance. Whether you’re baking for a special occasion or simply indulging your love for lemon, these cupcakes offer the perfect balance of tart, sweet, and creamy textures.

Why Lemon Meringue Cupcakes are a Must-Try

These cupcakes stand out for their layered complexity and balance of flavors. The tender lemon cake, rich lemon curd filling, and fluffy meringue topping come together in perfect harmony. Unlike some lemon desserts that can be overly sweet, the tartness of fresh lemon juice and zest keeps these cupcakes light and refreshing. The meringue adds a cloud-like texture that melts in your mouth, creating a dessert experience that’s both indulgent and delicate. Additionally, the visual appeal of golden-browned meringue swirls makes these cupcakes a show-stopping dessert for any event. If you’re a fan of bold citrus flavors and elegant desserts, you won’t want to miss out on these lemon meringue cupcakes.

Serving Suggestions

Lemon meringue cupcakes are versatile and can be enjoyed in many settings. They’re perfect for afternoon tea, birthday parties, or bridal showers. Serve them with a cup of hot tea for a cozy pairing, or complement the bright lemon flavor with a chilled glass of sparkling water or lemonade. For a more elevated experience, drizzle the cupcakes with lemon syrup before adding the meringue or serve them alongside fresh berries. If you want to impress guests at a dinner party, plate the cupcakes with a small scoop of vanilla ice cream to balance the tartness with creamy sweetness. The cupcakes also make for thoughtful gifts when packaged in decorative boxes with clear windows to show off the beautiful meringue tops.

Presentation Ideas

Presentation is a key part of elevating any dessert, and lemon meringue cupcakes are no exception. To enhance the visual appeal, consider using decorative cupcake liners with lemon or floral patterns that complement the theme of the cupcakes. After topping the cupcakes with meringue, use a kitchen torch to toast the peaks evenly for a more controlled golden-brown finish. You can also garnish each cupcake with a twist of lemon zest, a small candied lemon slice, or a sprinkle of powdered sugar for added elegance. If you’re serving these cupcakes at a party, arrange them on a tiered dessert stand for an impressive display. For individual servings, place each cupcake in a decorative box or jar to create a portable dessert that guests can take home.

Zesty Lemon Meringue Cupcakes

Tips for Perfect Lemon Curd

Lemon curd is a crucial element of this recipe, and getting it right ensures a flavorful, silky filling. Here are some additional tips to achieve perfect lemon curd every time:

  1. Use Fresh Ingredients: Always use fresh lemon juice and zest for the best flavor. Bottled lemon juice lacks the brightness and aroma that fresh lemons provide.
  2. Constant Stirring: Stir the curd constantly as it cooks to prevent the eggs from curdling. A rubber spatula works well for scraping the sides and bottom of the pan.
  3. Low Heat: Cook the lemon curd over low heat to allow it to thicken gradually. Cooking over high heat can lead to lumps or a grainy texture.
  4. Strain for Smoothness: If you notice any lumps after cooking, strain the curd through a fine mesh sieve to ensure a smooth texture.
  5. Chill Completely: Allow the lemon curd to cool completely before using it to fill the cupcakes. Warm curd can cause the meringue to weep or deflate.

How to Achieve the Perfect Meringue

Making meringue can be intimidating, but with the right techniques, you can create fluffy, stable peaks every time. Follow these tips for meringue success:

  1. Clean Bowl and Beaters: Ensure your mixing bowl and beaters are completely clean and dry. Any trace of grease or moisture can prevent the egg whites from whipping properly.
  2. Room Temperature Eggs: Bring the egg whites to room temperature before whipping. This helps them whip faster and achieve greater volume.
  3. Cream of Tartar: Adding cream of tartar stabilizes the egg whites, making it easier to achieve stiff peaks that hold their shape.
  4. Slow Sugar Addition: Gradually add the sugar, one tablespoon at a time, to avoid deflating the egg whites. Be patient, as rushing this step can result in a grainy meringue.
  5. Stiff Peaks: Continue whipping until stiff peaks form. You’ll know the meringue is ready when it holds its shape when the beaters are lifted, and the peaks stand upright without collapsing.

Common Mistakes and How to Avoid Them

When making lemon meringue cupcakes, a few common issues can arise. Here’s how to avoid them:

  • Cupcakes Sinking in the Middle: Overmixing the batter can lead to dense, sunken cupcakes. Mix just until the dry ingredients are incorporated.
  • Runny Lemon Curd: If your lemon curd doesn’t thicken, it may not have cooked long enough. Continue cooking over low heat until it coats the back of a spoon.
  • Weeping Meringue: This happens when moisture forms between the meringue and the cupcake. Ensure the lemon curd is fully cooled before topping with meringue, and don’t overbake the meringue.
  • Burnt Meringue: When toasting under the broiler, keep a close eye on the meringue. It browns quickly, and just a few extra seconds can result in burning.

Storing and Making Ahead

If you’re planning to make lemon meringue cupcakes in advance, follow these storage tips to keep them fresh:

  • Cupcakes Without Meringue: The lemon curd-filled cupcakes can be stored in an airtight container in the refrigerator for up to 2 days before adding the meringue.
  • Assembled Cupcakes: Once topped with meringue, store the cupcakes in the refrigerator in an airtight container. They’re best enjoyed within 24 hours to maintain the texture of the meringue.
  • Freezing Lemon Curd: If you have extra lemon curd, you can freeze it in a sealed container for up to 3 months. Thaw in the refrigerator before using.

Variations and Customizations

Lemon meringue cupcakes are incredibly versatile, and there are plenty of ways to put your own spin on the recipe:

  1. Berry Swirl: Add a layer of raspberry or blueberry jam along with the lemon curd for a fruity twist.
  2. Chocolate Drizzle: Drizzle melted dark or white chocolate over the meringue for added richness.
  3. Coconut Meringue: Fold shredded coconut into the meringue before toasting for a tropical touch.
  4. Mini Cupcakes: Make mini lemon meringue cupcakes for bite-sized treats that are perfect for parties.
  5. Gluten-Free: Use a gluten-free flour blend to make the cupcakes suitable for gluten-sensitive guests.

Zesty Lemon Meringue Cupcakes

Frequently Asked Questions (FAQs)

1. Can I use store-bought lemon curd?
Yes, store-bought lemon curd can be used for convenience, but homemade curd has a fresher, brighter flavor.

2. How do I know when the meringue is done?
The meringue is done when it’s golden brown and the peaks are set.

3. Can I skip the meringue?
If you prefer, you can top the cupcakes with whipped cream instead of meringue for a different texture.

4. What’s the best way to toast the meringue?
Using a kitchen torch gives you more control over browning. However, a broiler works well if you monitor it closely.

5. Can I make lemon meringue cupcakes dairy-free?
Yes! Use plant-based butter and a non-dairy milk alternative in the cupcake batter, and coconut oil instead of butter for the lemon curd.

By following these tips, techniques, and variations, you’ll master the art of baking Zesty Lemon Meringue Cupcakes. Whether you’re a beginner or an experienced baker, these cupcakes are sure to delight everyone who takes a bite!

Zesty Lemon Meringue Cupcakes

Print

Best Zesty Lemon Meringue Cupcakes – 5 Easy Steps !

5 Stars 4 Stars 3 Stars 2 Stars 1 Star

No reviews

Zesty Lemon Meringue Cupcakes are a delightful twist on the classic lemon meringue pie. These cupcakes combine moist lemon-infused cake with a luscious lemon curd filling, topped with light and airy meringue that’s toasted to golden perfection. Each bite is a balance of tart lemon and sweet meringue, creating an explosion of flavor and texture. This recipe is perfect for spring gatherings, birthdays, or any occasion that calls for a show-stopping dessert. If you’re a lemon dessert lover, these cupcakes are a must-try. Let’s dive into the detailed process to create these stunning cupcakes!

  • Author: Emilia

Ingredients

Scale

Ingredients for Zesty Lemon Meringue Cupcakes

For the Cupcakes:

  • 1 ½ cups all-purpose flour: The base structure for the cupcakes.
  • 1 cup granulated sugar: Provides sweetness and helps with browning.
  • ½ cup unsalted butter, softened: Adds moisture and richness.
  • 2 large eggs: Helps bind the ingredients and adds structure.
  • ½ cup whole milk: Adds moisture and tenderness to the crumb.
  • 2 teaspoons baking powder: Leavens the cupcakes for a light, fluffy texture.
  • 1 teaspoon vanilla extract: Adds a hint of warmth to balance the lemon.
  • ½ teaspoon salt: Enhances flavor.
  • Zest of 1 lemon: Intensifies the lemon flavor.
  • 2 tablespoons fresh lemon juice: Adds brightness and tartness.

For the Lemon Curd:

  • ½ cup granulated sugar: Sweetens the curd and balances the tartness.
  • 2 large eggs: Thickens the lemon curd.
  • ½ cup fresh lemon juice: Provides a tangy, citrusy base.
  • 2 tablespoons lemon zest: Adds extra lemon flavor and aroma.
  • 4 tablespoons unsalted butter, cut into pieces: Makes the curd smooth and rich.

For the Meringue Topping:

  • 3 large egg whites: Forms the base of the meringue.
  • ¾ cup granulated sugar: Sweetens and stabilizes the meringue.
  • ½ teaspoon cream of tartar: Helps stabilize the egg whites.
  • 1 teaspoon vanilla extract: Adds flavor to the meringue.

Instructions

Detailed Instructions for Making Zesty Lemon Meringue Cupcakes

Step 1: Preheat the Oven

  • Preheat your oven to 350°F (175°C).
  • Line a cupcake pan with paper liners. The liners will help the cupcakes release easily and make them easier to handle after baking.

Step 2: Make the Cupcake Batter

  1. Cream Butter and Sugar:
    • In a large bowl, cream together the softened butter and sugar using an electric mixer on medium speed. Beat until the mixture is light and fluffy—about 2-3 minutes. This step incorporates air, ensuring soft and tender cupcakes.
  2. Add Eggs One at a Time:
    • Add the eggs one at a time, mixing well after each addition. This helps the batter stay smooth and emulsified.
  3. Incorporate Liquids:
    • Stir in the milk, vanilla extract, lemon zest, and lemon juice. The lemon zest provides bold lemon flavor, while the juice adds tartness and moisture.

Step 3: Combine Dry Ingredients

  1. Whisk Dry Ingredients:
    • In a separate bowl, whisk together the all-purpose flour, baking powder, and salt. Ensure the baking powder is evenly distributed to avoid uneven rising.
  2. Combine Wet and Dry Mixtures:
    • Gradually add the dry mixture to the wet ingredients, mixing on low speed until just combined. Avoid overmixing, as it can make the cupcakes dense.

Step 4: Fill the Cupcake Liners and Bake

  1. Fill Liners:
    • Divide the batter evenly among the cupcake liners, filling each about two-thirds full. Overfilling can cause the cupcakes to overflow.
  2. Bake:
    • Bake in the preheated oven for 18-20 minutes, or until a toothpick inserted into the center comes out clean.
  3. Cool:
    • Let the cupcakes cool in the pan for 5 minutes before transferring them to a wire rack to cool completely.

Step 5: Prepare the Lemon Curd

  1. Mix Ingredients:
    • In a medium saucepan, whisk together the sugar, eggs, lemon juice, and lemon zest.
  2. Cook the Curd:
    • Cook over low heat, stirring constantly with a wooden spoon or rubber spatula to prevent curdling. The mixture will thicken as it cooks—about 8-10 minutes. It’s ready when it coats the back of a spoon.
  3. Add Butter:
    • Remove from heat and stir in the butter pieces until fully melted and smooth. The butter gives the curd its rich texture.
  4. Cool:
    • Let the lemon curd cool to room temperature before filling the cupcakes.

Step 6: Fill the Cupcakes

  1. Core the Cupcakes:
    • Once the cupcakes are completely cooled, use a small knife or cupcake corer to cut out a small section from the center of each cupcake.
  2. Fill with Lemon Curd:
    • Spoon a generous amount of lemon curd into each cavity.

Step 7: Make the Meringue

  1. Beat Egg Whites:
    • In a clean, dry mixing bowl, beat the egg whites with an electric mixer on medium speed until frothy.
  2. Stabilize with Cream of Tartar:
    • Add the cream of tartar and continue beating until soft peaks form (when the tips of the peaks curl over).
  3. Add Sugar Gradually:
    • Gradually add the sugar, one tablespoon at a time, beating until stiff peaks form. The meringue should be glossy and hold its shape when the beaters are lifted.
  4. Mix in Vanilla:
    • Add the vanilla extract and beat just until combined.

Step 8: Top the Cupcakes with Meringue

  1. Pipe or Spread:
    • Using a piping bag with a large round or star tip, pipe the meringue onto each cupcake. Alternatively, use a spoon or spatula to spread the meringue, creating decorative peaks and swirls.

Step 9: Toast the Meringue

  1. Preheat Broiler:
    • Preheat your broiler to high.
  2. Toast Carefully:
    • Place the cupcakes under the broiler for 1-2 minutes, watching closely. The meringue will toast quickly—remove as soon as it turns golden brown.

Optional: Use a kitchen torch for more control over browning the meringue.

Step 10: Serve

  • Allow the cupcakes to cool slightly before serving. These cupcakes pair beautifully with tea or coffee and are perfect for any occasion.

Notes

Notes:

Details:

  • Prep Time: 45 minutes
  • Chill Time: 2 hours
  • Cook Time: 55 minutes
  • Total Time: 3 hours 40 minutes (including chilling)
  • Yield: 8 servings
  • Category: Dessert
  • Method: Baking
  • Cuisine: French-inspired
  • Diet: Vegetarian

Keywords: Lemon Tart, Zesty Lemon Tart, Citrus Dessert, Easy Lemon Tart, Lemon Tart Recipe, Spring Dessert, Tart Dessert

Video URL: Add a video link if available for a visual step-by-step guide.

Equipment:

  • Tart pan
  • Mixing bowls
  • Rolling pin
  • Whisk
  • Measuring cups and spoons
  • Pie weights or dried beans
  • Parchment paper

Nutrition (Per Serving):

  • Serving Size: 1 slice
  • Calories: 340
  • Sugar: 18g
  • Sodium: 110mg
  • Fat: 15g
  • Saturated Fat: 8g
  • Unsaturated Fat: 5g
  • Trans Fat: 0g
  • Carbohydrates: 45g
  • Fiber: 1g
  • Protein: 5g
  • Cholesterol: 120mg

Did you make this recipe?

Share a photo and tag us — we can't wait to see what you've made!

Zesty Lemon Tart Delight – 3 Easy Citrus Dessert

Introduction: Zesty Lemon Tart Delight

A Zesty Lemon Tart Delight is a refreshing, citrus-infused dessert that’s perfect for any occasion. With its buttery tart crust and bright lemon filling, this dessert is a true crowd-pleaser. Lemon desserts are famous for their balance of sweetness and tang, and this tart is no exception. The creamy lemon curd filling nestled in a crisp crust creates a flavor explosion in every bite. Whether you’re preparing a special dinner or just indulging your love for citrus, this tart offers an elevated touch of elegance and freshness. Perfectly garnished with powdered sugar and fresh berries, this dessert brings a light and airy finish to any meal. Lemon tarts also have the advantage of being make-ahead friendly, ideal for hosting or meal prepping dessert. Let’s dive into what makes this lemon tart a winner and how to make it easily at home.

Zesty Lemon Tart Delight

Brief Description of the Recipe

This lemon tart consists of two main components: the crust and the filling. The tart crust is buttery, crisp, and lightly sweetened with powdered sugar, providing the perfect foundation. The filling is made with fresh lemon juice, lemon zest, eggs, cream, and a bit of cornstarch for thickening. After baking the filling to set it, the tart is chilled to perfection. The tart is simple to garnish with powdered sugar, berries, or lemon slices for extra flair. It’s a versatile dessert, easily adjustable to personal preferences with a variety of topping options. This dessert’s bright, zesty lemon flavor pairs well with tea, coffee, or after-dinner cocktails.

Highlight Key Appeal: Ease of Preparation, Versatility, or Uniqueness

The Lemon Tart Delight is celebrated for its simple preparation, adaptability, and vibrant flavor. It’s versatile enough for casual dining or special occasions, and it only requires everyday ingredients found in most kitchens. With just a bit of mixing and baking, you can create a dessert that looks and tastes gourmet. The blend of sweet and tangy is universally loved, making this a standout treat.

Why This Recipe is a Winner

This Zesty Lemon Tart Delight stands out for its rich, bright, and creamy filling paired with a flaky, buttery crust. The use of fresh lemon juice and zest ensures a burst of citrus flavor in every bite, which is far superior to store-bought lemon desserts. Additionally, the texture is a perfect balance—creamy but firm, soft yet structured. The ease of preparation and make-ahead nature means less stress when planning meals or entertaining guests. Its fresh, citrusy taste is a fantastic way to cleanse the palate after a meal.

Personal Anecdote or Connection to the Recipe

The first time I made this lemon tart was for a spring brunch, and it was an instant hit. I loved the way the fresh lemon aroma filled the kitchen during baking. The tart was both visually stunning and delicious, making it a conversation piece on the table. Now, it’s my go-to dessert for family gatherings, where everyone requests “that lemon tart” every time.

Zesty Lemon Tart Delight

Ingredients

For the Tart Crust:

  • 1 ½ cups all-purpose flour (base structure)
  • ½ cup powdered sugar (light sweetness)
  • ½ teaspoon salt (balances sweetness)
  • 1 stick (½ cup) unsalted butter, softened (flaky texture)
  • 1 large egg yolk (binding agent)
  • 2-3 tablespoons cold water (adjustable consistency)

For the Lemon Filling:

  • 1 cup granulated sugar (sweetness)
  • 3 large eggs (custard texture)
  • 2 large egg yolks (adds richness)
  • 1 cup fresh lemon juice (tartness and flavor)
  • Zest of 2 lemons (intensifies citrus flavor)
  • ½ cup heavy cream (adds creaminess)
  • 1 tablespoon cornstarch (thickening agent)
  • ¼ teaspoon salt (enhances flavors)

For Garnish:

  • Powdered sugar (visual and taste enhancement)
  • Fresh berries (optional, added color and flavor)
  • Lemon slices (optional, decorative element)

Zesty Lemon Tart Delight

Optional: Variations or Substitutions

  • Orange Tart: Swap out lemon juice and zest for orange for a sweeter citrus flavor.
  • Coconut Cream Lemon Tart: Add ½ cup of coconut cream to the filling for a tropical twist.
  • Gluten-Free Crust: Use a gluten-free flour blend instead of all-purpose flour.
  • Honey Lemon Tart: Replace half of the sugar with honey for a deeper sweetness.

Preparation Tips

How to Make the Recipe

  1. Prepare the Tart Crust:
    • Combine flour, powdered sugar, and salt in a bowl.
    • Add softened butter and mix until the mixture forms coarse crumbs.
    • Stir in egg yolk and add cold water, one tablespoon at a time, until the dough comes together.
    • Shape into a disk, wrap in plastic wrap, and refrigerate for 30 minutes.
  2. Preheat the Oven:
    • Set oven to 350°F (175°C).
  3. Roll Out the Dough:
    • Roll out the chilled dough on a floured surface to fit a 12-inch tart pan.
    • Transfer to the pan and press the dough evenly into the bottom and sides.
  4. Blind Bake the Crust:
    • Prick the dough with a fork. Line with parchment paper and add pie weights or dried beans.
    • Bake for 15 minutes. Remove weights and parchment, then bake for 10 more minutes until golden. Let cool.
  5. Prepare the Lemon Filling:
    • In a bowl, whisk together sugar, eggs, and egg yolks.
    • Add lemon juice, zest, cream, cornstarch, and salt. Mix until smooth.
  6. Fill the Crust:
    • Pour the lemon mixture into the cooled crust.
  7. Bake:
    • Bake for 25-30 minutes until the filling is set but slightly jiggly.
  8. Cool and Refrigerate:
    • Let the tart cool to room temperature. Refrigerate for at least 2 hours.
  9. Serve:
    • Dust with powdered sugar and garnish as desired. Slice and serve chilled.

Zesty Lemon Tart Delight

Highlight Key Techniques for Best Results

  • Blind Baking: Ensures a crispy crust that doesn’t get soggy.
  • Lemon Zest: Zest the lemons before juicing for maximum flavor.
  • Straining the Filling: For a smoother texture, strain the filling before pouring into the crust.

Serving Suggestions

  • Serve with fresh whipped cream for extra indulgence.
  • Pair with hot tea or iced coffee for a perfect flavor contrast.
  • Garnish with edible flowers for a springtime presentation.

Helpful Tips

  • Always chill the crust dough before baking to prevent shrinking.
  • Taste the filling mixture before baking and adjust the sweetness if necessary.
  • Use fresh lemons instead of bottled juice for the best flavor.

Substitutions and Variations

  • Dairy-Free Version: Use coconut cream instead of heavy cream.
  • Lemon Lavender Tart: Add 1 teaspoon of dried lavender to the filling for a floral note.
  • Chocolate Lemon Tart: Drizzle melted dark chocolate over the baked tart for a luxurious finish.

Frequently Asked Questions

  1. Can I make this tart ahead of time? Yes, it’s best made the day before.
  2. How long does it last? Store in the fridge for up to 3 days.
  3. Can I freeze it? Yes, but it’s best enjoyed fresh.
  4. What if I don’t have a tart pan? Use a pie pan as a substitute.
  5. How do I prevent cracks in the filling? Don’t overbake—remove while the center is slightly jiggly.
  6. Can I use bottled lemon juice? Fresh lemon juice is recommended for better flavor.
  7. What’s the best crust alternative? Graham cracker crust works well.
  8. How do I know when it’s done? The edges will be set, and the center should wobble slightly.
  9. Can I double the recipe? Yes, but use a larger tart pan or multiple pans.
  10. Can I make it vegan? Use a vegan egg substitute and coconut cream.

Zesty Lemon Tart Delight

Ideas for Repurposing Leftovers into New Dishes

  • Lemon Tart Parfait: Layer leftover tart slices with yogurt and granola.
  • Lemon Tart Milkshake: Blend tart slices with vanilla ice cream and milk.
  • Mini Lemon Tarts: Cut into small circles and serve in muffin cups as bite-sized treats.

Related Recipes

Print

Zesty Lemon Tart Delight – 3 Easy Citrus Dessert

5 Stars 4 Stars 3 Stars 2 Stars 1 Star

No reviews

This lemon tart consists of two main components: the crust and the filling. The tart crust is buttery, crisp, and lightly sweetened with powdered sugar, providing the perfect foundation. The filling is made with fresh lemon juice, lemon zest, eggs, cream, and a bit of cornstarch for thickening. After baking the filling to set it, the tart is chilled to perfection. The tart is simple to garnish with powdered sugar, berries, or lemon slices for extra flair. It’s a versatile dessert, easily adjustable to personal preferences with a variety of topping options. This dessert’s bright, zesty lemon flavor pairs well with tea, coffee, or after-dinner cocktails.

  • Author: Emilia

Ingredients

Scale

Ingredients

For the Tart Crust:

  • 1 ½ cups all-purpose flour (base structure)
  • ½ cup powdered sugar (light sweetness)
  • ½ teaspoon salt (balances sweetness)
  • 1 stick (½ cup) unsalted butter, softened (flaky texture)
  • 1 large egg yolk (binding agent)
  • 23 tablespoons cold water (adjustable consistency)

For the Lemon Filling:

  • 1 cup granulated sugar (sweetness)
  • 3 large eggs (custard texture)
  • 2 large egg yolks (adds richness)
  • 1 cup fresh lemon juice (tartness and flavor)
  • Zest of 2 lemons (intensifies citrus flavor)
  • ½ cup heavy cream (adds creaminess)
  • 1 tablespoon cornstarch (thickening agent)
  • ¼ teaspoon salt (enhances flavors)

For Garnish:

  • Powdered sugar (visual and taste enhancement)
  • Fresh berries (optional, added color and flavor)
  • Lemon slices (optional, decorative element)

Optional: Variations or Substitutions

  • Orange Tart: Swap out lemon juice and zest for orange for a sweeter citrus flavor.
  • Coconut Cream Lemon Tart: Add ½ cup of coconut cream to the filling for a tropical twist.
  • Gluten-Free Crust: Use a gluten-free flour blend instead of all-purpose flour.
  • Honey Lemon Tart: Replace half of the sugar with honey for a deeper sweetness.

Instructions

Preparation Tips

How to Make the Recipe

  1. Prepare the Tart Crust:

    • Combine flour, powdered sugar, and salt in a bowl.
    • Add softened butter and mix until the mixture forms coarse crumbs.
    • Stir in egg yolk and add cold water, one tablespoon at a time, until the dough comes together.
    • Shape into a disk, wrap in plastic wrap, and refrigerate for 30 minutes.
  2. Preheat the Oven:

    • Set oven to 350°F (175°C).
  3. Roll Out the Dough:

    • Roll out the chilled dough on a floured surface to fit a 12-inch tart pan.
    • Transfer to the pan and press the dough evenly into the bottom and sides.
  4. Blind Bake the Crust:

    • Prick the dough with a fork. Line with parchment paper and add pie weights or dried beans.
    • Bake for 15 minutes. Remove weights and parchment, then bake for 10 more minutes until golden. Let cool.
  5. Prepare the Lemon Filling:

    • In a bowl, whisk together sugar, eggs, and egg yolks.
    • Add lemon juice, zest, cream, cornstarch, and salt. Mix until smooth.
  6. Fill the Crust:

    • Pour the lemon mixture into the cooled crust.
  7. Bake:

    • Bake for 25-30 minutes until the filling is set but slightly jiggly.
  8. Cool and Refrigerate:

    • Let the tart cool to room temperature. Refrigerate for at least 2 hours.
  9. Serve:

    • Dust with powdered sugar and garnish as desired. Slice and serve chilled.

Highlight Key Techniques for Best Results

  • Blind Baking: Ensures a crispy crust that doesn’t get soggy.
  • Lemon Zest: Zest the lemons before juicing for maximum flavor.
  • Straining the Filling: For a smoother texture, strain the filling before pouring into the crust.

Notes

Notes

  • Prep Time: 45 minutes
  • Cook Time: 55 minutes
  • Total Time: 2 hours 40 minutes (including chilling time)
  • Yield: 8 servings
  • Category: Dessert
  • Method: Baking
  • Cuisine: French-inspired
  • Diet: Vegetarian
  • Keywords: Lemon Tart, Lemon Dessert, Zesty Dessert, Spring Tart, Citrus Dessert
  • Equipment: Tart pan, rolling pin, mixing bowls, whisk, pie weights, parchment paper
  • Nutrition (Per Serving):
    • Serving Size: 1 slice
    • Calories: 340
    • Sugar: 18g
    • Sodium: 110mg
    • Fat: 15g
    • Saturated Fat: 8g
    • Unsaturated Fat: 5g
    • Trans Fat: 0g
    • Carbohydrates: 45g
    • Fiber: 1g
    • Protein: 5g
    • Cholesterol: 120mg

Did you make this recipe?

Share a photo and tag us — we can't wait to see what you've made!

No Bake Lemon Cheesecake Delight: A Quick & Easy Dessert Guide

Introduction:

No Bake Lemon Cheesecake Delight is the perfect dessert for any occasion. Light, creamy, and bursting with fresh lemon flavor, this dessert requires no oven, making it an ideal choice for warm days or when you’re short on time. It features a rich, buttery graham cracker crust layered with a smooth lemon-flavored cream cheese filling, all topped with whipped cream for a fluffy finish. The zesty lemon flavor gives the cheesecake a refreshing tang, cutting through the richness and leaving you craving another slice. This dessert is versatile—it can be served in a large pan, individual cups, or even in jars for portable treats. Whether for a dinner party, potluck, or weeknight indulgence, No Bake Lemon Cheesecake Delight will be a showstopper. Bonus? It’s simple to prepare, with no fancy equipment needed. Read on to learn how to whip up this citrusy delight!

Brief description of the recipe: No Bake Lemon Cheesecake Delight

This No Bake Lemon Cheesecake Delight features multiple delicious layers that come together for the ultimate dessert experience. The graham cracker crust is prepared by mixing crushed graham crackers with melted butter and pressing it into a dish to form the base. The lemon-flavored cream cheese filling is light yet decadent, made with softened cream cheese, powdered sugar, lemon juice, and lemon zest to maximize that tangy flavor. To finish, a layer of fluffy whipped cream is spread over the top, adding an airy texture. This dessert is chilled until set, making it easy to slice and serve. It’s incredibly adaptable—swap the crust for vanilla wafers, or add a drizzle of lemon syrup on top for extra flair. With minimal prep and maximum taste, it’s bound to become a favorite in your dessert rotation.

Highlight key appeal: ease of preparation, versatility, or uniqueness

No Bake Lemon Cheesecake Delight stands out for its ease of preparation. There’s no need for baking or complex steps—just simple layering and chilling. Its versatility means it can be served in various ways, from traditional slices to individual cups. The combination of a buttery crust and tart lemon filling ensures a unique balance of richness and brightness, making this dessert a hit with everyone.

No Bake Lemon Cheesecake Delight

Why This Recipe is a Winner

This dessert wins hearts for its bright, citrusy twist on traditional cheesecake. The no-bake format means it’s a stress-free, crowd-pleasing dessert that still looks and tastes impressive. Unlike store-bought lemon cheesecake, this homemade version has a fresh, natural lemon flavor that’s not overly sweet or artificial. It’s also ideal for summer gatherings when you want a light dessert that doesn’t require turning on the oven. The creamy texture and vibrant flavor make it a perfect ending to any meal.

Personal anecdote or connection to the recipe

The first time I made No Bake Lemon Cheesecake Delight was for a summer picnic. It was hot, and I didn’t want to bake anything. Everyone was blown away by how light and refreshing it was. My grandmother, a lemon dessert aficionado, declared it one of the best she’d ever had! Since then, it’s been a staple for family events and gatherings.

Ingredients

  • 1 ½ cups graham cracker crumbs
  • ½ cup unsalted butter, melted
  • 1 cup granulated sugar
  • 16 oz cream cheese, softened
  • 1 cup sour cream
  • ½ cup fresh lemon juice
  • Zest of 2 lemons
  • 1 tsp vanilla extract
  • 1 tsp gelatin powder optional
  • 2 tbsp water if using gelatin
  • Fresh berries for garnish, optional
  • Lemon slices for garnish, optional

Optional: Variations or substitutions

  • Crust substitutions: Swap graham crackers for digestive biscuits or crushed vanilla wafers.
  • Flavor variations: Add a blueberry compote on top for a lemon-blueberry twist.
  • Sugar-free option: Use a sugar substitute to make it diabetic-friendly.
  • Dairy-free: Replace cream cheese with a plant-based alternative and heavy cream with coconut creamNo Bake Lemon Cheesecake Delight

    Preparation Tips

    To make the perfect No Bake Lemon Cheesecake Delight, follow these detailed steps to ensure each layer is just right. From preparing a sturdy crust to achieving a smooth and creamy filling, every step matters. Let’s break down the process step-by-step so you can create a flawless, crowd-pleasing dessert.

    Step-by-Step Detailed Instructions

    Step 1: Prepare the Crust

    Ingredients:

    • 2 cups graham cracker crumbs
    • ½ cup melted butter
    • 2 tbsp sugar

    Instructions:

    1. Crushing the Graham Crackers:

      • If you’re using whole graham crackers, place them in a food processor and pulse until fine crumbs form. Alternatively, place the crackers in a zip-top bag and crush them with a rolling pin. Ensure the crumbs are uniform to create a cohesive crust.
    2. Mixing:

      • In a large mixing bowl, combine the graham cracker crumbs, melted butter, and sugar. Mix until the crumbs are evenly coated with butter. You should be able to press the mixture into the bowl, and it should hold its shape without crumbling.
    3. Pressing the Crust:

      • Transfer the crumb mixture to an 8×8-inch dish (or similar). Using a flat-bottomed glass or measuring cup, firmly press the crumbs into an even layer across the bottom. Be sure to pack it tightly to create a crust that holds its shape when sliced.
    4. Chilling the Crust:

      • Refrigerate the crust for at least 20 minutes to firm it up. This helps prevent crumbling when the filling is added.

    Step 2: Make the Lemon Cream Cheese Filling

    Ingredients:

    • 16 oz cream cheese, softened
    • 1 cup powdered sugar
    • ¼ cup fresh lemon juice
    • 1 tbsp lemon zest
    • 1 tsp vanilla extract

    Instructions:

    1. Softening the Cream Cheese:

      • Leave the cream cheese at room temperature for at least 30 minutes before using. Softened cream cheese is essential to avoid lumps in the filling.
    2. Beating the Cream Cheese:

      • In a large mixing bowl, use a hand mixer (or stand mixer with a paddle attachment) to beat the cream cheese on medium speed until smooth and creamy. This should take 2-3 minutes.
    3. Incorporating the Powdered Sugar:

      • Gradually add the powdered sugar to the cream cheese, a little at a time. Beat on low speed at first to avoid a sugar cloud, then increase to medium until fully incorporated. The mixture should be smooth and thick.
    4. Adding Lemon Flavor:

      • Pour in the fresh lemon juice and lemon zest. Continue beating until well combined. Taste the mixture to ensure the lemon flavor is to your liking—you can add more zest for extra tang if desired.
    5. Vanilla Extract:

      • Add the vanilla extract and beat until fully mixed. The filling should be smooth, thick, and creamy with no lumps.

    Step 3: Assemble the Filling Over the Crust

    1. Spreading the Filling:

      • Remove the chilled crust from the refrigerator. Using a rubber spatula or an offset spatula, evenly spread the lemon cream cheese filling over the crust. Start from the center and work your way out to the edges.
    2. Smoothing the Surface:

      • Smooth out the top to create an even layer. This step is crucial if you want a professional-looking dessert. An offset spatula works best for this, but a spoon can also be used.

    Step 4: Make the Whipped Cream Topping

    Ingredients:

    • 1 cup heavy whipping cream
    • 2 tbsp powdered sugar

    Instructions:

    1. Chilling the Equipment:

      • For best results, place your mixing bowl and beaters in the refrigerator for 10-15 minutes before whipping the cream. Cold equipment helps the cream whip faster and achieve better volume.
    2. Whipping the Cream:

      • Pour the cold heavy cream into the chilled bowl. Start beating on low speed, gradually increasing to medium-high. Beat until the cream starts to thicken.
    3. Adding Sugar:

      • Once the cream is thickened but not yet forming peaks, add the powdered sugar. Continue beating until stiff peaks form. This means when you lift the beaters, the cream will hold its shape without collapsing.
    4. Do Not Overwhip:

      • Be careful not to overwhip, or the cream will turn grainy or start to separate. Stop as soon as stiff peaks are achieved.

    Step 5: Spread the Whipped Topping

    1. Spreading Over the Filling:

      • Carefully spread the whipped cream over the lemon cream cheese filling. Use gentle, even strokes to avoid mixing the layers.
    2. Decorative Swirls (Optional):

      • For a more decorative finish, use the back of a spoon or a spatula to create gentle swirls or peaks in the whipped cream.

    Step 6: Chill the Dessert

    1. Refrigeration:

      • Cover the dish with plastic wrap or foil to prevent the dessert from absorbing any odors in the fridge. Chill for at least 4 hours, but overnight is best for the firmest texture and cleanest slices.
    2. Why Chilling is Important:

      • Chilling allows the filling to fully set, ensuring the dessert holds its shape when sliced. Skipping this step will result in a runny, unstable filling.

    Step 7: Slice and Serve

    1. Slicing:

      • To achieve clean slices, use a sharp knife. Wipe the blade with a damp cloth between cuts to prevent the layers from smearing.
    2. Serving Options:

      • Garnish with lemon zest, lemon slices, or fresh berries before serving for added presentation and flavor.

    Additional Tips for Best Results:

    • Adjust Sweetness: If you prefer a less sweet dessert, reduce the powdered sugar in the filling or whipped topping slightly.
    • Extra Lemon Flavor: For more lemon intensity, add a small amount of lemon extract or extra lemon zest.
    • Texture Variations: For added crunch, sprinkle crushed graham crackers or chopped nuts over the whipped topping.
    • Storage: Leftovers should be stored in the refrigerator, covered, for up to 3 days.

    By following these detailed steps and tips, you’ll have a perfectly layered, smooth, and creamy No Bake Lemon Cheesecake Delight that’s sure to impress!

Serving Suggestions

  • Serve with a garnish of lemon zest or candied lemon slices.
  • Pair with a cup of iced tea or lemonade for a refreshing treat.
  • Add fresh berries for color and additional flavor contrast.

Helpful Tips

  • Storage: Keep refrigerated for up to 3 days.
  • Freezing: This dessert can be frozen for up to 1 month. Thaw in the refrigerator before serving.
  • Garnish creativity: Top with crushed graham crackers or lemon curd for extra flair.
  • Adjust sweetness: Taste the filling before assembling and adjust sugar levels to your preference.
  • Layering tip: Smooth the filling layer with an offset spatula for a professional look.

Substitutions and Variations

  • Gluten-free option: Use gluten-free graham crackers for the crust.
  • Extra lemony: Add lemon extract for a more intense lemon flavor.
  • Berry twist: Incorporate raspberries or blackberries for a fruity balance.
  • Chocolate crust: Replace the graham cracker crust with an Oreo crust for a lemon-chocolate combo.
  • Mini desserts: Create individual servings in small cups or mason jars for easy portion control.

Frequently Asked Questions

  1. How long should I chill it?
    At least 4 hours, but overnight is best for full setting.
  2. Can I freeze it?
    Yes, freeze for up to 1 month. Thaw before serving.
  3. Can I make it ahead of time?
    Absolutely! This dessert is even better the next day.
  4. What’s the best lemon juice to use?
    Fresh lemon juice is highly recommended for the best flavor.
  5. Can I use store-bought whipped topping?
    Yes, but homemade whipped cream provides better texture.
  6. How do I prevent the crust from crumbling?
    Press it firmly into the pan and chill before adding the filling.
  7. Can I add more lemon zest?
    Yes, for extra tanginess, add more zest to the filling.
  8. What’s a dairy-free alternative?
    Use dairy-free cream cheese and coconut cream.
  9. Can I use bottled lemon juice?
    It works, but fresh juice gives a brighter flavor.
  10. Can I add a fruit topping?
    Yes, berry compote or lemon curd are great options.

No Bake Lemon Cheesecake Delight

Ideas for repurposing leftovers into new dishes

  • Use leftovers as a filling for lemon parfaits with layered fruit and granola.
  • Spread the filling over pancakes for a breakfast treat.
  • Freeze leftover slices and enjoy as a frozen cheesecake dessert.

Related Recipes:

Related Recipes:

Here are some similar or complementary recipes that pair beautifully with No Bake Lemon Cheesecake Delight:

  1. No Bake Lemon Raspberry Cheesecake Cups
    • A refreshing blend of lemon and raspberry in portable cups for an elegant dessert option.
  2. Lemon Bar Cookie Cups
    • A bite-sized dessert that combines zesty lemon flavor with a buttery cookie crust.
  3. No Bake Pistachio Cheesecake
    • Creamy pistachio cheesecake that’s perfect for those who love no-bake desserts.
  4. Luscious Lemon Raspberry Swirl Cheesecake Cups
    • Layers of tart lemon and sweet raspberry come together in this visually stunning dessert.
  5. Lemon Truffles Recipe
    • Small, tangy lemon truffles with a creamy filling—perfect for lemon dessert lovers!
  6. Classic Lemon Bars
    • A timeless lemon dessert with a tangy filling and crisp crust.
  7. Blueberry Cheesecake Rolls
    • A sweet combination of blueberry and cheesecake, rolled and baked to perfection.
  8. Mediterranean Lemon Chicken with Artichokes and Olives
    • If you want a savory dish to complement the lemony flavors of dessert, this chicken dish is perfect!

These recipes add variety to your dessert table while enhancing the citrusy lemon theme of No Bake Lemon Cheesecake Delight.

Print

No Bake Lemon Cheesecake Delight: A Quick & Easy Dessert Guide

5 Stars 4 Stars 3 Stars 2 Stars 1 Star

No reviews

This No Bake Lemon Cheesecake Delight features multiple delicious layers that come together for the ultimate dessert experience. The graham cracker crust is prepared by mixing crushed graham crackers with melted butter and pressing it into a dish to form the base. The lemon-flavored cream cheese filling is light yet decadent, made with softened cream cheese, powdered sugar, lemon juice, and lemon zest to maximize that tangy flavor. To finish, a layer of fluffy whipped cream is spread over the top, adding an airy texture. This dessert is chilled until set, making it easy to slice and serve. It’s incredibly adaptable—swap the crust for vanilla wafers, or add a drizzle of lemon syrup on top for extra flair. With minimal prep and maximum taste, it’s bound to become a favorite in your dessert rotation.

  • Author: Emilia
  • Prep Time: 15 minutes
  • Cook Time: 15 minutes
  • Total Time: 30 minutes
  • Yield: 8 servings 1x
  • Category: Dessert
  • Method: No Bake
  • Cuisine: American
  • Diet: Vegetarian

Ingredients

Scale

Ingredients

  • 1 ½ cups graham cracker crumbs
  • ½ cup unsalted butter, melted
  • 1 cup granulated sugar
  • 16 oz cream cheese, softened
  • 1 cup sour cream
  • ½ cup fresh lemon juice
  • Zest of 2 lemons
  • 1 tsp vanilla extract
  • 1 tsp gelatin powder optional
  • 2 tbsp water if using gelatin
  • Fresh berries for garnish, optional
  • Lemon slices for garnish, optional

Instructions

Preparation Tips

To make the perfect No Bake Lemon Cheesecake Delight, follow these detailed steps to ensure each layer is just right. From preparing a sturdy crust to achieving a smooth and creamy filling, every step matters. Let’s break down the process step-by-step so you can create a flawless, crowd-pleasing dessert.

Step-by-Step Detailed Instructions

Step 1: Prepare the Crust

Ingredients:

  • 2 cups graham cracker crumbs
  • ½ cup melted butter
  • 2 tbsp sugar

Instructions:

  1. Crushing the Graham Crackers:

    • If you’re using whole graham crackers, place them in a food processor and pulse until fine crumbs form. Alternatively, place the crackers in a zip-top bag and crush them with a rolling pin. Ensure the crumbs are uniform to create a cohesive crust.
  2. Mixing:

    • In a large mixing bowl, combine the graham cracker crumbs, melted butter, and sugar. Mix until the crumbs are evenly coated with butter. You should be able to press the mixture into the bowl, and it should hold its shape without crumbling.
  3. Pressing the Crust:

    • Transfer the crumb mixture to an 8×8-inch dish (or similar). Using a flat-bottomed glass or measuring cup, firmly press the crumbs into an even layer across the bottom. Be sure to pack it tightly to create a crust that holds its shape when sliced.
  4. Chilling the Crust:

    • Refrigerate the crust for at least 20 minutes to firm it up. This helps prevent crumbling when the filling is added.

Step 2: Make the Lemon Cream Cheese Filling

Ingredients:

  • 16 oz cream cheese, softened
  • 1 cup powdered sugar
  • ¼ cup fresh lemon juice
  • 1 tbsp lemon zest
  • 1 tsp vanilla extract

Instructions:

  1. Softening the Cream Cheese:

    • Leave the cream cheese at room temperature for at least 30 minutes before using. Softened cream cheese is essential to avoid lumps in the filling.
  2. Beating the Cream Cheese:

    • In a large mixing bowl, use a hand mixer (or stand mixer with a paddle attachment) to beat the cream cheese on medium speed until smooth and creamy. This should take 2-3 minutes.
  3. Incorporating the Powdered Sugar:

    • Gradually add the powdered sugar to the cream cheese, a little at a time. Beat on low speed at first to avoid a sugar cloud, then increase to medium until fully incorporated. The mixture should be smooth and thick.
  4. Adding Lemon Flavor:

    • Pour in the fresh lemon juice and lemon zest. Continue beating until well combined. Taste the mixture to ensure the lemon flavor is to your liking—you can add more zest for extra tang if desired.
  5. Vanilla Extract:

    • Add the vanilla extract and beat until fully mixed. The filling should be smooth, thick, and creamy with no lumps.

Step 3: Assemble the Filling Over the Crust

  1. Spreading the Filling:

    • Remove the chilled crust from the refrigerator. Using a rubber spatula or an offset spatula, evenly spread the lemon cream cheese filling over the crust. Start from the center and work your way out to the edges.
  2. Smoothing the Surface:

    • Smooth out the top to create an even layer. This step is crucial if you want a professional-looking dessert. An offset spatula works best for this, but a spoon can also be used.

Step 4: Make the Whipped Cream Topping

Ingredients:

  • 1 cup heavy whipping cream
  • 2 tbsp powdered sugar

Instructions:

  1. Chilling the Equipment:

    • For best results, place your mixing bowl and beaters in the refrigerator for 10-15 minutes before whipping the cream. Cold equipment helps the cream whip faster and achieve better volume.
  2. Whipping the Cream:

    • Pour the cold heavy cream into the chilled bowl. Start beating on low speed, gradually increasing to medium-high. Beat until the cream starts to thicken.
  3. Adding Sugar:

    • Once the cream is thickened but not yet forming peaks, add the powdered sugar. Continue beating until stiff peaks form. This means when you lift the beaters, the cream will hold its shape without collapsing.
  4. Do Not Overwhip:

    • Be careful not to overwhip, or the cream will turn grainy or start to separate. Stop as soon as stiff peaks are achieved.

Step 5: Spread the Whipped Topping

  1. Spreading Over the Filling:

    • Carefully spread the whipped cream over the lemon cream cheese filling. Use gentle, even strokes to avoid mixing the layers.
  2. Decorative Swirls (Optional):

    • For a more decorative finish, use the back of a spoon or a spatula to create gentle swirls or peaks in the whipped cream.

Step 6: Chill the Dessert

  1. Refrigeration:

    • Cover the dish with plastic wrap or foil to prevent the dessert from absorbing any odors in the fridge. Chill for at least 4 hours, but overnight is best for the firmest texture and cleanest slices.
  2. Why Chilling is Important:

    • Chilling allows the filling to fully set, ensuring the dessert holds its shape when sliced. Skipping this step will result in a runny, unstable filling.

Step 7: Slice and Serve

  1. Slicing:

    • To achieve clean slices, use a sharp knife. Wipe the blade with a damp cloth between cuts to prevent the layers from smearing.
  2. Serving Options:

    • Garnish with lemon zest, lemon slices, or fresh berries before serving for added presentation and flavor.

Additional Tips for Best Results:

  • Adjust Sweetness: If you prefer a less sweet dessert, reduce the powdered sugar in the filling or whipped topping slightly.
  • Extra Lemon Flavor: For more lemon intensity, add a small amount of lemon extract or extra lemon zest.
  • Texture Variations: For added crunch, sprinkle crushed graham crackers or chopped nuts over the whipped topping.
  • Storage: Leftovers should be stored in the refrigerator, covered, for up to 3 days.

By following these detailed steps and tips, you’ll have a perfectly layered, smooth, and creamy No Bake Lemon Cheesecake Delight that’s sure to impress!

Notes

Nutrition (per serving):
Serving Size: 1 slice
Calories: 310
Sugar: 20g
Sodium: 180mg
Fat: 18g
Saturated Fat: 10g
Unsaturated Fat: 6g
Trans Fat: 0g
Carbohydrates: 35g
Fiber: 1g
Protein: 4g
Cholesterol: 40mg

Did you make this recipe?

Share a photo and tag us — we can't wait to see what you've made!

Creamsicle Orange Cookies- 3 Easy Step

Introduction :

Transform the classic orange and vanilla popsicle into a soft, chewy cookie that captures all the flavors of summer! These Creamsicle Orange Cookies combine the bright, citrusy taste of fresh oranges with smooth, creamy vanilla frosting to create a dessert that’s both nostalgic and irresistible.

Perfect for summer picnics, bake sales, or any time you’re craving something sweet with a citrus twist, these cookies feature a tender, buttery base infused with fresh orange zest and a rich, creamy vanilla frosting. The result is a cookie that tastes just like the beloved frozen treat that inspired it.

This recipe yields perfectly soft cookies with slightly crisp edges and a melt-in-your-mouth texture. The combination of orange and vanilla creates that signature creamsicle flavor that everyone knows and loves. Whether you’re making these for a special occasion or just because, these cookies are sure to bring smiles to faces and transport you right back to those carefree summer days.

Easy to make and even easier to enjoy, these Creamsicle Orange Cookies are a delightful twist on traditional sugar cookies that will quickly become a family favorite!


Creamsicle Orange Cookies

Ingredients: For the cookies:

  • 23⁄4 cups all-purpose flour
  • 1 teaspoon baking soda
  • 1⁄2 teaspoon salt
  • 1 cup butter, softened
  • 11⁄2 cups granulated sugar
  • 2 large eggs
  • 2 tablespoons orange zest
  • 2 teaspoons vanilla extract
  • 1⁄2 teaspoon orange extract

For the frosting:

  • 4 cups powdered sugar
  • 1⁄2 cup butter, softened
  • 3-4 tablespoons heavy cream
  • 1 teaspoon vanilla extract
  • Orange food coloring (optional)

Instructions:

  1. Preheat oven to 350°F (175°C). Line baking sheets with parchment paper.
  2. In a medium bowl, whisk together flour, baking soda, and salt.
  3. In a large bowl, cream butter and sugar until light and fluffy (about 3 minutes).
  4. Beat in eggs one at a time, then add orange zest, vanilla extract, and orange extract.
  5. Gradually mix in dry ingredients until just combined.
  6. Drop rounded tablespoons of dough onto prepared baking sheets, spacing 2 inches apart.
  7. Bake for 10-12 minutes or until edges are lightly golden.
  8. Cool on baking sheets for 5 minutes before transferring to wire racks.

For the frosting:

  1. Beat butter until creamy.
  2. Gradually add powdered sugar, cream, and vanilla extract.
  3. Beat until smooth and creamy, adding more cream if needed.
  4. Add orange food coloring if desired.
  5. Frost cooled cookies.

Makes approximately 24-30 cookies.

Tips:

  • Use fresh orange zest for best flavor
  • Let cookies cool completely before frosting
  • Store in an airtight container for up to 5 days

Serving and Storage Tips

Serving Suggestions:

  • Serve cookies at room temperature for the best texture and flavor
  • Pair with a cold glass of milk or hot tea/coffee
  • Present on a decorative platter for parties or gatherings
  • Consider serving alongside vanilla ice cream for an extra special dessert
  • For special occasions, garnish with candied orange peel or orange zest

Storage Guidelines:

  1. Room Temperature Storage:
  • Store in an airtight container
  • Place wax paper between layers to prevent sticking
  • Will stay fresh for up to 5 days
  • Keep away from direct sunlight and heat
  1. Refrigerator Storage:
  • Can be refrigerated for up to 1 week
  • Bring to room temperature before serving
  • Store in an airtight container
  • Separate layers with wax paper
  1. Freezer Storage:
  • Unfrosted cookies can be frozen for up to 3 months
  • Store in freezer-safe container or zip-top bag
  • Place parchment paper between layers
  • Thaw completely before frosting and serving

Make-Ahead Tips:

  • Cookie dough can be refrigerated for up to 3 days
  • Frozen cookie dough balls can last up to 3 months
  • Frosting can be made 3-4 days ahead and refrigerated
  • Allow frosting to come to room temperature before using

Additional Notes:

  • Cookies may soften over time due to moisture in the frosting
  • For best results, frost cookies only when ready to serve
  • If shipping, consider sending unfrosted cookies with frosting separately
  • In warm weather, keep frosted cookies refrigerated until serving

Variations

  1. Flavor Twists:
  • Lemon Creamsicle: Replace orange zest/extract with lemon
  • Lime Creamsicle: Use lime zest and extract instead of orange
  • Chocolate Orange: Add 1/2 cup mini chocolate chips to dough
  • White Chocolate Dipped: Half-dip cooled cookies in melted white chocolate
  • Double Orange: Add crushed candied orange peel to the dough
  1. Frosting Variations:
  • Cream Cheese Frosting: Replace half the butter with cream cheese
  • Citrus Swirl: Divide frosting and color half orange for a marble effect
  • Orange Buttercream: Add orange zest and extract to frosting
  • Whipped Cream Topping: Use stabilized whipped cream instead of frosting
  • Glaze Option: Make a simple orange glaze instead of thick frosting
  1. Texture Modifications:
  • Sandwich Cookies: Create sandwich cookies with frosting between two cookies
  • Crunchy Version: Bake cookies 2-3 minutes longer for crispy edges
  • Add-Ins:
    • Chopped nuts (pecans or macadamia nuts work well)
    • White chocolate chips
    • Orange-flavored cranberries
    • Coconut flakes
  1. Dietary Alternatives:
  • Gluten-Free: Use 1:1 gluten-free flour blend
  • Vegan:
    • Replace butter with vegan butter
    • Use flax eggs instead of regular eggs
    • Make vegan frosting with plant-based ingredients
  • Reduced Sugar: Use sugar alternatives in both cookie and frosting
  1. Decorative Options:
  • Roll edges in orange sugar sprinkles
  • Top with orange segment candies
  • Drizzle with dark chocolate
  • Add orange zest to tops before baking
  • Use cookie stamps for patterns
  1. Holiday Variations:
  • Halloween: Add orange and black sprinkles
  • Christmas: Add red and green sprinkles
  • Easter: Shape into eggs and decorate accordingly
  • Summer: Top with edible flowers

Each variation maintains the core creamsicle flavor while offering unique twists to suit different occasions and preferences.

Print

Creamsicle Orange Cookies

5 Stars 4 Stars 3 Stars 2 Stars 1 Star

No reviews

Transform the classic orange and vanilla popsicle into a soft, chewy cookie that captures all the flavors of summer! These Creamsicle Orange Cookies combine the bright, citrusy taste of fresh oranges with smooth, creamy vanilla frosting to create a dessert that’s both nostalgic and irresistible.

Perfect for summer picnics, bake sales, or any time you’re craving something sweet with a citrus twist, these cookies feature a tender, buttery base infused with fresh orange zest and a rich, creamy vanilla frosting. The result is a cookie that tastes just like the beloved frozen treat that inspired it.

  • Author: Emilia
  • Prep Time: 15 minutes
  • Cook Time: 12 minutes
  • Total Time: 27 minutes
  • Yield: 24 cookies 1x
  • Category: Dessert, Snack
  • Method: Baking
  • Cuisine: American
  • Diet: Vegetarian

Ingredients

Scale

Ingredients: For the cookies:

  • 23⁄4 cups all-purpose flour
  • 1 teaspoon baking soda
  • 1⁄2 teaspoon salt
  • 1 cup butter, softened
  • 11⁄2 cups granulated sugar
  • 2 large eggs
  • 2 tablespoons orange zest
  • 2 teaspoons vanilla extract
  • 1⁄2 teaspoon orange extract

For the frosting:

  • 4 cups powdered sugar
  • 1⁄2 cup butter, softened
  • 34 tablespoons heavy cream
  • 1 teaspoon vanilla extract
  • Orange food coloring (optional)

Instructions

  1. Preheat oven to 350°F (175°C). Line baking sheets with parchment paper.
  2. In a medium bowl, whisk together flour, baking soda, and salt.
  3. In a large bowl, cream butter and sugar until light and fluffy (about 3 minutes).
  4. Beat in eggs one at a time, then add orange zest, vanilla extract, and orange extract.
  5. Gradually mix in dry ingredients until just combined.
  6. Drop rounded tablespoons of dough onto prepared baking sheets, spacing 2 inches apart.
  7. Bake for 10-12 minutes or until edges are lightly golden.
  8. Cool on baking sheets for 5 minutes before transferring to wire racks.

For the frosting:

  1. Beat butter until creamy.
  2. Gradually add powdered sugar, cream, and vanilla extract.
  3. Beat until smooth and creamy, adding more cream if needed.
  4. Add orange food coloring if desired.
  5. Frost cooled cookies.

Makes approximately 24-30 cookies.

Tips:

  • Use fresh orange zest for best flavor
  • Let cookies cool completely before frosting
  • Store in an airtight container for up to 5 days

Notes

Equipment

  • Baking sheet
  • Mixing bowls
  • Hand or stand mixer
  • Parchment paper
  • Cookie scoop

Nutrition

  • Serving Size: 1 cookie
  • Calories: 120
  • Sugar: 9g
  • Sodium: 80mg
  • Fat: 5g
  • Saturated Fat: 3g
  • Unsaturated Fat: 2g
  • Trans Fat: 0g
  • Carbohydrates: 17g
  • Fiber: 0.5g
  • Protein: 1g
  • Cholesterol: 15mg

Did you make this recipe?

Share a photo and tag us — we can't wait to see what you've made!

The Best Raspberry Bread: 5 Secrets to Baking Perfection

Introduction

Imagine the aroma of freshly baked bread wafting through your kitchen, the sight of golden crumbs sprinkled with juicy raspberries, and the taste of a perfectly balanced sweet and tangy flavor in your mouth. That’s exactly what The Best Raspberry Bread is all about! This charming recipe combines the simplicity of a quick bread with the vibrantpop of raspberries, making it a family-friendly favorite that’s sure to wow anyone who takes a bite.

Are you tired of store-bought bread that lacks that homemade charm? The Best Raspberry Bread is easy to make, requires minimal prep time, and costs a fraction of what you’d spend at the bakery. Plus, it’s versatile enough to enjoy as breakfast, dessert, or even as a snack with a cup of tea.

Looking for something equally delicious but different? Try our Peanut Butter Banana Bread, which is just as moist and flavorful but with a creamy twist. But for now, let’s dive into The Best Raspberry Bread—a recipe that’s perfect for satisfying your sweet tooth or impressing your family and friends.

The Best Raspberry Bread

What is The Best Raspberry Bread?

So, what exactly is The Best Raspberry Bread? It’s a type of quick bread, meaning it doesn’t require yeast and can be baked in just a few hours. The secret to its charm lies in the combination of tender, fluffy bread and bursts of juicy raspberries that add a pop of freshness and sweetness.

But why is it called The Best Raspberry Bread? Well, it’s all in the name! This isn’t just any ordinary bread—it’s designed to be the ultimate version of its kind. Whether you’re a fan of sweet breads or a_SAMPLING=raspberry enthusiast, this recipe is sure to impress. After all, the way to a man’s heart is through his stomach, and this bread is sure to capture it.

Why You’ll Love This The Best Raspberry Bread

1. Creamy and Sweet Flavors

The BEST Raspberry Bread offers a delightful balance of sweetness and tanginess, thanks to the natural flavors of raspberries. Each bite is filled with tender bread and bursts of juicy fruit, making it perfect for breakfast, dessert, or even as a snack.

2. Budget-Friendly and Easy to Make

Forget about expensive baked goods at the store—this recipe is wallet-friendly and uses ingredients you likely already have at home. Plus, it’s quick to prepare, so you can enjoy it without spending hours in the kitchen.

3. Flavorful Add-Ins

You can customize this bread with your favorite toppings or mix-ins. Want to add a_hint of crunch? Sprinkle some nuts or seeds on top. Craving something extra sweet? Drizzle it with a bit of honey. The possibilities are endless!

Looking for more quick bread recipes? Check out our Chocolate Banana Bread—but don’t stay away too long, because The Best Raspberry Bread is calling your name!

The Best Raspberry Bread

How to Make The Best Raspberry Bread

Quick Overview

This recipe is designed to be simple, delicious, and satisfying. With its creamy texture and sweet raspberry flavor, it’s perfect for any occasion. Plus, it’s ready in less than an hour, making it a great option for busy mornings or last-minute dessert needs.

Key Ingredients for The Best Raspberry Bread

Here’s what you’ll need to make The Best Raspberry Bread:

  • 1 3⁄4 cups all-purpose flour
  • 1 teaspoon baking powder
  • 1⁄2 teaspoon baking soda
  • 1⁄2 teaspoon salt
  • 1⁄4 cup unsalted butter, softened
  • 3⁄4 cup granulated sugar
  • 2 large eggs
  • 1 cup buttermilk
  • 1 teaspoon vanilla extract
  • 1 cup fresh raspberries (or frozen raspberries, thawed)

Step-by-Step Instructions

  1. Preheat Your Oven
    Start by preheating your oven to 375°F (190°C). Grease an 8×4-inch loaf pan or line it with parchment paper.
  2. Prepare the Dry Ingredients
    In a medium bowl, whisk together the flour, baking powder, baking soda, and salt until fully combined. Set aside.
  3. Mix Wet Ingredients
    In a large bowl, beat the butter and sugar together until creamy. Add the eggs one at a time, mixing well after each addition.
  4. Combine Wet and Dry Ingredients
    Pour in the buttermilk, vanilla extract, and mix until well combined. Gradually add the dry ingredients to the wet ingredients, mixing until the batter is smooth.
  5. Fold in Raspberries
    Gently fold in the fresh raspberries, taking care not to overmix to keep them intact.
  6. Bake the Bread
    Pour the batter into the prepared loaf pan and bake for 55-60 minutes, or until a toothpick inserted into the center comes out clean.
  7. Cool and Enjoy
    Let the bread cool in the pan for 10 minutes before transferring it to a wire rack to cool completely. Slice and serve warm or at room temperature.

The Best Raspberry Bread

What to Serve The Best Raspberry Bread With

Looking to elevate your The Best Raspberry Bread experience? Pair it with one of these delicious sides or drinks:

  • A dollop of whipped butter or cream cheese for an extra indulgent treat.
  • A cup of coffee or tea for a cozy breakfast or afternoon snack.
  • Fresh berries or a fruit salad for a refreshing contrast to the sweet bread.

Top Tips for Perfecting The Best Raspberry Bread

1. Use Fresh Raspberries

For the best flavor, use fresh raspberries. If you can’t find fresh ones, frozen raspberries work well too—just make sure to thaw them before using.

2. Don’t Overmix the Batter

Overmixing can make the bread tough. Mix until just combined and fold in the raspberries gently.

3. Let It Cool Completely

Resist the temptation to dig in while it’s still warm. Letting it cool ensures the bread sets properly and slices neatly.

Storing and Reheating Tips

Storing

Store The Best Raspberry Bread in an airtight container at room temperature for up to 3 days. For longer storage, keep it in the refrigerator for up to 1 week or freeze for up to 3 months.

Reheating

To reheat, slice the bread and toast it in a pan over medium heat until warmed through. Alternatively, wrap it in foil and heat it in the oven at 350°F (175°C) for 10-15 minutes.

The Best Raspberry Bread

 FAQs for the Best Raspberry Bread Blog Post

1. What makes this raspberry bread the “best”?

The Best Raspberry Bread stands out due to its perfect balance of flavors, where the sweetness of the bread is complemented by the tartness of the raspberries. It’s crafted to be moist, fluffy, and bursting with juicy raspberries, ensuring every bite is delicious.

2. How long does it take to prepare THIS raspberry bread?

Preparing this raspberry bread is quick and easy! The total preparation time is about 1 hour, including baking. It’s perfect for those looking for a tasty treat without spending too much time in the kitchen.

3. Can I use frozen raspberries instead of fresh ones?

Absolutely! If fresh raspberries aren’t available, frozen raspberries work beautifully. Just make sure to thaw them slightly and drain excess liquid before adding them to the batter to avoid making the bread too soggy.

4. How should I store leftover raspberry bread?

Store the bread in an airtight container at room temperature for up to 3 days. For longer storage, keep it in the refrigerator for up to 1 week or freeze it for up to 3 months. Thaw frozen bread at room temperature or reheat it gently in the oven.

5. Why didn’t my raspberry bread rise well?

Poor rising could be due to a few reasons. Ensure your baking powder and baking soda are fresh, as they are crucial for leavening. Also, make sure the buttermilk is at room temperature, as cold ingredients can slow the rising process. Additionally, ensure your oven is preheated properly to the correct temperature.

6. Can I make this recipe vegan?

Yes, you can make this recipe vegan by substituting the eggs with a flax egg (2 tablespoons ground flaxseed mixed with 6 tablespoons water) and using vegan butter or oil. Simply follow the same instructions, and enjoy a delicious vegan version of our Best Raspberry Bread!

7. What are some great serving suggestions for raspberry bread?

Raspberry bread is incredibly versatile! Serve it as a sweet breakfast with a cup of tea, as a dessert drizzled with icing, or enjoy it with a dollop of whipped cream or a smear of cream cheese. It also pairs well with fresh fruit or a side of coffee.

8. How many servings does this recipe make?

This recipe yields approximately 8-10 servings, depending on how thick you slice the bread. It’s perfect for sharing with family and friends or enjoying throughout the week.

9. Can I reheat raspberry bread, and how?

Yes, reheating raspberry bread is easy! Slice the bread and toast it in a pan over medium heat until warmed through. Alternatively, wrap it in foil and heat it in the oven at 350°F (175°C) for 10-15 minutes for a delicious, warm treat.

10. What are the key tips for ensuring the bread turns out perfectly?

  • Use fresh or thawed raspberries for the best flavor.
  • Don’t overmix the batter to keep the bread tender.
  • Let the bread cool completely before slicing for neat, even pieces.
  • Experiment with different toppings or mix-ins to customize the flavor to your liking.

The Best Raspberry Bread