Introduction:
No Bake Lemon Cheesecake Delight is the perfect dessert for any occasion. Light, creamy, and bursting with fresh lemon flavor, this dessert requires no oven, making it an ideal choice for warm days or when you’re short on time. It features a rich, buttery graham cracker crust layered with a smooth lemon-flavored cream cheese filling, all topped with whipped cream for a fluffy finish. The zesty lemon flavor gives the cheesecake a refreshing tang, cutting through the richness and leaving you craving another slice. This dessert is versatile—it can be served in a large pan, individual cups, or even in jars for portable treats. Whether for a dinner party, potluck, or weeknight indulgence, No Bake Lemon Cheesecake Delight will be a showstopper. Bonus? It’s simple to prepare, with no fancy equipment needed. Read on to learn how to whip up this citrusy delight!
Brief description of the recipe: No Bake Lemon Cheesecake Delight
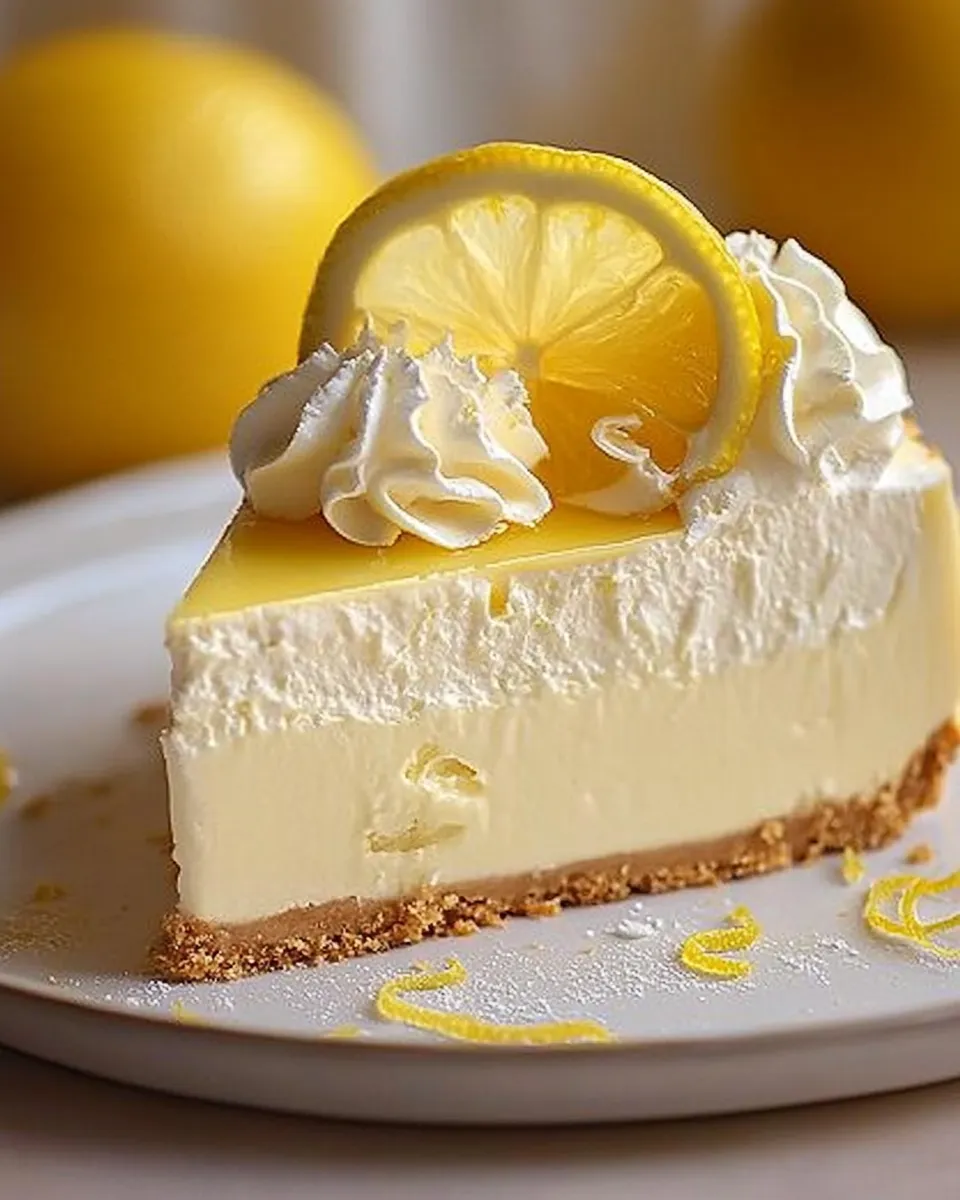
This No Bake Lemon Cheesecake Delight features multiple delicious layers that come together for the ultimate dessert experience. The graham cracker crust is prepared by mixing crushed graham crackers with melted butter and pressing it into a dish to form the base. The lemon-flavored cream cheese filling is light yet decadent, made with softened cream cheese, powdered sugar, lemon juice, and lemon zest to maximize that tangy flavor. To finish, a layer of fluffy whipped cream is spread over the top, adding an airy texture. This dessert is chilled until set, making it easy to slice and serve. It’s incredibly adaptable—swap the crust for vanilla wafers, or add a drizzle of lemon syrup on top for extra flair. With minimal prep and maximum taste, it’s bound to become a favorite in your dessert rotation.
Highlight key appeal: ease of preparation, versatility, or uniqueness
No Bake Lemon Cheesecake Delight stands out for its ease of preparation. There’s no need for baking or complex steps—just simple layering and chilling. Its versatility means it can be served in various ways, from traditional slices to individual cups. The combination of a buttery crust and tart lemon filling ensures a unique balance of richness and brightness, making this dessert a hit with everyone.
Why This Recipe is a Winner
This dessert wins hearts for its bright, citrusy twist on traditional cheesecake. The no-bake format means it’s a stress-free, crowd-pleasing dessert that still looks and tastes impressive. Unlike store-bought lemon cheesecake, this homemade version has a fresh, natural lemon flavor that’s not overly sweet or artificial. It’s also ideal for summer gatherings when you want a light dessert that doesn’t require turning on the oven. The creamy texture and vibrant flavor make it a perfect ending to any meal.
Personal anecdote or connection to the recipe
The first time I made No Bake Lemon Cheesecake Delight was for a summer picnic. It was hot, and I didn’t want to bake anything. Everyone was blown away by how light and refreshing it was. My grandmother, a lemon dessert aficionado, declared it one of the best she’d ever had! Since then, it’s been a staple for family events and gatherings.
Ingredients
-
1 ½ cups graham cracker crumbs
-
½ cup unsalted butter, melted
-
1 cup granulated sugar
- 16 oz cream cheese, softened
- 1 cup sour cream
- ½ cup fresh lemon juice
- Zest of 2 lemons
- 1 tsp vanilla extract
- 1 tsp gelatin powder optional
- 2 tbsp water if using gelatin
- Fresh berries for garnish, optional
- Lemon slices for garnish, optional
Optional: Variations or substitutions
- Crust substitutions: Swap graham crackers for digestive biscuits or crushed vanilla wafers.
- Flavor variations: Add a blueberry compote on top for a lemon-blueberry twist.
- Sugar-free option: Use a sugar substitute to make it diabetic-friendly.
- Dairy-free: Replace cream cheese with a plant-based alternative and heavy cream with coconut cream
Preparation Tips
To make the perfect No Bake Lemon Cheesecake Delight, follow these detailed steps to ensure each layer is just right. From preparing a sturdy crust to achieving a smooth and creamy filling, every step matters. Let’s break down the process step-by-step so you can create a flawless, crowd-pleasing dessert.
Step-by-Step Detailed Instructions
Step 1: Prepare the Crust
Ingredients:
- 2 cups graham cracker crumbs
- ½ cup melted butter
- 2 tbsp sugar
Instructions:
-
Crushing the Graham Crackers:
- If you’re using whole graham crackers, place them in a food processor and pulse until fine crumbs form. Alternatively, place the crackers in a zip-top bag and crush them with a rolling pin. Ensure the crumbs are uniform to create a cohesive crust.
-
Mixing:
- In a large mixing bowl, combine the graham cracker crumbs, melted butter, and sugar. Mix until the crumbs are evenly coated with butter. You should be able to press the mixture into the bowl, and it should hold its shape without crumbling.
-
Pressing the Crust:
- Transfer the crumb mixture to an 8×8-inch dish (or similar). Using a flat-bottomed glass or measuring cup, firmly press the crumbs into an even layer across the bottom. Be sure to pack it tightly to create a crust that holds its shape when sliced.
-
Chilling the Crust:
- Refrigerate the crust for at least 20 minutes to firm it up. This helps prevent crumbling when the filling is added.
Step 2: Make the Lemon Cream Cheese Filling
Ingredients:
- 16 oz cream cheese, softened
- 1 cup powdered sugar
- ¼ cup fresh lemon juice
- 1 tbsp lemon zest
- 1 tsp vanilla extract
Instructions:
-
Softening the Cream Cheese:
- Leave the cream cheese at room temperature for at least 30 minutes before using. Softened cream cheese is essential to avoid lumps in the filling.
-
Beating the Cream Cheese:
- In a large mixing bowl, use a hand mixer (or stand mixer with a paddle attachment) to beat the cream cheese on medium speed until smooth and creamy. This should take 2-3 minutes.
-
Incorporating the Powdered Sugar:
- Gradually add the powdered sugar to the cream cheese, a little at a time. Beat on low speed at first to avoid a sugar cloud, then increase to medium until fully incorporated. The mixture should be smooth and thick.
-
Adding Lemon Flavor:
- Pour in the fresh lemon juice and lemon zest. Continue beating until well combined. Taste the mixture to ensure the lemon flavor is to your liking—you can add more zest for extra tang if desired.
-
Vanilla Extract:
- Add the vanilla extract and beat until fully mixed. The filling should be smooth, thick, and creamy with no lumps.
Step 3: Assemble the Filling Over the Crust
-
Spreading the Filling:
- Remove the chilled crust from the refrigerator. Using a rubber spatula or an offset spatula, evenly spread the lemon cream cheese filling over the crust. Start from the center and work your way out to the edges.
-
Smoothing the Surface:
- Smooth out the top to create an even layer. This step is crucial if you want a professional-looking dessert. An offset spatula works best for this, but a spoon can also be used.
Step 4: Make the Whipped Cream Topping
Ingredients:
- 1 cup heavy whipping cream
- 2 tbsp powdered sugar
Instructions:
-
Chilling the Equipment:
- For best results, place your mixing bowl and beaters in the refrigerator for 10-15 minutes before whipping the cream. Cold equipment helps the cream whip faster and achieve better volume.
-
Whipping the Cream:
- Pour the cold heavy cream into the chilled bowl. Start beating on low speed, gradually increasing to medium-high. Beat until the cream starts to thicken.
-
Adding Sugar:
- Once the cream is thickened but not yet forming peaks, add the powdered sugar. Continue beating until stiff peaks form. This means when you lift the beaters, the cream will hold its shape without collapsing.
-
Do Not Overwhip:
- Be careful not to overwhip, or the cream will turn grainy or start to separate. Stop as soon as stiff peaks are achieved.
Step 5: Spread the Whipped Topping
-
Spreading Over the Filling:
- Carefully spread the whipped cream over the lemon cream cheese filling. Use gentle, even strokes to avoid mixing the layers.
-
Decorative Swirls (Optional):
- For a more decorative finish, use the back of a spoon or a spatula to create gentle swirls or peaks in the whipped cream.
Step 6: Chill the Dessert
-
Refrigeration:
- Cover the dish with plastic wrap or foil to prevent the dessert from absorbing any odors in the fridge. Chill for at least 4 hours, but overnight is best for the firmest texture and cleanest slices.
-
Why Chilling is Important:
- Chilling allows the filling to fully set, ensuring the dessert holds its shape when sliced. Skipping this step will result in a runny, unstable filling.
Step 7: Slice and Serve
-
Slicing:
- To achieve clean slices, use a sharp knife. Wipe the blade with a damp cloth between cuts to prevent the layers from smearing.
-
Serving Options:
- Garnish with lemon zest, lemon slices, or fresh berries before serving for added presentation and flavor.
Additional Tips for Best Results:
- Adjust Sweetness: If you prefer a less sweet dessert, reduce the powdered sugar in the filling or whipped topping slightly.
- Extra Lemon Flavor: For more lemon intensity, add a small amount of lemon extract or extra lemon zest.
- Texture Variations: For added crunch, sprinkle crushed graham crackers or chopped nuts over the whipped topping.
- Storage: Leftovers should be stored in the refrigerator, covered, for up to 3 days.
By following these detailed steps and tips, you’ll have a perfectly layered, smooth, and creamy No Bake Lemon Cheesecake Delight that’s sure to impress!
Serving Suggestions
- Serve with a garnish of lemon zest or candied lemon slices.
- Pair with a cup of iced tea or lemonade for a refreshing treat.
- Add fresh berries for color and additional flavor contrast.
Helpful Tips
- Storage: Keep refrigerated for up to 3 days.
- Freezing: This dessert can be frozen for up to 1 month. Thaw in the refrigerator before serving.
- Garnish creativity: Top with crushed graham crackers or lemon curd for extra flair.
- Adjust sweetness: Taste the filling before assembling and adjust sugar levels to your preference.
- Layering tip: Smooth the filling layer with an offset spatula for a professional look.
Substitutions and Variations
- Gluten-free option: Use gluten-free graham crackers for the crust.
- Extra lemony: Add lemon extract for a more intense lemon flavor.
- Berry twist: Incorporate raspberries or blackberries for a fruity balance.
- Chocolate crust: Replace the graham cracker crust with an Oreo crust for a lemon-chocolate combo.
- Mini desserts: Create individual servings in small cups or mason jars for easy portion control.
Frequently Asked Questions
- How long should I chill it?
At least 4 hours, but overnight is best for full setting. - Can I freeze it?
Yes, freeze for up to 1 month. Thaw before serving. - Can I make it ahead of time?
Absolutely! This dessert is even better the next day. - What’s the best lemon juice to use?
Fresh lemon juice is highly recommended for the best flavor. - Can I use store-bought whipped topping?
Yes, but homemade whipped cream provides better texture. - How do I prevent the crust from crumbling?
Press it firmly into the pan and chill before adding the filling. - Can I add more lemon zest?
Yes, for extra tanginess, add more zest to the filling. - What’s a dairy-free alternative?
Use dairy-free cream cheese and coconut cream. - Can I use bottled lemon juice?
It works, but fresh juice gives a brighter flavor. - Can I add a fruit topping?
Yes, berry compote or lemon curd are great options.
Ideas for repurposing leftovers into new dishes
- Use leftovers as a filling for lemon parfaits with layered fruit and granola.
- Spread the filling over pancakes for a breakfast treat.
- Freeze leftover slices and enjoy as a frozen cheesecake dessert.
Related Recipes:
Related Recipes:
Here are some similar or complementary recipes that pair beautifully with No Bake Lemon Cheesecake Delight:
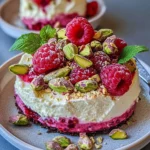
- No Bake Lemon Raspberry Cheesecake Cups
- A refreshing blend of lemon and raspberry in portable cups for an elegant dessert option.
- Lemon Bar Cookie Cups
- A bite-sized dessert that combines zesty lemon flavor with a buttery cookie crust.
- No Bake Pistachio Cheesecake
- Creamy pistachio cheesecake that’s perfect for those who love no-bake desserts.
- Luscious Lemon Raspberry Swirl Cheesecake Cups
- Layers of tart lemon and sweet raspberry come together in this visually stunning dessert.
- Lemon Truffles Recipe
- Small, tangy lemon truffles with a creamy filling—perfect for lemon dessert lovers!
- Classic Lemon Bars
- A timeless lemon dessert with a tangy filling and crisp crust.
- Blueberry Cheesecake Rolls
- A sweet combination of blueberry and cheesecake, rolled and baked to perfection.
- Mediterranean Lemon Chicken with Artichokes and Olives
- If you want a savory dish to complement the lemony flavors of dessert, this chicken dish is perfect!
These recipes add variety to your dessert table while enhancing the citrusy lemon theme of No Bake Lemon Cheesecake Delight.
Print
No Bake Lemon Cheesecake Delight: A Quick & Easy Dessert Guide
- Total Time: 30 minutes
- Yield: 8 servings 1x
- Diet: Vegetarian
Description
This No Bake Lemon Cheesecake Delight features multiple delicious layers that come together for the ultimate dessert experience. The graham cracker crust is prepared by mixing crushed graham crackers with melted butter and pressing it into a dish to form the base. The lemon-flavored cream cheese filling is light yet decadent, made with softened cream cheese, powdered sugar, lemon juice, and lemon zest to maximize that tangy flavor. To finish, a layer of fluffy whipped cream is spread over the top, adding an airy texture. This dessert is chilled until set, making it easy to slice and serve. It’s incredibly adaptable—swap the crust for vanilla wafers, or add a drizzle of lemon syrup on top for extra flair. With minimal prep and maximum taste, it’s bound to become a favorite in your dessert rotation.
Ingredients
Ingredients
-
1 ½ cups graham cracker crumbs
-
½ cup unsalted butter, melted
-
1 cup granulated sugar
- 16 oz cream cheese, softened
- 1 cup sour cream
- ½ cup fresh lemon juice
- Zest of 2 lemons
- 1 tsp vanilla extract
- 1 tsp gelatin powder optional
- 2 tbsp water if using gelatin
- Fresh berries for garnish, optional
- Lemon slices for garnish, optional
Instructions
Preparation Tips
To make the perfect No Bake Lemon Cheesecake Delight, follow these detailed steps to ensure each layer is just right. From preparing a sturdy crust to achieving a smooth and creamy filling, every step matters. Let’s break down the process step-by-step so you can create a flawless, crowd-pleasing dessert.
Step-by-Step Detailed Instructions
Step 1: Prepare the Crust
Ingredients:
- 2 cups graham cracker crumbs
- ½ cup melted butter
- 2 tbsp sugar
Instructions:
-
Crushing the Graham Crackers:
- If you’re using whole graham crackers, place them in a food processor and pulse until fine crumbs form. Alternatively, place the crackers in a zip-top bag and crush them with a rolling pin. Ensure the crumbs are uniform to create a cohesive crust.
-
Mixing:
- In a large mixing bowl, combine the graham cracker crumbs, melted butter, and sugar. Mix until the crumbs are evenly coated with butter. You should be able to press the mixture into the bowl, and it should hold its shape without crumbling.
-
Pressing the Crust:
- Transfer the crumb mixture to an 8×8-inch dish (or similar). Using a flat-bottomed glass or measuring cup, firmly press the crumbs into an even layer across the bottom. Be sure to pack it tightly to create a crust that holds its shape when sliced.
-
Chilling the Crust:
- Refrigerate the crust for at least 20 minutes to firm it up. This helps prevent crumbling when the filling is added.
Step 2: Make the Lemon Cream Cheese Filling
Ingredients:
- 16 oz cream cheese, softened
- 1 cup powdered sugar
- ¼ cup fresh lemon juice
- 1 tbsp lemon zest
- 1 tsp vanilla extract
Instructions:
-
Softening the Cream Cheese:
- Leave the cream cheese at room temperature for at least 30 minutes before using. Softened cream cheese is essential to avoid lumps in the filling.
-
Beating the Cream Cheese:
- In a large mixing bowl, use a hand mixer (or stand mixer with a paddle attachment) to beat the cream cheese on medium speed until smooth and creamy. This should take 2-3 minutes.
-
Incorporating the Powdered Sugar:
- Gradually add the powdered sugar to the cream cheese, a little at a time. Beat on low speed at first to avoid a sugar cloud, then increase to medium until fully incorporated. The mixture should be smooth and thick.
-
Adding Lemon Flavor:
- Pour in the fresh lemon juice and lemon zest. Continue beating until well combined. Taste the mixture to ensure the lemon flavor is to your liking—you can add more zest for extra tang if desired.
-
Vanilla Extract:
- Add the vanilla extract and beat until fully mixed. The filling should be smooth, thick, and creamy with no lumps.
Step 3: Assemble the Filling Over the Crust
-
Spreading the Filling:
- Remove the chilled crust from the refrigerator. Using a rubber spatula or an offset spatula, evenly spread the lemon cream cheese filling over the crust. Start from the center and work your way out to the edges.
-
Smoothing the Surface:
- Smooth out the top to create an even layer. This step is crucial if you want a professional-looking dessert. An offset spatula works best for this, but a spoon can also be used.
Step 4: Make the Whipped Cream Topping
Ingredients:
- 1 cup heavy whipping cream
- 2 tbsp powdered sugar
Instructions:
-
Chilling the Equipment:
- For best results, place your mixing bowl and beaters in the refrigerator for 10-15 minutes before whipping the cream. Cold equipment helps the cream whip faster and achieve better volume.
-
Whipping the Cream:
- Pour the cold heavy cream into the chilled bowl. Start beating on low speed, gradually increasing to medium-high. Beat until the cream starts to thicken.
-
Adding Sugar:
- Once the cream is thickened but not yet forming peaks, add the powdered sugar. Continue beating until stiff peaks form. This means when you lift the beaters, the cream will hold its shape without collapsing.
-
Do Not Overwhip:
- Be careful not to overwhip, or the cream will turn grainy or start to separate. Stop as soon as stiff peaks are achieved.
Step 5: Spread the Whipped Topping
-
Spreading Over the Filling:
- Carefully spread the whipped cream over the lemon cream cheese filling. Use gentle, even strokes to avoid mixing the layers.
-
Decorative Swirls (Optional):
- For a more decorative finish, use the back of a spoon or a spatula to create gentle swirls or peaks in the whipped cream.
Step 6: Chill the Dessert
-
Refrigeration:
- Cover the dish with plastic wrap or foil to prevent the dessert from absorbing any odors in the fridge. Chill for at least 4 hours, but overnight is best for the firmest texture and cleanest slices.
-
Why Chilling is Important:
- Chilling allows the filling to fully set, ensuring the dessert holds its shape when sliced. Skipping this step will result in a runny, unstable filling.
Step 7: Slice and Serve
-
Slicing:
- To achieve clean slices, use a sharp knife. Wipe the blade with a damp cloth between cuts to prevent the layers from smearing.
-
Serving Options:
- Garnish with lemon zest, lemon slices, or fresh berries before serving for added presentation and flavor.
Additional Tips for Best Results:
- Adjust Sweetness: If you prefer a less sweet dessert, reduce the powdered sugar in the filling or whipped topping slightly.
- Extra Lemon Flavor: For more lemon intensity, add a small amount of lemon extract or extra lemon zest.
- Texture Variations: For added crunch, sprinkle crushed graham crackers or chopped nuts over the whipped topping.
- Storage: Leftovers should be stored in the refrigerator, covered, for up to 3 days.
By following these detailed steps and tips, you’ll have a perfectly layered, smooth, and creamy No Bake Lemon Cheesecake Delight that’s sure to impress!
Notes
Nutrition (per serving):
Serving Size: 1 slice
Calories: 310
Sugar: 20g
Sodium: 180mg
Fat: 18g
Saturated Fat: 10g
Unsaturated Fat: 6g
Trans Fat: 0g
Carbohydrates: 35g
Fiber: 1g
Protein: 4g
Cholesterol: 40mg
- Prep Time: 15 minutes
- Cook Time: 15 minutes
- Category: Dessert
- Method: No Bake
- Cuisine: American
Keywords: No Bake Lemon Cheesecake Delight, easy lemon dessert, no bake cheesecake, lemon dessert
Related posts:
 Lemon Raspberry Cheesecake Cups – Easy and Elegant Dessert
 Rainbow Marble Cake Recipe: A Colorful and Delicious Treat
 Enchanted Forest Blackberry Velvet Delight: A Magical Dessert
 Heavenly Peach Cobbler Poke Cake – Summer Dessert Recipe
 Flaky Homemade Pie Crust Recipe Perfect or Sweet & Savory Pies
 No Bake Lemon Raspberry Cheesecake Cups – Easy Dessert
 Top 5 Reasons Why Lush Raspberry Pistachio Cheesecake Is a Must-Try Treat
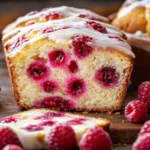 The Best Raspberry Bread: 5 Secrets to Baking Perfection