
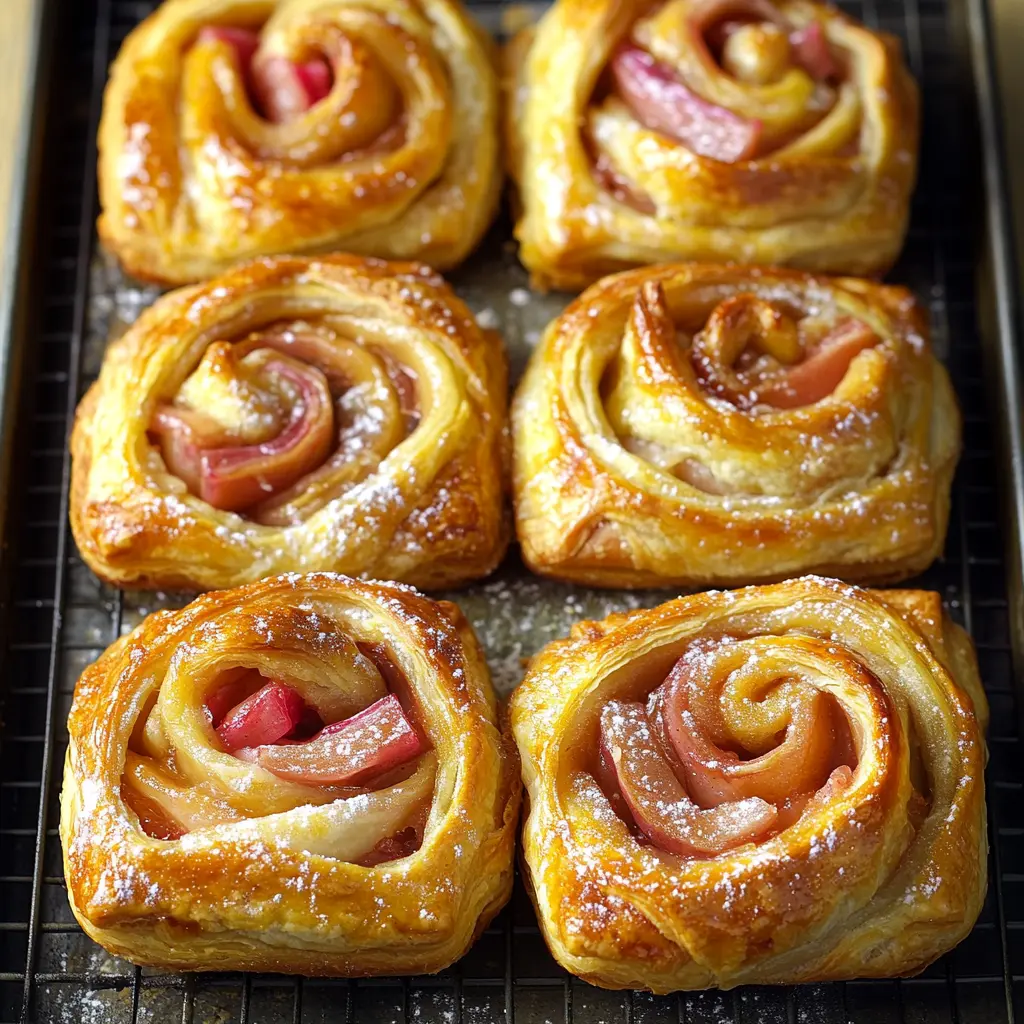
There’s something absolutely magical about the moment these golden-brown spirals emerge from the oven, their caramelized tops glistening with ruby-red rhubarb juices and cinnamon sugar. The kitchen fills with an aroma that could wake the entire neighborhood – buttery pastry, tangy rhubarb, and warm spices creating the most intoxicating breakfast perfume. The first time I made these for a weekend brunch, my usually polite guests nearly came to blows over the last bun. My friend Sarah, who claims she “doesn’t really like rhubarb,” sheepishly asked if she could take two home. When someone who avoids rhubarb becomes possessive over your morning buns, you know you’ve created something extraordinary. These aren’t just breakfast pastries; they’re the reason people will start showing up early for brunch and lingering long after the coffee’s gone cold.
Why This Recipe Works
These rhubarb morning buns succeed where many fail by achieving the perfect balance between the pastry’s buttery richness and rhubarb’s bright acidity. The secret lies in treating the rhubarb with just enough sugar to tame its tartness while preserving its distinctive tangy character that cuts through the rich dough.
The dough itself is enriched with butter and eggs, creating a tender crumb that’s substantial enough to hold the juicy rhubarb filling without becoming soggy. I’ve tested countless variations to find the ideal hydration level that yields buns that are both fluffy and structurally sound when loaded with fruit.
The technique of creating a cinnamon-sugar base that caramelizes during baking provides a crispy bottom that contrasts beautifully with the soft interior. This method, borrowed from traditional morning bun recipes, elevates these from simple sweet rolls to something truly special. My mother-in-law, who ran a bakery for thirty years, declared these “better than anything we sold.” When a professional baker offers that level of praise, you know the recipe is keeper.
Key Components Breakdown
Essential Ingredients
Fresh Rhubarb – The star ingredient that provides signature tartness and beautiful color. Look for stalks that are firm and crisp with vibrant pink or red coloring. Younger, thinner stalks tend to be less fibrous and break down more evenly during baking. I get mine from our farmers market where one vendor grows an especially rosy variety that creates stunning pink swirls throughout the buns.
Granulated Sugar – Serves multiple purposes: taming rhubarb’s tartness, creating caramelization, and feeding the yeast. The amount perfectly balances the fruit’s acidity without making the buns overly sweet. I use regular granulated sugar rather than superfine for better caramelization on the bun bottoms.
Unsalted Butter – The foundation of richness in both the dough and the caramelized bottom. Use high-quality butter as its flavor is prominent throughout. European-style butter with higher fat content creates even more luxurious results. The melted butter for the filling helps the sugar adhere while creating pockets of butterscotch flavor as it bakes.
All-Purpose Flour – Provides structure while maintaining tenderness. Bread flour would make the buns too chewy, while cake flour wouldn’t provide enough structure to support the juicy filling. I’ve found unbleached all-purpose flour gives the best texture and flavor.
Active Dry Yeast – Creates the light, airy texture that distinguishes morning buns from denser pastries. Fresh yeast is crucial – check expiration dates and store properly. I proof my yeast in warm water with a pinch of sugar to ensure it’s active before proceeding.
Eggs – Enrich the dough, providing structure, color, and flavor. Room temperature eggs incorporate better into the dough. Farm-fresh eggs with deep orange yolks create the most beautiful golden color in the finished buns.
Milk – Adds tenderness and helps create a soft crumb. Whole milk provides the best flavor and texture, though 2% works in a pinch. Warming the milk to about 110°F helps activate the yeast while melting the butter for easier incorporation.
Equipment Needed
Stand Mixer with Dough Hook – While you can knead by hand, a mixer makes the process much easier and ensures proper gluten development. The enriched dough requires significant kneading to achieve the right texture.
9×13-inch Baking Pan – Provides the perfect size for 12 buns with enough space to rise and expand. Light-colored metal pans prevent over-browning on the bottom. Glass pans work but may require temperature adjustment.
Sharp Knife or Bench Scraper – Essential for cutting clean portions of dough and chopping rhubarb evenly. A bench scraper is particularly useful for transferring the rolled dough.
Rolling Pin – For creating an even rectangle of dough that rolls into uniform buns. A heavy rolling pin helps achieve consistent thickness more easily.
Pastry Brush – For applying melted butter to the dough and the finished buns. Silicone brushes are easy to clean and don’t shed bristles.
Kitchen Scale – Optional but recommended for consistent results. Weighing ingredients, especially flour, ensures perfect texture every time.
The Technique Section
Critical Steps
Properly preparing the rhubarb prevents excess moisture from making the buns soggy. Chop it into small, uniform pieces (about 1/4-inch) and toss with the sugar, letting it macerate for 15-20 minutes. This draws out some moisture while beginning to candy the fruit. The first time I made these, I used larger chunks and ended up with pockets of sour rhubarb and soggy spots – lesson learned!
Developing the dough correctly is crucial for texture. Knead until it’s smooth and elastic, about 8-10 minutes in a stand mixer or 12-15 minutes by hand. The dough should be slightly tacky but not sticky. Proper gluten development ensures the buns can support the juicy filling while maintaining a light, fluffy texture.
Creating even buns requires careful rolling and cutting. Roll the dough into a 12×18-inch rectangle, maintaining even thickness throughout. Spread the filling evenly, leaving a 1-inch border on one long edge for sealing. Roll tightly but not so tight that filling squeezes out. Cut into 12 equal pieces using a sharp knife or unflavored dental floss for the cleanest cuts.
The caramelization technique transforms ordinary buns into something special. Generously butter the baking pan, then sprinkle with cinnamon sugar before adding the buns. As they bake, this creates a crispy, caramelized bottom that contrasts beautifully with the soft interior. It’s like having the best parts of a cinnamon roll and a morning bun in one pastry.
The second rise is critical for achieving the right texture. Let the shaped buns rise in a warm place until nearly doubled, about 45-60 minutes. They should look puffy and spring back slowly when gently poked. Under-risen buns will be dense; over-risen ones may collapse during baking.
Temperature and Timing
Yeast activation requires water between 105-115°F (40-46°C). Too cool and the yeast won’t activate; too hot and you’ll kill it. I use an instant-read thermometer for accuracy. The yeast should foam within 5-10 minutes if properly activated.
The first rise typically takes 1-1.5 hours in a warm place (around 75-80°F). The dough should roughly double in size. In cooler kitchens, this may take longer. I often use my oven with just the light on to create a warm environment.
Baking temperature of 350°F (175°C) allows the buns to cook through without burning the sugary bottom. Start checking at 25 minutes – they’re done when golden brown on top and the internal temperature reaches 190°F (88°C).
Cool the buns for exactly 5 minutes before inverting. This allows the caramelized bottom to set slightly without hardening completely. Wait too long and they’ll stick; invert too soon and the topping will run off.
For optimal enjoyment, serve warm or at room temperature. The contrast between the crispy bottom and soft interior is most pronounced when warm, but they remain delicious for hours after baking.
Troubleshooting Guide
Common Issues
Buns too dense or heavy? The dough was likely under-kneaded or under-risen. For this batch, serve them warmed with butter to help mask the density. Next time, ensure proper gluten development through adequate kneading and allow full rising times.
Soggy bottoms? Too much moisture from the rhubarb or underbaking. For this batch, return to the oven for 5-10 minutes at 325°F to dry out. Future batches benefit from macerating and draining the rhubarb before using.
Filling leaked out? The buns were rolled too loosely or cut unevenly. For this batch, embrace the messy deliciousness! Next time, roll more tightly and ensure even cuts. Sealing the edge well prevents major leaks.
Burnt sugar on bottom? The oven temperature was too high or baking time too long. Unfortunately, this can’t be fixed, but the tops may still be salvageable. Use an oven thermometer to verify temperature accuracy and check buns earlier next time.
Rhubarb too tart? The fruit wasn’t ripe enough or needed more sugar. Serve with sweetened whipped cream or a glaze to balance. Adjust sugar in the filling based on your rhubarb’s tartness level – taste a piece raw to gauge.
Variations and Adaptations
Seasonal Options
Late spring version: Add strawberries with the rhubarb for the classic combination. Use about 1 cup diced strawberries to 2 cups rhubarb, reducing sugar slightly as strawberries add natural sweetness.
Summer stone fruit: Replace rhubarb with diced peaches or apricots when they’re at peak ripeness. Add a pinch of almond extract to the dough for a complementary flavor note.
Fall comfort: Substitute diced apples and add cinnamon to the filling. A handful of chopped toasted walnuts adds wonderful texture and autumn flavor.
Winter citrus: When rhubarb is out of season, use a combination of orange segments and candied ginger for a bright, warming filling that fights winter blues.
Dietary Modifications
For a dairy-free version, substitute the butter with high-quality vegan butter and use non-dairy milk. The texture will be slightly different but still delicious. Several lactose-intolerant friends request this version regularly.
Need them egg-free? Replace each egg with a “flax egg” (1 tablespoon ground flaxseed mixed with 3 tablespoons water, allowed to gel). The texture will be slightly denser but still enjoyable.
Lower sugar option: Reduce the sugar in both dough and filling by up to 25% without significantly affecting texture. Use a sugar substitute in the filling if needed, though this may affect caramelization.
Gluten-free adaptation: Use a cup-for-cup gluten-free flour blend designed for yeast breads. Add 1 teaspoon xanthan gum if your blend doesn’t include it. Expect a slightly different texture but still delicious results.
Storage and Make-Ahead
These buns are best enjoyed fresh but store beautifully for 2-3 days at room temperature in an airtight container. The bottom will lose some crispness but the flavors actually deepen overnight.
For longer storage, wrap individually in plastic wrap and freeze for up to 3 months. Thaw overnight at room temperature, then warm in a 300°F oven for 5-10 minutes to refresh.
The dough can be made the night before through the first rise. Punch down, cover tightly, and refrigerate overnight. In the morning, let it come to room temperature (about 30 minutes) before rolling and filling.
Assembled, unbaked buns can be covered and refrigerated overnight. In the morning, let them rise at room temperature for about 1 hour before baking. This make-ahead option is perfect for stress-free entertaining.
To refresh day-old buns, warm them in a 300°F oven for 5-7 minutes. This re-crisps the bottom and softens the interior, almost like they’re fresh-baked.
FAQ
Can I use frozen rhubarb?
Yes, but thaw completely and drain excess liquid first. Frozen rhubarb releases more moisture than fresh, so you may need to add an extra tablespoon of flour or cornstarch to the filling to absorb excess juice. The flavor remains excellent, though the texture may be slightly softer.
Why didn’t my buns rise properly?
Several factors affect rising: expired yeast, water temperature too hot or cold, kitchen too cool, or not enough time. Always proof yeast first to ensure it’s active. Create a warm environment (75-80°F) for optimal rising. Be patient – rushing the rise produces dense buns.
Can I make these without a stand mixer?
Absolutely! Mix the dough by hand using a wooden spoon, then knead on a floured surface for 12-15 minutes until smooth and elastic. It’s more work but entirely doable. The kneading process is actually quite therapeutic and connects you to centuries of baking tradition.
How do I know when they’re done baking?
Look for deep golden-brown color on top and sides pulling slightly from the pan. The internal temperature should reach 190°F (88°C). Tap the top – it should sound hollow. If unsure, err on the side of slight overbaking rather than underbaking for the best texture.
Closing Thoughts
The best morning bun moments happen when the kitchen fills with anticipatory silence as you flip that pan, revealing the caramelized, glistening bottoms and watching everyone’s eyes widen in appreciation. There’s something deeply satisfying about creating a pastry that transforms a humble spring vegetable into the star of the breakfast table.
Around here, these rhubarb morning buns have become our weekend tradition once the first stalks appear at the farmers market. My daughter has graduated from helping stir to actually rolling out the dough herself, carefully spreading the filling with the concentration of a budding pastry chef. These are the kitchen memories I treasure most – passing down not just recipes, but the joy of creating something extraordinary from simple ingredients.
I couldn’t resist bringing a batch to our neighborhood coffee morning last spring. By 10 am, every last crumb had disappeared, and I left with six different requests for the recipe. There’s something wonderful about sharing a recipe that consistently brings joy – watching it ripple through a community, creating new traditions in other homes.
Whether you’re a seasoned baker or trying your hand at yeasted pastries for the first time, these morning buns offer both delicious rewards and forgiving technique. The combination of tangy rhubarb, caramelized sugar, and butter-rich dough creates something that feels fancy enough for company yet comfortable enough for family breakfast. I hope they bring as much happiness to your mornings as they have to mine!
PrintRhubarb Morning Buns
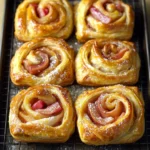
Buttery yeasted buns swirled with tangy rhubarb and cinnamon sugar, featuring a caramelized bottom that creates the perfect contrast of textures
Prep Time: 30 minutes | Rise Time: 2 hours | Cook Time: 30 minutes | Total Time: 3 hours | Servings: 12 buns
Ingredients
For the Dough:
- 3½ cups all-purpose flour, plus more for rolling
- ¼ cup granulated sugar
- 2¼ teaspoons active dry yeast (1 packet)
- 1 teaspoon salt
- ¾ cup whole milk, warmed to 110°F
- ¼ cup unsalted butter, melted and cooled slightly
- 2 large eggs, room temperature
- 1 teaspoon vanilla extract
For the Filling:
- 12 oz fresh rhubarb, trimmed and chopped into ¼-inch pieces
- ½ cup granulated sugar, divided
- ¼ cup unsalted butter, melted
- 2 teaspoons ground cinnamon
- ½ teaspoon ground cardamom (optional)
- 2 tablespoons all-purpose flour
For the Pan and Topping:
- 3 tablespoons unsalted butter, softened
- ¼ cup granulated sugar
- 1 teaspoon ground cinnamon
For the Glaze (optional):
- 1 cup powdered sugar
- 2–3 tablespoons milk
- ½ teaspoon vanilla extract
Instructions
- Begin the dough: In a small bowl, combine the warm milk, 1 tablespoon of the sugar, and the yeast. Stir gently and let sit for 5-10 minutes until foamy. This confirms your yeast is active and ready to work its magic.
- In the bowl of a stand mixer fitted with the dough hook (or a large mixing bowl if working by hand), combine the flour, remaining sugar, and salt.
- Add the yeast mixture, melted butter, eggs, and vanilla to the flour mixture. Mix on low speed until the dough comes together, then increase to medium speed and knead for 8-10 minutes until smooth and elastic. The dough should be slightly tacky but not sticky.
- Place the dough in a greased bowl, turning to coat all sides. Cover with a damp cloth or plastic wrap and let rise in a warm place until doubled in size, about 1-1½ hours.
- While the dough rises, prepare the filling: Toss the chopped rhubarb with ¼ cup of the sugar and let sit for 15-20 minutes to macerate. This draws out excess moisture and begins to candy the fruit.
- Prepare the pan: Generously butter a 9×13-inch baking pan. Mix the ¼ cup sugar and 1 teaspoon cinnamon together, then sprinkle evenly over the bottom of the buttered pan. This creates the caramelized bottom.
- In a small bowl, mix the remaining ¼ cup sugar, 2 teaspoons cinnamon, cardamom (if using), and flour for the filling.
- Once the dough has risen, punch it down and turn it onto a lightly floured surface. Roll into a 12×18-inch rectangle, maintaining even thickness throughout.
- Brush the dough with the melted butter, leaving a 1-inch border on one long edge. Sprinkle the cinnamon-sugar mixture evenly over the buttered area.
- Drain the macerated rhubarb and distribute it evenly over the cinnamon sugar. The macerating process should have created a syrupy coating on the fruit.
- Starting from the long edge opposite the border, roll the dough tightly into a log. Pinch the seam to seal. Using a sharp knife or unflavored dental floss, cut the log into 12 equal pieces.
- Place the buns cut-side up in the prepared pan, spacing them evenly. They should not quite touch – they’ll expand during the second rise.
- Cover the pan with a damp towel or greased plastic wrap and let rise in a warm place until the buns are puffy and nearly doubled, about 45-60 minutes. They should fill the pan and touch each other.
- Meanwhile, preheat your oven to 350°F (175°C).
- Bake the buns for 28-35 minutes, until golden brown on top and the internal temperature reaches 190°F (88°C). If the tops brown too quickly, tent with foil for the last 10 minutes.
- Remove from the oven and let cool in the pan for exactly 5 minutes – no longer! This timing is crucial for the caramelized bottom to set properly without sticking.
- Place a large serving platter or sheet pan over the baking pan and quickly invert. Let the pan sit for a moment before lifting to allow any caramel to drip onto the buns.
- If desired, make the glaze: Whisk together powdered sugar, milk, and vanilla until smooth. Drizzle over the warm buns.
- Serve warm or at room temperature. The buns are best the day they’re made but remain delicious for 2-3 days.
Notes:
- Choose rhubarb that’s bright pink or red for the most beautiful color in the finished buns
- The cardamom adds a subtle exotic note that complements rhubarb beautifully, but it’s optional
- For make-ahead convenience, prepare through step 12, cover tightly, and refrigerate overnight. In the morning, let rise at room temperature for about 1 hour before baking
- These freeze beautifully – wrap individually once cooled and freeze for up to 3 months
- No glaze is really needed as the caramelized bottom provides plenty of sweetness, but it does make them extra special
Nutritional Information:
Per bun: Calories: 310, Protein: 6g, Carbohydrates: 48g, Fat: 11g, Fiber: 2g, Sugar: 22g
Storage Tips:
Store in an airtight container at room temperature for up to 3 days. For longer storage, wrap individually and freeze. Refresh day-old buns in a 300°F oven for 5-7 minutes to restore the contrast between crispy bottom and soft interior.
In reality, what makes these rhubarb morning buns truly special isn’t just their perfect balance of tart and sweet or their irresistible caramelized bottoms – it’s the way they transform an ordinary morning into an occasion. There’s something about pulling a pan of golden, spiraled buns from the oven that makes even the simplest breakfast feel celebratory. Whether shared with family around the kitchen table or presented at an elegant brunch, these buns have a way of creating moments worth savoring, bite by delicious bite. They’re proof that sometimes the best recipes are those that take humble ingredients and, with a little time and care, turn them into something that brings genuine joy to both baker and eater alike.