Roasted Sweet Potato Rounds with Honey and Feta

Y’know, there’s something downright magical about a simple dish that just works every time, and for me, that’s Roasted Sweet Potato Rounds with Honey and Feta. I stumbled upon this recipe a few years back during a chilly fall evening when I was desperate to whip up something cozy yet impressive for a last-minute dinner with friends. I had a couple of sweet potatoes sitting on my counter, some leftover feta in the fridge, and a jar of honey begging to be used, and voila, Roasted Sweet Potato Rounds with Honey and Feta became an instant hit! For more recipes like this, check out roasted sweet potato rounds with herbed ricotta walnuts and cranberries. For more recipes like this, check out roasted sweet potato rounds with herbed ricotta walnuts and cranberries. For more recipes like this, check out sweet potato rounds with burrata roasted beets and walnut sage pesto. If you love this recipe, you’ll also enjoy baked radicchio and sweet potato side dish. For more inspiration, I recommend checking out stovetop potato and onion sidedish recipe. For another great variation, check out chicken and dumplings with a homemade dumpling recipe. I was inspired by sweet and salty popcorn when creating this recipe. For more inspiration, I recommend checking out sweet potato fry dipping sauce.

I’ll never forget how the sweet, caramelized edges of the potatoes paired with that tangy feta and a drizzle of honey had everyone at the table scraping their plates. My buddy Mike even asked for the recipe right then and there, which, let’s be real, is the ultimate compliment for any home cook. If you’re looking for a side dish or appetizer that’s equal parts easy and drool-worthy, stick with me, because Roasted Sweet Potato Rounds with Honey and Feta is about to become your new go-to.

Truth be told, I’ve made this dish more times than I can count since that night, tweaking it here and there to get it just right. So, let’s dive into why this recipe for Roasted Sweet Potato Rounds with Honey and Feta will steal your heart (and maybe a spot on your weekly menu).

Why You’ll Love This Recipe

Roasted Sweet Potato Rounds with Herbed Ricotta, Walnuts, and Cranberries

I’ve found that Roasted Sweet Potato Rounds with Honey and Feta hits all the right notes for anyone who loves a balance of flavors. There’s the natural sweetness of the potatoes, amplified by a golden drizzle of honey, and then that creamy, salty kick from the feta that just ties it all together. It’s like a little party on your palate, and honestly, who doesn’t love that?

Plus, in my kitchen, this dish is a lifesaver when I need something fuss-free yet fancy enough to impress. Whether it’s a holiday spread or a casual weeknight dinner, Roasted Sweet Potato Rounds with Honey and Feta always gets rave reviews without me slaving over the stove for hours. Trust me, if I can pull this off on a busy Tuesday, you’ve got this in the bag too!

Ingredients List

Alright, let’s talk about what you’ll need to make Roasted Sweet Potato Rounds with Honey and Feta. I’m all about keeping things simple, but I do have my preferences when it comes to picking the best ingredients for this dish. I usually buy medium-sized sweet potatoes because they’re easier to slice into uniform rounds, and I’m a sucker for a good local honey to really elevate the flavor.

Here’s the full lineup with exact measurements to nail Roasted Sweet Potato Rounds with Honey and Feta every time:

  • 2 medium sweet potatoes (about 1.5 lbs or 680g), washed and sliced into 1/4-inch rounds
  • 2 tablespoons (30ml) olive oil, for that perfect crisp
  • 1 teaspoon (5g) sea salt, to bring out the natural flavors
  • 1/2 teaspoon (2.5g) black pepper, freshly ground if you’ve got it
  • 3 tablespoons (45ml) honey, preferably raw for a richer taste
  • 1/2 cup (75g) crumbled feta cheese, I go for a tangy, creamy one
  • 1 tablespoon (3g) fresh thyme leaves, optional but adds a nice earthy touch

I’ve gotta say, don’t skimp on the feta—its sharpness is what makes Roasted Sweet Potato Rounds with Honey and Feta truly pop. And if you can, grab sweet potatoes with a deep orange hue; I think they roast up sweeter and prettier on the plate. Let’s get these ingredients prepped and ready to roll!

Variations

One thing I adore about Roasted Sweet Potato Rounds with Honey and Feta is how dang versatile it is. I’ve played around with this recipe a bunch over the years, tweaking it for different vibes or whatever I’ve got in my pantry. Here are some fun spins on Roasted Sweet Potato Rounds with Honey and Feta that I’ve tried and loved, and I bet you’ll find a fave among them too.

  • Spicy Kick: Sprinkle on 1/2 teaspoon of chili flakes or a dash of hot sauce before roasting for a little heat that contrasts the honey’s sweetness.
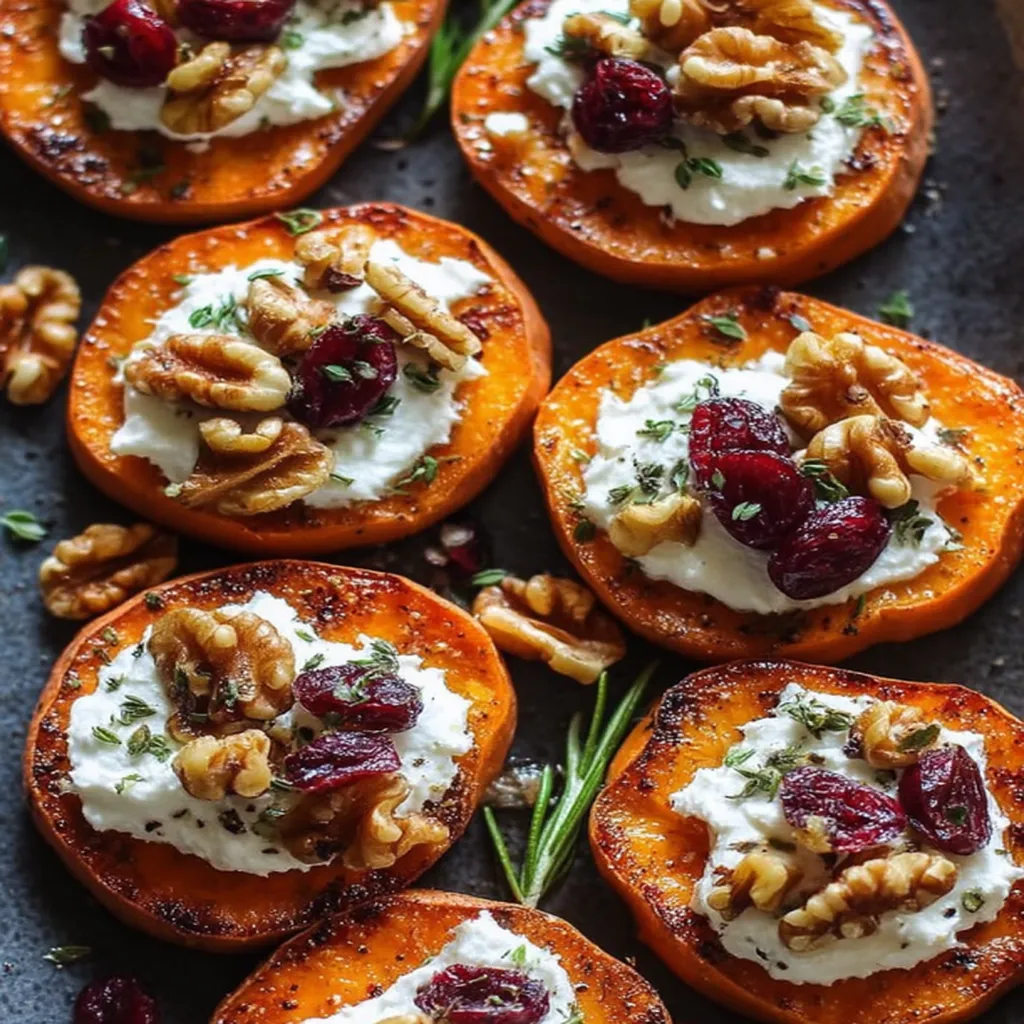
  • Nutty Crunch: Toss in a handful of chopped pecans or walnuts in the last 5 minutes of roasting for some texture—I tried this once for Thanksgiving, and it was a game-changer.
  • Herby Twist: Swap the thyme for rosemary or sage; I’m partial to rosemary because it feels so cozy with Roasted Sweet Potato Rounds with Honey and Feta.
  • Maple Magic: Use maple syrup instead of honey for a deeper, autumnal flavor—my kids always ask for this version!
  • Goat Cheese Swap: Replace feta with crumbled goat cheese if you want something a bit milder and creamier.
  • Cinnamon Dust: Add a pinch of ground cinnamon before baking for a warm, dessert-like vibe that still works as a side.
  • Bacon Bits: Crumble some cooked bacon over the top after roasting—honestly, I did this for a brunch, and folks went wild.
  • Garlic Lover’s Dream: Rub a bit of minced garlic into the rounds before roasting for a savory punch that pairs so well with Roasted Sweet Potato Rounds with Honey and Feta.

I’m telling ya, experimenting with this dish is half the fun. Whether you’re keeping it classic or jazzing it up, Roasted Sweet Potato Rounds with Honey and Feta always delivers.

Servings and Timing

Let’s break down the nitty-gritty of how long it’ll take to whip up Roasted Sweet Potato Rounds with Honey and Feta and how many folks you can feed with it. In my experience, this recipe comes together pretty quick, even if you’re multitasking in the kitchen. Here’s what you’re looking at for timing and servings when making Roasted Sweet Potato Rounds with Honey and Feta.

  • Prep Time: 10 minutes
  • Cook Time: 25-30 minutes
  • Total Time: About 35-40 minutes
  • Servings: 4-6 as a side dish or appetizer

I usually find this fits perfectly as a side for a small family dinner, but you can double it up if you’re hosting a crowd. Honestly, it’s so tasty, you might want to anyway!

Step-by-Step Instructions

Alright, let’s get down to business and make some killer Roasted Sweet Potato Rounds with Honey and Feta. I’ve got this process down to a science after making it a zillion times, so follow along, and I’ll share my little tricks to get those rounds perfectly golden and delicious. Let’s do this step by step, like I’m right there in the kitchen with ya.

Step 1: Preheat and Prep

First things first, crank your oven to 425°F (220°C) and line a baking sheet with parchment paper—I swear by this for easy cleanup. Wash your sweet potatoes well (no need to peel unless you hate the skin like my picky eater kid does), and slice them into 1/4-inch rounds. Keep ‘em even so they cook at the same rate.

Step 2: Season and Oil

Toss those sweet potato rounds in a big bowl with olive oil, salt, and pepper until they’re nicely coated. I like to use my hands for this—call it my “get in there” method—because it ensures every piece gets some love. Spread them out in a single layer on the baking sheet for maximum crispiness when making Roasted Sweet Potato Rounds with Honey and Feta.

Step 3: Roast to Perfection

Pop the tray in the oven and roast for about 25-30 minutes, flipping halfway through so both sides get that gorgeous golden edge. I’ve learned to check around the 20-minute mark since ovens can be sneaky and overcook ‘em. You’re aiming for tender centers with slightly crispy edges for the best Roasted Sweet Potato Rounds with Honey and Feta.

Step 4: Add the Good Stuff

Once they’re out of the oven, drizzle the honey over the warm rounds—don’t be shy, let it pool a little! Then sprinkle on the crumbled feta and thyme if you’re using it. I’ve found that adding these post-roast keeps the feta from melting away, which is key for that perfect bite of Roasted Sweet Potato Rounds with Honey and Feta.

Step 5: Serve and Savor

Transfer your masterpiece to a platter or just serve ‘em straight from the tray if you’re feeling casual like I usually am. These Roasted Sweet Potato Rounds with Honey and Feta taste amazing hot or at room temp, so no stress if they sit out a bit. Dig in and watch ‘em disappear!

Nutritional Information

Roasted Sweet Potato Rounds with Herbed Ricotta, Walnuts, and Cranberries

I’m no dietitian, but I like to keep an eye on what I’m eating, especially with a dish as moreish as Roasted Sweet Potato Rounds with Honey and Feta. Here’s a rough breakdown per serving (based on 6 servings) so you’ve got an idea of what you’re getting with Roasted Sweet Potato Rounds with Honey and Feta. These numbers are approximate, but they’ve helped me balance my meals.

  • Calories: 220 per serving
  • Fat: 9g
  • Protein: 4g
  • Carbohydrates: 32g
  • Sodium: 380mg

I love that this dish isn’t too heavy but still feels indulgent with that honey and feta combo. It’s a win in my book!

Healthier Alternatives

If you’re looking to lighten up Roasted Sweet Potato Rounds with Honey and Feta, I’ve got some swaps I’ve tried that work like a charm. I’m all for making dishes fit my mood or health goals, so here are a few tweaks for Roasted Sweet Potato Rounds with Honey and Feta that don’t skimp on flavor. Give ‘em a shot if you’re watching calories or just wanna mix things up.

  • Less Oil: Cut the olive oil down to 1 tablespoon and use a spray to lightly coat the rounds—I’ve done this when I’m cutting back, and they still crisp up nicely.
  • Honey Substitute: Swap honey for a drizzle of agave nectar or skip the sweetener entirely for a more savory take on Roasted Sweet Potato Rounds with Honey and Feta.
  • Low-Fat Cheese: Use reduced-fat feta or even a sprinkle of nutritional yeast if you’re going dairy-free—honestly, it’s not the same, but it works in a pinch.
  • Baking Instead of Frying: Okay, this recipe is already baked, but if you’re tempted to pan-fry for speed, stick to roasting to keep the fat content down.

These tweaks let me enjoy Roasted Sweet Potato Rounds with Honey and Feta guilt-free, which is always a bonus in my kitchen!

Serving Suggestions

I’ve served Roasted Sweet Potato Rounds with Honey and Feta in so many ways over the years, and it never fails to shine, no matter the occasion. Here are a few ideas straight from my table to yours that’ll make this dish feel extra special. Whether it’s a weeknight or a party, Roasted Sweet Potato Rounds with Honey and Feta fits right in.

  • As a Side: Pair it with grilled chicken or pork chops for a hearty, balanced meal—I love how the sweetness complements savory proteins.
  • Appetizer Style: Stack them on a platter with toothpicks for a cute, bite-sized party snack; my guests always rave!
  • Brunch Buddy: Serve alongside scrambled eggs and greens for a brunch that looks gourmet without much effort.
  • Holiday Star: Add Roasted Sweet Potato Rounds with Honey and Feta to your Thanksgiving or Christmas spread—it’s a crowd-pleaser every time.

I’m telling ya, this dish is so versatile, you’ll find a million ways to serve it up!

Common Mistakes to Avoid

I’ve had my fair share of kitchen oopsies while perfecting Roasted Sweet Potato Rounds with Honey and Feta, so let me save you some headaches with a few pitfalls to dodge. Trust me, I learned these the hard way, and I don’t want you to repeat my blunders when making Roasted Sweet Potato Rounds with Honey and Feta. Here’s what to watch out for.

  • Overcrowding the Pan: If the rounds overlap, they’ll steam instead of roast—I’ve ruined a batch this way, and they were mushy instead of crispy.
  • Skipping the Flip: Don’t forget to turn them halfway through roasting, or one side will be soggy while the other burns (yep, been there).
  • Too Much Honey: Drizzle lightly at first; I once poured too much, and it turned into a sticky mess that overpowered the feta.
  • Wrong Thickness: Slice too thick, and they won’t cook through; too thin, and they’ll burn—aim for that 1/4-inch sweet spot for Roasted Sweet Potato Rounds with Honey and Feta.

Keep these in mind, and you’ll be golden—literally and figuratively!

Storing Tips

If by some miracle you’ve got leftovers of Roasted Sweet Potato Rounds with Honey and Feta, I’ve got you covered on how to store ‘em right. In my experience, they keep pretty well if you handle ‘em with care. Here’s how I stash Roasted Sweet Potato Rounds with Honey and Feta to enjoy later.

  • Refrigerator: Store in an airtight container for up to 3-4 days; they reheat decently in the oven or microwave.
  • Freezer: I don’t recommend freezing as the texture gets weird, but if you must, freeze without the feta and honey for up to a month.

I’ve found reheating in the oven at 350°F keeps that crispy edge better than nuking it. Give it a try!

Frequently Asked Questions

I get a ton of questions about Roasted Sweet Potato Rounds with Honey and Feta, so I’ve rounded up the most common ones I hear from friends and readers. Let’s tackle ‘em with some real-talk answers based on my kitchen adventures with Roasted Sweet Potato Rounds with Honey and Feta.

Can I make this ahead of time?

Totally! Roast the sweet potatoes a day ahead, store ‘em in the fridge, and add the honey and feta right before serving. I’ve done this for parties, and it saves so much stress.

Can I use a different cheese?

Sure thing—goat cheese or blue cheese works great if feta’s not your vibe. I’ve swapped in goat cheese when I was out of feta, and it was still yummy.

Do I need to peel the sweet potatoes?

Nah, I usually don’t unless the skin’s super tough. The skin adds texture and nutrients, but peel if you prefer a smoother bite.

Can I grill these instead of roasting?

Yep, I’ve grilled them on medium heat for about 4-5 minutes per side. Just watch ‘em closely so they don’t burn!

Is this dish gluten-free?

It sure is, as long as your ingredients are certified gluten-free. Always double-check your feta or honey if you’re super sensitive.

Can I use yams instead of sweet potatoes?

You can, but yams are starchier and less sweet, so the flavor might differ. I’ve tried it, and it’s okay, just not my fave.

How do I get the rounds extra crispy?

Crank the oven to 450°F for the last 5 minutes or use a convection setting if you’ve got one. That’s my little trick for extra crunch!

Can kids eat this?

Absolutely, my kiddos love Roasted Sweet Potato Rounds with Honey and Feta! Just go easy on the salt if they’re little ones.

Conclusion

Well, there you have it, folks—everything I know and love about Roasted Sweet Potato Rounds with Honey and Feta. I hope you’re as excited as I am to whip up this easy, flavorful dish and share it with your crew.

Whether it’s a holiday feast or just a cozy night in, Roasted Sweet Potato Rounds with Honey and Feta is bound to impress, so give it a go and let me know how it turns out—I’d love to hear!

Spicy Jalapeño Popper Mediterranean Ground Beef Stir Fry

Hey there, friends! I’m beyond excited to share a recipe that’s become a total game-changer in my kitchen: the Spicy Jalapeño Popper Mediterranean Ground Beef Stir Fry. I stumbled upon this flavor mash-up a couple of years back when I was craving something bold yet comforting, and let me tell ya, it’s been a family favorite ever since. For more recipes like this, check out mediterranean ground beef stir fry. For more recipes like this, check out mediterranean ground beef stir fry a perfect match with raspberry bread top 3 reasons. For more recipes like this, check out mediterranean ground beef stir fry. If you love this recipe, you’ll also enjoy ground beef and potato casserole. I was inspired by satisfying baked penne pasta with ground beef when creating this recipe. For another great variation, check out one pan steak stir fry. For more inspiration, I recommend checking out veggie steak stir fry. My friend at chinese garlic sauce brown stir fry sauce has a similar recipe that you might enjoy.

My husband, who’s usually picky about spice, couldn’t stop raving about this dish the first time I made it!

I remember that day vividly. I was experimenting with some leftover jalapeños and ground beef, tossing in Mediterranean vibes with feta and olives, and the result was this mouthwatering Spicy Jalapeño Popper Mediterranean Ground Beef Stir Fry. It was pure magic, like a party in every bite!

Now, I’m no stranger to kitchen flops, but this recipe? It’s pretty darn foolproof, and I can’t wait to walk you through it. Whether you’re a spice lover or just looking to shake up dinner, this Spicy Jalapeño Popper Mediterranean Ground Beef Stir Fry is gonna steal your heart.

Why You’ll Love This Recipe

I’ve cooked a lot of meals in my day, and I gotta say, this Spicy Jalapeño Popper Mediterranean Ground Beef Stir Fry stands out for its wild combo of flavors. It’s got the heat of jalapeño poppers, the heartiness of ground beef, and those Mediterranean touches that make it feel a bit fancy without extra effort. In my kitchen, it’s the dish I turn to when I want something quick but impressive.

And honestly, who doesn’t love a one-pan wonder? I’ve found that this Spicy Jalapeño Popper Mediterranean Ground Beef Stir Fry comes together fast, which is a lifesaver on busy weeknights. Plus, the leftovers (if there are any!) taste even better the next day.

Ingredients List

Let’s talk ingredients for this Spicy Jalapeño Popper Mediterranean Ground Beef Stir Fry. I’m all about using what’s fresh and accessible, but I do have a few preferences I’ll share. If you’ve got a local market, grab your produce there for the best flavor.

I usually buy my ground beef from a trusted butcher for that extra freshness, and I’m picky about my jalapeños—gotta have that perfect heat! Here’s everything you need to whip up this Spicy Jalapeño Popper Mediterranean Ground Beef Stir Fry at home. These measurements make a hearty batch for about four hungry folks.

For the Stir Fry Base

  • 1 pound (450g) ground beef, 80/20 for juiciness
  • 2 tablespoons (30ml) olive oil, extra virgin if you’ve got it
  • 1 medium yellow onion, finely diced for sweetness
  • 3 cloves garlic, minced for that aromatic punch
  • 3 fresh jalapeños, seeded and sliced (keep seeds if you’re brave!)
  • 1 red bell pepper, diced for a pop of color
  • 1 teaspoon (5g) smoked paprika, for depth
  • 1 teaspoon (5g) ground cumin, for warm spice

For the Jalapeño Popper Twist

  • 4 ounces (115g) cream cheese, softened for creamy goodness
  • 1/2 cup (50g) shredded cheddar cheese, sharp for extra bite
  • 2 tablespoons (30g) bacon bits, optional but oh-so-good

For the Mediterranean Flair

  • 1/2 cup (75g) crumbled feta cheese, for tangy richness
  • 1/4 cup (40g) kalamata olives, pitted and halved
  • 1 tablespoon (15ml) lemon juice, fresh-squeezed for brightness
  • 2 tablespoons (5g) fresh parsley, chopped for garnish

With these in hand, you’re ready to make a killer Spicy Jalapeño Popper Mediterranean Ground Beef Stir Fry!

Variations

I love how versatile this Spicy Jalapeño Popper Mediterranean Ground Beef Stir Fry can be. Over the years, I’ve played around with different twists depending on what’s in my pantry or who’s coming over for dinner. Here are some variations I’ve tried (and loved) that you might wanna give a shot.

  • Turkey Swap: Use ground turkey instead of beef for a lighter take. I’ve done this when I’m trying to cut back on red meat, and it still packs a punch.
  • Extra Heat: Toss in a pinch of red pepper flakes or a diced serrano pepper. My brother begged for more spice once, so I tried this, and whoa, it was fiery!
  • Veggie Boost: Add zucchini or spinach for more greens. I sneak these in for my kids, and they don’t even notice.
  • Low-Carb Version: Skip the rice and serve this Spicy Jalapeño Popper Mediterranean Ground Beef Stir Fry over cauliflower rice. I’ve made this for friends on keto, and they loved it.
  • Cheesy Overload: Double the cheddar for an ooey-gooey vibe. My teens always ask for this one, and I can’t say no.
  • Mild Twist: Swap jalapeños for poblano peppers if heat’s not your thing. I did this once for a potluck, and it was still delish.
  • Herby Kick: Mix in some fresh oregano along with the parsley. I tried this on a whim, and it brought even more Mediterranean flair to the Spicy Jalapeño Popper Mediterranean Ground Beef Stir Fry.
  • Bean Addition: Throw in a can of drained chickpeas for extra protein. It’s a hearty tweak I’ve used when feeding a crowd.

Each tweak keeps the essence of the Spicy Jalapeño Popper Mediterranean Ground Beef Stir Fry but lets you make it your own. Which one are you gonna try first?

Servings and Timing

Let’s break down the nitty-gritty for this Spicy Jalapeño Popper Mediterranean Ground Beef Stir Fry. In my experience, timing can vary a tad based on your stove or how fast you chop, but these are my usual benchmarks. Here’s what you’re looking at for whipping up this dish.

  • Prep Time: 15 minutes
  • Cook Time: 25 minutes
  • Total Time: 40 minutes
  • Servings: 4-6 portions

I’ve found this Spicy Jalapeño Popper Mediterranean Ground Beef Stir Fry feeds my family of four with a little leftover for lunch the next day. Perfect for a quick, satisfying meal!

Step-by-Step Instructions

Alright, let’s get cooking! I’m gonna walk you through making this Spicy Jalapeño Popper Mediterranean Ground Beef Stir Fry like I’m right there in the kitchen with ya. I’ve got some little tricks up my sleeve to make this a breeze.

Spicy Jalapeño Popper Mediterranean Ground Beef Stir Fry recipe step-by-step guide
Delicious Spicy Jalapeño Popper Mediterranean Ground Beef Stir Fry prepared with love – follow this detailed recipe guide

Step 1: Prep Your Ingredients

Start by chopping your onion, bell pepper, and jalapeños. I like to dice everything pretty fine so it cooks evenly, and trust me, wearing gloves while handling jalapeños saves you from spicy finger drama! Keep your cheeses and olives ready to go—this Spicy Jalapeño Popper Mediterranean Ground Beef Stir Fry moves fast.

Step 2: Cook the Beef

Heat olive oil in a large skillet over medium-high heat. Toss in the ground beef and break it up with a wooden spoon—don’t let it clump! I usually add a pinch of salt here to draw out flavor as it browns for about 5-7 minutes. Once it’s cooked, drain any excess fat if you’re not using lean meat.

Step 3: Sauté the Veggies

In the same skillet, add your onions, garlic, jalapeños, and bell pepper. Stir ‘em around for 4-5 minutes until they soften and smell amazing. I love this step because the kitchen starts smelling like a flavor explosion for the Spicy Jalapeño Popper Mediterranean Ground Beef Stir Fry!

Step 4: Spice It Up

Sprinkle in the smoked paprika and cumin, stirring to coat everything. I sometimes give the pan a good shake to mix it all up without over-stirring. Let it cook for another minute to wake up those spices.

Step 5: Add the Popper Magic

Lower the heat to medium, then stir in the cream cheese until it melts into a creamy dream. Add the cheddar and bacon bits if you’re using ‘em, mixing until it’s all gooey. This is where the Spicy Jalapeño Popper Mediterranean Ground Beef Stir Fry gets that signature vibe, and I always sneak a taste here (shh, don’t tell!).

Step 6: Finish with Mediterranean Flair

Finally, toss in the feta, olives, and a squeeze of lemon juice. Stir gently for a minute to combine, then top with fresh parsley. This last bit ties the Spicy Jalapeño Popper Mediterranean Ground Beef Stir Fry together—serve it hot and watch it disappear!

Nutritional Information

I’m no dietitian, but I like to keep tabs on what’s in my meals, especially with something as hearty as this Spicy Jalapeño Popper Mediterranean Ground Beef Stir Fry. Here’s the breakdown per serving, based on six portions. These are rough estimates, but I think they’re pretty close.

  • Calories: 380 per serving
  • Fat: 28g
  • Protein: 22g
  • Carbohydrates: 8g
  • Sodium: 620mg

This Spicy Jalapeño Popper Mediterranean Ground Beef Stir Fry isn’t exactly diet food, but it’s filling and packed with flavor, so a little goes a long way!

Healthier Alternatives

If you’re looking to lighten up this Spicy Jalapeño Popper Mediterranean Ground Beef Stir Fry, I’ve got ya covered. I’ve swapped things out plenty of times when I’m watching my waistline or cooking for health-conscious pals. Here are some tweaks that still keep the dish tasty.

  • Leaner Meat: Use ground turkey or chicken instead of beef. I’ve done this and barely noticed the difference.
  • Low-Fat Cheese: Swap cream cheese for a reduced-fat version. It’s not quite as rich, but it works in a pinch for this Spicy Jalapeño Popper Mediterranean Ground Beef Stir Fry.
  • Skip the Cheddar: Cut back on cheddar or use a lighter sprinkle of feta only. I’ve tried this when cutting calories, and it’s still yummy.
  • More Veggies: Bulk it up with extra bell peppers or spinach to lower the calorie density. This is my go-to for stretching the Spicy Jalapeño Popper Mediterranean Ground Beef Stir Fry without sacrificing flavor.

Serving Suggestions

I’ve served this Spicy Jalapeño Popper Mediterranean Ground Beef Stir Fry in all sorts of ways, depending on the mood or occasion. It’s super versatile, and I love getting creative with it. Here are a few ideas that have worked for me.

  • Over Rice: Spoon it over fluffy basmati or jasmine rice to soak up the juices. This is my default!
  • With Flatbread: Pair it with warm pita or naan for a Mediterranean feel. I did this at a dinner party, and everyone raved.
  • As a Wrap: Stuff it into tortillas with some lettuce for a handheld meal. My kids love this version of Spicy Jalapeño Popper Mediterranean Ground Beef Stir Fry.
  • With a Salad: Serve alongside a crisp Greek salad for a balanced plate. It’s my fave way to add freshness to the Spicy Jalapeño Popper Mediterranean Ground Beef Stir Fry.

Common Mistakes to Avoid

I’ve made my fair share of kitchen blunders with this Spicy Jalapeño Popper Mediterranean Ground Beef Stir Fry, so lemme save you the headache. Trust me on this one—I’ve learned the hard way! Here are pitfalls to dodge.

  • Overcooking the Beef: Don’t let it go too long, or it’ll get dry. I’ve ruined a batch by not paying attention.
  • Skipping the Drain: If your beef is fatty, drain the grease before adding veggies, or it’ll be too oily. Been there, done that with this Spicy Jalapeño Popper Mediterranean Ground Beef Stir Fry!
  • Too Much Heat: Be careful with jalapeño seeds if you’re not spice-ready. I once overdid it and had to chug milk.
  • Not Melting Cheese Properly: Add cream cheese on low heat, or it’ll clump. I messed this up early on with the Spicy Jalapeño Popper Mediterranean Ground Beef Stir Fry.

Storing Tips

I’ve found that this Spicy Jalapeño Popper Mediterranean Ground Beef Stir Fry holds up pretty well for leftovers, which is a win in my book. Here’s how I keep it fresh when I make a big batch. Follow these, and you’re golden.

  • Refrigerator: Store in an airtight container for 3-4 days. It reheats like a dream!
  • Freezer: Freeze portions in freezer-safe bags for up to 2 months. I do this with extra Spicy Jalapeño Popper Mediterranean Ground Beef Stir Fry for quick meals.
  • Reheating: Warm it on the stovetop with a splash of water to loosen it up. Works every time!

Spicy Jalapeño Popper Mediterranean Ground Beef Stir Fry recipe step-by-step guide
Delicious Spicy Jalapeño Popper Mediterranean Ground Beef Stir Fry prepared with love – follow this detailed recipe guide

Frequently Asked Questions

I’ve gotten a bunch of questions about this Spicy Jalapeño Popper Mediterranean Ground Beef Stir Fry over the years, so I’ll tackle the most common ones here. Let’s dive in!

Can I make this ahead of time?

Absolutely! I often prep the Spicy Jalapeño Popper Mediterranean Ground Beef Stir Fry a day ahead, store it in the fridge, and reheat it. Just add a little water or broth when warming to keep it from drying out.

Is it too spicy for kids?

It can be! I usually reduce jalapeños or skip the seeds for my little ones. You can always adjust the heat in this Spicy Jalapeño Popper Mediterranean Ground Beef Stir Fry to suit your crew.

Can I use ground pork instead?

Sure thing. I’ve tried pork, and it adds a different richness. Just watch the fat content and drain if needed.

What if I don’t have feta?

No worries—sub in goat cheese or even skip it. The dish still shines without it, in my experience.

Can I make it vegetarian?

Yup, swap beef for plant-based crumbles or lentils. I’ve done this for veggie friends, and it’s still tasty.

How do I tone down the creaminess?

Cut back on the cream cheese or skip the cheddar. I’ve done a lighter version, and it’s still got that kick.

Does it pair with pasta?

It totally can! I’ve tossed leftovers of Spicy Jalapeño Popper Mediterranean Ground Beef Stir Fry with spaghetti, and it’s a fun twist.

Can I grill the veggies first?

Go for it. Grilling adds a smoky vibe I’ve tried and loved. Just don’t overcook ‘em before the stir fry.

Conclusion

Well, there you have it, folks—my go-to recipe for Spicy Jalapeño Popper Mediterranean Ground Beef Stir Fry that’s never let me down. I hope you’ll give this a whirl and experience the crazy-good flavors for yourself.

If you’ve got tweaks or stories about making this Spicy Jalapeño Popper Mediterranean Ground Beef Stir Fry, drop ‘em in the comments—I’d love to hear! Let’s keep the kitchen fun rolling!

Crispy Fried Goat Cheese Balls with Spicy Honey Drizzle

I still remember the first time I whipped up a batch of Crispy Fried Goat Cheese Balls with Spicy Honey Drizzle for a small get-together at my place. It was one of those rainy fall evenings where you just crave something warm, indulgent, and a little bit fancy without spending hours in the kitchen. My friends couldn’t stop raving about the creamy, tangy goat cheese paired with that sweet-spicy kick, and honestly, I was pretty proud of myself for pulling it off! For more recipes like this, check out whipped feta dip with honey pistachios and cranberries. For more recipes like this, check out blooming onion bites with dipping sauce crispy delicious. For more recipes like this, check out roasted cranberry and goat cheese flatbread. For more inspiration, I recommend checking out delightful honey cookies with icing. If you love this recipe, you’ll also enjoy sauteed swiss chard with parmesan cheese. If you love this recipe, you’ll also enjoy egg ham casserole with cheese. If you love this recipe, you’ll also enjoy banana cream cupcakes with cream cheese filling. For more inspiration, I recommend checking out blue cheese sauce.

See, I’ve always been a sucker for fried appetizers (who isn’t?), but these Crispy Fried Goat Cheese Balls with Spicy Honey Drizzle quickly became my go-to. They’re a crowd-pleaser, super versatile, and, in my experience, way easier to make than they look. Let me walk you through why I think you’ll fall in love with them too.

I’ve messed up plenty of recipes in my day, but perfecting these Crispy Fried Goat Cheese Balls with Spicy Honey Drizzle taught me a few tricks I’m excited to share. So, grab your apron, and let’s get frying!

Why You’ll Love This Recipe

I’ve found that Crispy Fried Goat Cheese Balls with Spicy Honey Drizzle are the kind of dish that makes you feel like a gourmet chef without all the fuss. The contrast of the crunchy exterior with the melty, tangy goat cheese inside is just pure magic, and that spicy honey drizzle? Oh, it’s the cherry on top that takes it to another level!

In my kitchen, these little bites are a guaranteed hit whether I’m hosting a party or just treating myself on a quiet night. They’re quick enough to make on a whim but impressive enough to serve to guests. Trust me, once you try Crispy Fried Goat Cheese Balls with Spicy Honey Drizzle, you’ll be hooked like I am.

Ingredients List

Let’s talk about what you’ll need to make these irresistible Crispy Fried Goat Cheese Balls with Spicy Honey Drizzle. I’m pretty picky about ingredients, so I’ll share my go-to choices and why I love them. Feel free to tweak based on what you’ve got on hand, but here’s what works best for me.

For the Goat Cheese Balls

  • 8 oz (225g) goat cheese, softened (I prefer a log from the local market for that fresh, tangy bite)
  • 1/2 cup (60g) all-purpose flour, for dredging
  • 2 large eggs, beaten, at room temperature
  • 1 cup (100g) panko breadcrumbs, for that extra crunch (trust me, panko over regular breadcrumbs any day)
  • 1/2 teaspoon garlic powder, for a subtle savory note
  • Vegetable oil, for frying (I usually go for canola because it’s neutral and affordable)

For the Spicy Honey Drizzle

  • 1/4 cup (60ml) honey, raw if you can swing it for deeper flavor
  • 1/2 teaspoon red pepper flakes, adjust if you’re spice-shy (I love a good kick)
  • 1 teaspoon hot sauce, optional but amazing for extra heat (Sriracha is my jam)

I’ve made Crispy Fried Goat Cheese Balls with Spicy Honey Drizzle with cheaper goat cheese before, and honestly, it’s worth splurging on a good one for the creamiest texture. If your store doesn’t have panko, regular breadcrumbs will do in a pinch, but they won’t get quite as crispy. And don’t skimp on that honey drizzle—it’s what makes these pop!

Variations

One of the reasons I keep coming back to Crispy Fried Goat Cheese Balls with Spicy Honey Drizzle is how easy they are to customize. I’ve played around with different flavors over the years, and let me tell you, there’s something for everyone here. Whether you’re feeding picky eaters or spice lovers, you can switch things up without breaking a sweat.

Here are some variations I’ve tried and loved for Crispy Fried Goat Cheese Balls with Spicy Honey Drizzle:

  • Herb-Infused: Mix 1 tablespoon of chopped fresh thyme or rosemary into the goat cheese for an earthy vibe. I did this for a holiday party once, and it felt so festive!
  • Nutty Crunch: Roll the balls in crushed walnuts or pecans before frying for extra texture. My kids always ask for this version.
  • Smoky Twist: Add a pinch of smoked paprika to the breadcrumb mix for a deeper, smokier flavor.
  • Sweet Swap: Swap the spicy honey for a balsamic glaze if heat isn’t your thing. I tried this once and was surprised how well it worked.
  • Cheesy Mix: Blend in a bit of cream cheese with the goat cheese for an even softer center. This is my go-to when I want them extra gooey.
  • Garlic Lover’s Dream: Double the garlic powder or add minced fresh garlic to the cheese. My husband begs for this one.
  • Spicy Boost: Mix a dash of cayenne into the goat cheese for an internal heat kick to match the Crispy Fried Goat Cheese Balls with Spicy Honey Drizzle.

I’m always tinkering with these, so don’t be afraid to experiment. Got a favorite herb or spice? Toss it in and see how it vibes with those Crispy Fried Goat Cheese Balls with Spicy Honey Drizzle!

Servings and Timing

I’ve made Crispy Fried Goat Cheese Balls with Spicy Honey Drizzle for everything from solo snacks to big family gatherings, so I’ve got the timing down pat. In my experience, these come together pretty quickly once you’ve got the hang of it, even if you’re multitasking in the kitchen. Here’s the breakdown for planning your prep.

  • Prep Time: 15 minutes
  • Cook Time: 10 minutes
  • Total Time: 25 minutes
  • Servings: 4-6 portions (about 12-15 balls, depending on size)

These timings are based on how long it usually takes me to roll and fry a batch of Crispy Fried Goat Cheese Balls with Spicy Honey Drizzle. If you’re new to frying, it might take a smidge longer, but you’ll get the rhythm down soon enough!

Step-by-Step Instructions

Alright, let’s dive into making Crispy Fried Goat Cheese Balls with Spicy Honey Drizzle step by step. I’ve burned my fair share of batches (yep, I’m human too), so I’m sharing my hard-earned tips to help you nail it on the first try. Follow along, and don’t hesitate to tweak as you go!

Crispy Fried Goat Cheese Balls with Spicy Honey Drizzle recipe step-by-step guide
Delicious Crispy Fried Goat Cheese Balls with Spicy Honey Drizzle prepared with love – follow this detailed recipe guide

Step 1: Prep the Goat Cheese Balls

Start by scooping out small portions of softened goat cheese and rolling them into bite-sized balls, about 1 inch in diameter. I like to chill them in the fridge for 15-20 minutes to firm up—trust me, this keeps them from falling apart when frying. Wetting your hands a bit helps prevent sticking, something I learned after a very messy first attempt!

Step 2: Set Up the Breading Station

Grab three shallow bowls: one with flour, one with beaten eggs, and one with panko mixed with garlic powder. Roll each chilled ball first in flour, then egg, then panko. Double-coating in egg and panko gives that extra crunch I love in Crispy Fried Goat Cheese Balls with Spicy Honey Drizzle. (Pro tip: Use one hand for wet, one for dry to avoid a breaded finger disaster!)

Step 3: Fry to Perfection

Heat about 2 inches of vegetable oil in a deep skillet or pot to 350°F (175°C). Fry the balls in small batches for 1-2 minutes until golden brown, turning gently with a slotted spoon. I’ve found overcrowding the pan drops the oil temp and makes them soggy, so take your time with this step for perfect Crispy Fried Goat Cheese Balls with Spicy Honey Drizzle.

Step 4: Make the Spicy Honey Drizzle

While the balls cool on a paper towel-lined plate, warm the honey in a small saucepan over low heat. Stir in red pepper flakes and hot sauce if using, then let it simmer for a minute to meld the flavors. This spicy honey drizzle is the secret weapon of Crispy Fried Goat Cheese Balls with Spicy Honey Drizzle, so don’t skip it!

Step 5: Serve and Enjoy

Drizzle that spicy honey over the warm Crispy Fried Goat Cheese Balls with Spicy Honey Drizzle, or serve it on the side for dipping. I usually pop a few extra flakes on top for a pop of color. Now, dig in while they’re hot and gooey!

Nutritional Information

I’m no dietitian, but I like to keep an eye on what I’m eating, especially with something as indulgent as Crispy Fried Goat Cheese Balls with Spicy Honey Drizzle. Here’s a rough breakdown per serving (based on 4 servings) to give you an idea. Honestly, I don’t stress too much about the numbers with these—they’re a treat worth every bite!

  • Calories: 280 per serving
  • Fat: 16g
  • Protein: 8g
  • Carbohydrates: 24g
  • Sodium: 320mg

These stats for Crispy Fried Goat Cheese Balls with Spicy Honey Drizzle are approximate, so they might vary depending on your ingredients or frying oil absorption. If you’re counting calories, portion control is your friend here!

Healthier Alternatives

Now, I’m not gonna pretend Crispy Fried Goat Cheese Balls with Spicy Honey Drizzle are health food, but I’ve tinkered with a few swaps when I’m trying to lighten things up. These still keep the flavor and texture I crave, just with a little less guilt. Here are some ideas I’ve tested out.

  • Baked Instead of Fried: Bake the balls at 400°F (200°C) for 10-12 minutes on a parchment-lined tray for a lighter option. I’ve done this, and they’re not quite as crispy, but still delish.
  • Lower-Fat Cheese: Use a reduced-fat goat cheese or mix with part-skim ricotta. It’s not as rich, but it works in a pinch.
  • Less Honey: Cut the honey drizzle by half and add a splash of lemon juice for a tangy, lighter topping on Crispy Fried Goat Cheese Balls with Spicy Honey Drizzle.
  • Whole Wheat Breadcrumbs: Swap panko for whole wheat breadcrumbs for a bit more fiber. I’ve tried this and barely noticed a difference in my Crispy Fried Goat Cheese Balls with Spicy Honey Drizzle.

Serving Suggestions

I love serving Crispy Fried Goat Cheese Balls with Spicy Honey Drizzle in all sorts of ways depending on the occasion. They’re versatile enough to fit into a fancy dinner or a casual snack sesh. Here are a few ideas based on how I’ve dished them up.

  • As an Appetizer: Plate them with a small arugula salad for a fresh contrast. This was a hit at my last dinner party.
  • Party Snack: Serve with toothpicks for easy grabbing alongside other finger foods. My guests always devour these Crispy Fried Goat Cheese Balls with Spicy Honey Drizzle first!
  • Brunch Bite: Pair with a fruit platter for a sweet-savory brunch vibe.
  • Dinner Starter: Add them to a charcuterie board with cured meats and olives for a gourmet touch with Crispy Fried Goat Cheese Balls with Spicy Honey Drizzle.

Common Mistakes to Avoid

I’ve flubbed my fair share of batches of Crispy Fried Goat Cheese Balls with Spicy Honey Drizzle over the years, so let me save you some heartache with mistakes I’ve learned the hard way. These are easy traps to fall into, but with a little heads-up, you’ll dodge ‘em. Trust me on this one!

  • Not Chilling the Cheese: If you skip the fridge step, the balls can melt and break apart during frying. I’ve had a few sad, gooey messes because of this.
  • Oil Too Hot: Frying at too high a temp burns the outside before the inside warms up. I’ve ruined a batch or two with this rookie move on Crispy Fried Goat Cheese Balls with Spicy Honey Drizzle.
  • Overcrowding the Pan: Too many balls at once lower the oil temp and make them soggy. Been there, done that.
  • Skipping the Double Coat: A single layer of breadcrumbs won’t give you that signature crunch for Crispy Fried Goat Cheese Balls with Spicy Honey Drizzle. Don’t cut corners here!

Storing Tips

I’ve found that Crispy Fried Goat Cheese Balls with Spicy Honey Drizzle are best eaten fresh, but if you’ve got leftovers (rare in my house!), here’s how to store them. These tips are straight from my trial and error in the kitchen. They won’t be quite as crispy after storing, but they’re still tasty!

  • Refrigerator: Keep in an airtight container for up to 2 days. Reheat in the oven to crisp them up a bit.
  • Freezer: Freeze unbaked balls on a tray, then transfer to a freezer bag for up to 1 month. Fry straight from frozen, just add a minute to the cook time for Crispy Fried Goat Cheese Balls with Spicy Honey Drizzle.

Crispy Fried Goat Cheese Balls with Spicy Honey Drizzle recipe step-by-step guide
Delicious Crispy Fried Goat Cheese Balls with Spicy Honey Drizzle prepared with love – follow this detailed recipe guide

Frequently Asked Questions

I get a bunch of questions about making Crispy Fried Goat Cheese Balls with Spicy Honey Drizzle, so I’ve rounded up the most common ones. Let’s tackle these real quick so you’ve got all the info you need. Hit me up in the comments if I missed something!

Can I make these ahead of time?

Totally! You can roll and bread the Crispy Fried Goat Cheese Balls with Spicy Honey Drizzle a day ahead, then store them in the fridge until you’re ready to fry. Just don’t drizzle the honey until serving so they stay crisp.

Can I bake them instead of frying?

Yep, I’ve baked them at 400°F for about 10-12 minutes. They won’t be as golden or crunchy as the fried version of Crispy Fried Goat Cheese Balls with Spicy Honey Drizzle, but it’s a solid lighter option.

What if I don’t have goat cheese?

No worries! Cream cheese or a mix of feta and cream cheese can work in a pinch, though the flavor won’t be quite the same for Crispy Fried Goat Cheese Balls with Spicy Honey Drizzle.

Is the spicy honey too hot?

It depends on your taste. Start with less red pepper flakes if you’re unsure, then adjust. I love the heat, but not everyone does!

Can I use a different oil for frying?

Sure thing. I use canola, but peanut oil or even avocado oil works great if you’ve got it.

How do I keep them from falling apart?

Chill them before frying, and make sure your oil isn’t too hot. That’s saved me more times than I can count.

Can I double the recipe?

Absolutely, I do it all the time for parties. Just work in batches so you don’t overcrowd the pan.

What’s the best way to reheat leftovers?

Pop them in a 350°F oven for 5-7 minutes. It helps bring back a bit of that crispiness for Crispy Fried Goat Cheese Balls with Spicy Honey Drizzle.

Conclusion

I hope you’re as excited as I am to whip up these Crispy Fried Goat Cheese Balls with Spicy Honey Drizzle. They’ve been a game-changer in my kitchen, turning ordinary nights into something special with minimal effort. Give ‘em a shot, and let me know how they turn out—I’d love to hear your twists on Crispy Fried Goat Cheese Balls with Spicy Honey Drizzle!

Mediterranean Chicken Bell Pepper Ranch Burritos

I still remember the first time I whipped up a batch of Mediterranean Chicken Bell Pepper Ranch Burritos. It was one of those chaotic weeknights where I was scavenging through the fridge, hoping to cobble together something edible for my hungry crew. For more recipes like this, check out mediterranean meatballs tzatziki chicken. For more recipes like this, check out stuffed chicken breast with red pepper spinach and mozzarella. For more recipes like this, check out stuffed chicken breast with red pepper spinach and mozzarella. For another great variation, check out french onion chicken recipe. My friend at 13 delicious hindquarter chicken recipes has a similar recipe that you might enjoy. I was inspired by crock pot chicken fajita pasta when creating this recipe. For another great variation, check out slow cooker garlic lemon chicken. If you love this recipe, you’ll also enjoy hot honey ranch.

Mediterranean Chicken Bell Pepper Ranch Burritos recipe step-by-step guide
Delicious Mediterranean Chicken Bell Pepper Ranch Burritos prepared with love – follow this detailed recipe guide
Mediterranean Chicken Bell Pepper Ranch Burritos recipe step-by-step guide
Delicious Mediterranean Chicken Bell Pepper Ranch Burritos prepared with love – follow this detailed recipe guide

I had some leftover grilled chicken, a few bell peppers on their last legs, and a hankering for something with a zesty kick. That’s when these Mediterranean Chicken Bell Pepper Ranch Burritos were born, and let me tell you, they’ve been a family favorite ever since!

Honestly, I wasn’t sure how the Mediterranean flavors would mesh with the creamy ranch and tortilla wrap at first. But oh man, the combo of juicy chicken, crisp peppers, and that tangy dressing just clicked. My kids, who are notoriously picky, devoured their plates and asked for seconds.

So, if you’re looking for a quick, flavor-packed meal like my Mediterranean Chicken Bell Pepper Ranch Burritos, stick with me—I’ve got the deets to make it a breeze in your kitchen.

Over the years, I’ve tweaked this recipe for Mediterranean Chicken Bell Pepper Ranch Burritos to perfection (or at least, as close as I can get). It’s become my go-to when I need something hearty but not heavy, and I’m thrilled to share it with you. Let’s dive into why this dish is gonna steal a spot in your weekly rotation.

Why You’ll Love This Recipe

I’ve found that Mediterranean Chicken Bell Pepper Ranch Burritos are the ultimate crowd-pleaser, no matter who’s at the table. There’s just something magical about the way the smoky, herby chicken pairs with the sweet crunch of bell peppers and that cool ranch drizzle. It’s like a little flavor party in every bite, and I’m not exaggerating when I say I’ve yet to meet someone who didn’t love it!

In my kitchen, these burritos are also a lifesaver on busy days. They come together in under an hour, and you can tweak the ingredients based on what’s in your pantry. Trust me, once you try making Mediterranean Chicken Bell Pepper Ranch Burritos, you’ll be as hooked as I am.

Ingredients List

I’m pretty picky about ingredients for my Mediterranean Chicken Bell Pepper Ranch Burritos because fresh, quality stuff makes all the difference. I usually buy my bell peppers from the local farmer’s market for that extra crispness, and I prefer using homemade or high-quality store-bought ranch for the best flavor. Here’s everything you’ll need to whip up these bad boys at home.

For the Chicken Filling

  • 1 pound (450g) boneless, skinless chicken breast, cut into bite-sized pieces
  • 2 tablespoons (30ml) olive oil, for that Mediterranean vibe
  • 1 teaspoon (5g) dried oregano, to bring out those herby notes
  • 1 teaspoon (5g) smoked paprika, for a subtle smokiness
  • 1/2 teaspoon (2.5g) garlic powder, for depth
  • Salt and pepper, to taste

For the Veggies and Assembly

  • 2 large bell peppers (any color), sliced into thin strips—I love mixing red and yellow for color
  • 1 medium red onion, thinly sliced for a little bite
  • 1/2 cup (120ml) ranch dressing, store-bought or homemade for creaminess
  • 1/2 cup (60g) crumbled feta cheese, for that salty Mediterranean punch
  • 4 large flour tortillas, warmed up for easy rolling
  • 1/4 cup (15g) fresh parsley, chopped for a pop of freshness

I’ve played around with different veggies and cheeses over the years for my Mediterranean Chicken Bell Pepper Ranch Burritos, but this lineup never fails to impress. If you’ve got a favorite ranch brand, use it—those little touches make it your own. And don’t skimp on the feta; it’s the secret weapon in these Mediterranean Chicken Bell Pepper Ranch Burritos!

Variations

One thing I adore about Mediterranean Chicken Bell Pepper Ranch Burritos is how versatile they are. I’ve messed around with this recipe countless times, depending on what I’ve got in the fridge or who

Spinach Artichoke Pasta Salad

Hey there, friends! I’m so excited to share one of my all-time favorite summer dishes with you: Spinach Artichoke Pasta Salad. I stumbled upon this gem a few years back when I was scrambling to whip up something for a last-minute potluck, and let me tell you, it was love at first bite. My family couldn’t get enough of it, and now it’s a staple at every barbecue or picnic we host. For more recipes like this, check out spinach artichoke pasta salad. For more recipes like this, check out spinach artichoke pasta salad 2. For more recipes like this, check out spinach artichoke pasta salad 2. For more inspiration, I recommend checking out ultimate non creamy pasta salad recipe. For more inspiration, I recommend checking out creamy pasta salad loaded with veggies. I was inspired by tomato and basil pasta salad when creating this recipe. I was inspired by supreme pizza cold pasta salad recipe when creating this recipe. My friend at greek vinaigrette salad dressing has a similar recipe that you might enjoy.

Spinach Artichoke Pasta Salad recipe step-by-step guide
Delicious Spinach Artichoke Pasta Salad prepared with love – follow this detailed recipe guide
Spinach Artichoke Pasta Salad recipe step-by-step guide
Delicious Spinach Artichoke Pasta Salad prepared with love – follow this detailed recipe guide

I remember that first time I threw together a Spinach Artichoke Pasta Salad; I was nervous it wouldn’t come out right since I was just eyeballing the ingredients. But the creamy dressing, tender pasta, and those tangy artichokes? Pure magic.

And honestly, I’ve tweaked it a bunch since then to make it even better. If you’re looking for a crowd-pleaser that’s easy to toss together, this Spinach Artichoke Pasta Salad is gonna be your new go-to. Stick with me, and I’ll walk you through every step!

Why You’ll Love This Recipe

I’ve found that this Spinach Artichoke Pasta Salad just hits all the right notes. It’s creamy yet fresh, hearty but not heavy, and packs a flavor punch with every forkful. In my kitchen, it’s the dish that disappears first at any gathering, and I’m always fielding requests for the recipe.

Plus, it’s super versatile (more on that later!). Whether you’re making it for a quick weeknight side or a big family bash, this Spinach Artichoke Pasta Salad adapts like a champ. Trust me, once you try it, you’ll be hooked like I am.

Ingredients List

Alright, let’s talk about what goes into this Spinach Artichoke Pasta Salad. I’m pretty picky about my ingredients because I want that perfect balance of flavors, and I’ve learned what works best over time. I usually buy most of these at my local grocery store, though I’ll splurge on a good olive oil if I’m feeling fancy.

Here’s everything you’ll need to make a killer Spinach Artichoke Pasta Salad. I’ve got

Crispy Beef Stir-Fry with Peppers and Onions

Hey there, friends! I’ve gotta tell you, I stumbled upon my love for Crispy Beef Stir-Fry with Peppers and Onions years ago during a hectic weeknight when I was just throwing stuff together from the fridge. For more recipes like this, check out mediterranean ground beef stir fry a perfect match with raspberry bread top 3 reasons. For more recipes like this, check out mediterranean ground beef stir fry a perfect match with raspberry bread top 3 reasons. For more recipes like this, check out reuben bake with layers of corned beef sauerkraut and swiss cheese. I was inspired by ground beef and potato casserole when creating this recipe. For another great variation, check out hearty baked rhubarb and beef casserole. For another great variation, check out stuffed poblano peppers with black beans quinoa. My friend at chicken and dumplings with a homemade dumpling recipe has a similar recipe that you might enjoy. My friend at chinese garlic sauce brown stir fry sauce has a similar recipe that you might enjoy.

Crispy Beef Stir-Fry with Peppers and Onions recipe step-by-step guide
Delicious Crispy Beef Stir-Fry with Peppers and Onions prepared with love – follow this detailed recipe guide
Crispy Beef Stir-Fry with Peppers and Onions recipe step-by-step guide
Delicious Crispy Beef Stir-Fry with Peppers and Onions prepared with love – follow this detailed recipe guide

My family went nuts over it, and honestly, it’s been a staple in my kitchen ever since. There’s something magical about the sizzle of tender beef getting all crispy and caramelized alongside vibrant peppers and onions that just screams comfort food with a kick.

Now, I ain’t gonna lie, I’ve botched this dish a time or two in the beginning (more on that later), but once I got the hang of it, my Crispy Beef Stir-Fry with Peppers and Onions became the go-to for quick dinners or impressing guests. I’m so excited to share this with y’all today. It’s fast, flavorful, and I’m betting you’ve already got most of the ingredients on hand.

So, let’s dive into making this Crispy Beef Stir-Fry with Peppers and Onions together. Trust me, if I can whip this up after a long day, you’ve got this in the bag!

Why You’ll Love This Recipe

I’ve found that my Crispy Beef Stir-Fry with Peppers and Onions is a total crowd-pleaser, whether I’m cooking for picky eaters or foodie friends. The beef gets this incredible crispy edge that’s like a flavor explosion in every bite, and the peppers and onions add a sweet, crunchy contrast that just works. Plus, it’s ready in under 30 minutes, which is a lifesaver on busy nights.

In my kitchen, this Crispy Beef Stir-Fry with Peppers and Onions always sparks compliments, and I love how customizable it is. Wanna spice it up or keep it mild? No problem, I’ve got variations coming up that’ll fit your vibe. Stick with me, and I promise you’ll be hooked!

Ingredients List

Alright, let’s talk about what you need

Mediterranean Grilled Veggie and Burrata Panini

Man, I still remember the first time I whipped up a Mediterranean Grilled Veggie and Burrata Panini in my tiny apartment kitchen. It was one of those lazy summer afternoons when I had a bunch of veggies on the verge of going bad, and I just couldn’t bear to toss them. So, I threw together this sandwich, not expecting much, and holy moly, it turned out to be a game-changer! That creamy burrata paired with the smoky, grilled flavors of the Mediterranean Grilled Veggie and Burrata Panini had me hooked from the first bite. For more recipes like this, check out mediterranean chicken with artichokes and asparagus. For more recipes like this, check out mediterranean chicken with artichokes and asparagus. For more recipes like this, check out mediterranean grilled vegetable pasta salad. If you love this recipe, you’ll also enjoy quick and easy chicken pesto panini recipe. I was inspired by delicious and moist sour cherry cake recipe when creating this recipe. I was inspired by spinach dip bunny veggie tray when creating this recipe. If you love this recipe, you’ll also enjoy no bake nutella and banana cheesecake. My friend at swedish meatball sauce recipe has a similar recipe that you might enjoy.

Now, I’ve made this Mediterranean Grilled Veggie and Burrata Panini dozens of times since then, tweaking it here and there to get it just right. My family loves it too, especially my picky brother who usually turns his nose up at anything with “veggie” in the name.

I’m so excited to share this with y’all, ‘cause I know you’re gonna fall for this Mediterranean Grilled Veggie and Burrata Panini just as hard as I did.

Why You’ll Love This Recipe

I’ve found that the Mediterranean Grilled Veggie and Burrata Panini is one of those recipes that just hits all the right notes. It’s got that perfect balance of fresh, vibrant veggies and indulgent, melty burrata that makes every bite feel like a little vacation to the Mediterranean coast. Plus, it’s so easy to throw together, even on a busy weeknight when you’re scrambling for dinner ideas.

In my kitchen, this Mediterranean Grilled Veggie and Burrata Panini has become a go-to for impressing guests without breaking a sweat. It looks fancy, but honestly, it’s just a matter of grilling some veggies and assembling a sandwich. You’ll love how versatile it is too, whether you’re feeding a crowd or just treating yourself to something special.

Ingredients List

I’m a big believer in keeping things fresh and simple when it comes to a Mediterranean Grilled Veggie and Burrata Panini. I usually buy my veggies from the local farmers’ market when I can, ‘cause they’ve got that just-picked flavor you can’t beat. Here’s everything you’ll need to make this Mediterranean Grilled Veggie and Burrata Panini at home, with exact measurements to keep things foolproof.

For the Grilled Veggies

  • 1 medium zucchini, sliced into 1/4-inch rounds for even grilling
  • 1 medium eggplant, cut into 1/4-inch slices for tenderness
  • 1 red bell pepper, seeded and cut into wide strips
  • 1 tablespoon (15ml) olive oil, extra virgin for that rich Mediterranean vibe
  • 1/2 teaspoon sea salt, to bring out the natural flavors
  • 1/4 teaspoon black pepper, freshly ground if you’ve got it

For the Panini

  • 4 ciabatta rolls, sliced in half (I prefer the crusty kind for texture)
  • 8 ounces (225g) burrata cheese, torn into pieces for creamy goodness
  • 1/4 cup (60ml) pesto, store-bought or homemade for a herby punch
  • 1 handful fresh basil leaves, for that bright, aromatic touch
  • 2 tablespoons (30ml) balsamic glaze, for a sweet-tangy drizzle

I’ve gotta say, the burrata is the star of this Mediterranean Grilled Veggie and Burrata Panini, so don’t skimp on quality if you can help it. And if you’re feeling fancy, make your own pesto—it’s a total game-changer!

Variations

One thing I love about the Mediterranean Grilled Veggie and Burrata Panini is how easy it is to switch things up based on what you’ve got in the fridge or what you’re craving. I’ve played around with this recipe a ton over the years, and honestly, there’s no wrong way to do it.

Here are some variations of the Mediterranean Grilled Veggie and Burrata Panini that I’ve tried and loved (or at least learned from).

  • Meat Lover’s Twist: Add a few slices of prosciutto or grilled chicken if you’re in the mood for protein. I tried this once for my husband, and now he won’t let me make it any other way!
  • Spicy Kick: Spread a thin layer of harissa or sprinkle red pepper flakes for some heat. It’s a nice contrast to the creamy burrata.
  • Cheese Swap: If you can’t find burrata, fresh mozzarella works great too. I’ve used it in a pinch and still got that melty magic.
  • Veggie Mix-Up: Toss in some grilled mushrooms or artichoke hearts for extra depth. My kids always ask for mushrooms in their Mediterranean Grilled Veggie and Burrata Panini.
  • Herby Upgrade: Swap basil for arugula or add a sprinkle of dried oregano to the veggies before grilling. It’s a small tweak with big flavor.
  • Sweet Note: Add a few sun-dried tomatoes for a sweet-tart bite. I discovered this combo by accident, and it’s now a staple.
  • Bread Switch: Use sourdough or a baguette instead of ciabatta for a different crunch. I’m partial to sourdough myself.
  • Vegan Version: Skip the burrata and use a plant-based cheese or hummus as a creamy spread. I made this for a vegan friend, and they raved about it.

These tweaks keep the Mediterranean Grilled Veggie and Burrata Panini fresh every time I make it. What’ll you try first?

Servings and Timing

In my experience, this Mediterranean Grilled Veggie and Burrata Panini recipe is perfect for a small gathering or a family lunch. It usually takes me a little under an hour from start to finish, though I’ll admit I’m not the fastest chopper in the world. Here’s the breakdown for making your own Mediterranean Grilled Veggie and Burrata Panini.

  • Prep Time: 15 minutes
  • Cook Time: 20 minutes
  • Total Time: 35 minutes
  • Servings: 4 paninis

Step-by-Step Instructions

I’m gonna walk you through how I make my Mediterranean Grilled Veggie and Burrata Panini, step by step, with all the little tricks I’ve picked up along the way. Let’s get cooking!

Mediterranean Grilled Veggie and Burrata Panini recipe step-by-step guide
Delicious Mediterranean Grilled Veggie and Burrata Panini prepared with love – follow this detailed recipe guide

Step 1: Prep the Veggies

Start by slicing up your zucchini, eggplant, and bell pepper as evenly as you can. I’ve learned that keeping the slices around 1/4-inch thick helps them grill up nice and tender without falling apart. Toss ‘em with olive oil, salt, and pepper in a big bowl to get that flavor locked in.

Step 2: Grill the Veggies

Fire up a grill pan or outdoor grill to medium-high heat. Lay the veggies down in a single layer and let ‘em cook for about 3-4 minutes per side until you’ve got those gorgeous char marks. I usually do this in batches so nothing gets overcrowded—trust me, it’s worth the extra minute.

Step 3: Assemble the Panini

Grab your ciabatta rolls and spread a generous layer of pesto on the bottom half. Pile on the grilled veggies, then tear up that burrata and scatter it over the top. I love how the burrata just oozes when it gets warm in a Mediterranean Grilled Veggie and Burrata Panini.

Step 4: Add the Finishing Touches

Tuck in a few fresh basil leaves for that pop of green, then drizzle a bit of balsamic glaze if you’re feeling fancy. Pop the top half of the roll on, and you’re almost there with your Mediterranean Grilled Veggie and Burrata Panini.

Step 5: Grill the Sandwich

Heat up a panini press or a heavy skillet over medium heat. If I’m using a skillet, I press down with another heavy pan to get that squished, crispy effect. Cook for about 2-3 minutes per side until the bread is golden and the burrata starts to melt in your Mediterranean Grilled Veggie and Burrata Panini.

Step 6: Slice and Serve

Let the panini cool for just a minute before slicing it in half. I’ve burned my tongue one too many times jumping the gun here! Serve up your Mediterranean Grilled Veggie and Burrata Panini while it’s still warm and gooey.

Nutritional Information

I’m no dietitian, but I like to keep an eye on what I’m eating, especially with something as indulgent as a Mediterranean Grilled Veggie and Burrata Panini. Here’s a rough breakdown per serving of this Mediterranean Grilled Veggie and Burrata Panini, based on what I’ve calculated for my own peace of mind. (Numbers can vary a bit depending on your ingredients, of course!)

  • Calories: 480 per serving
  • Fat: 28g
  • Protein: 14g
  • Carbohydrates: 42g
  • Sodium: 620mg

Healthier Alternatives

If you’re looking to lighten up your Mediterranean Grilled Veggie and Burrata Panini, I’ve got a few swaps I’ve tried when I’m watching my calories or just wanna mix things up. These tweaks still keep that delicious Mediterranean Grilled Veggie and Burrata Panini vibe without all the guilt.

  • Lower Fat Cheese: Swap burrata for part-skim mozzarella or even a smear of light cream cheese. I’ve done this and still got that creamy texture.
  • Less Oil: Cut back to just a teaspoon of olive oil for grilling the veggies. It works fine, in my experience.
  • Whole Grain Bread: Use whole wheat ciabatta or a multigrain roll for extra fiber. I’ve swapped this in for a healthier Mediterranean Grilled Veggie and Burrata Panini.
  • Skip the Pesto: Use a light spread of hummus instead to cut down on fat. I think it adds a nice earthy flavor too.

Serving Suggestions

I love serving a Mediterranean Grilled Veggie and Burrata Panini with a few simple sides to round out the meal. Here are some of my go-to ideas for pairing up this Mediterranean Grilled Veggie and Burrata Panini, straight from my dinner table.

  • Light Salad: Toss together some mixed greens with a lemon vinaigrette for a fresh contrast.
  • Soup Side: A bowl of tomato basil soup is perfect for dipping your Mediterranean Grilled Veggie and Burrata Panini.
  • Fruit Plate: Serve with sliced melon or grapes for a sweet, refreshing bite.
  • Chips and Dip: At my last lunch gathering, I paired it with pita chips and tzatziki—total crowd-pleaser!

Common Mistakes to Avoid

I’ve botched my fair share of Mediterranean Grilled Veggie and Burrata Panini attempts over the years, so let me save you some grief with these pitfalls. Trust me on this one—I learned the hard way!

  • Overcooking Veggies: Don’t grill ‘em too long or they turn to mush. I’ve ended up with veggie slush before, and it’s no fun.
  • Skipping the Press: If you don’t press the panini, you miss that crispy, compact texture. I forgot once, and it was just a floppy mess.
  • Too Much Burrata: I know, it’s tempting, but overloading makes it soggy. Been there, done that with my Mediterranean Grilled Veggie and Burrata Panini.
  • Cold Bread: Make sure your grill or pan is hot before toasting the sandwich, or it won’t crisp up right. I’ve served some sad, soft paninis in my day.

Storing Tips

I’ve found that a Mediterranean Grilled Veggie and Burrata Panini doesn’t always keep super well, but with a few tricks, you can stretch it out. Here’s how I store leftovers of my Mediterranean Grilled Veggie and Burrata Panini.

  • Refrigerator: Wrap tightly in foil and store for up to 2 days. Reheat in a skillet to crisp it back up.
  • Freezer: I don’t recommend freezing the assembled panini—burrata gets weird. Grill and freeze just the veggies for up to a month.

Mediterranean Grilled Veggie and Burrata Panini recipe step-by-step guide
Delicious Mediterranean Grilled Veggie and Burrata Panini prepared with love – follow this detailed recipe guide

Frequently Asked Questions

I get a lot of questions about making a Mediterranean Grilled Veggie and Burrata Panini, so I’ve rounded up the most common ones here. Let’s dive in!

Can I make this recipe ahead of time?

You can grill the veggies a day ahead and store ‘em in the fridge. Just assemble and toast your Mediterranean Grilled Veggie and Burrata Panini right before serving to keep it fresh.

What if I don’t have a panini press?

No worries! Use a heavy skillet and press down with another pan or even a brick wrapped in foil. I’ve done this plenty of times.

Can I use frozen veggies?

I wouldn’t recommend it—they get too watery when grilled. Stick to fresh for the best texture.

Is burrata necessary?

It’s the star, but if you can’t find it, mozzarella or even ricotta can pinch-hit. It’s just not quite the same creamy vibe.

Can I make it gluten-free?

Totally! Swap the ciabatta for a gluten-free roll. I’ve got a friend who does this and loves it.

How do I keep the bread from getting soggy?

Don’t assemble too far in advance, and toast it well. I’ve learned to eat my Mediterranean Grilled Veggie and Burrata Panini right away!

What other veggies can I use?

Try mushrooms, yellow squash, or even asparagus. Mix it up based on what’s in season.

Can I make it vegan?

Yep, use hummus or a vegan cheese instead of burrata. It’s still super tasty, I promise.

Conclusion

I hope you’re as pumped as I am to try this Mediterranean Grilled Veggie and Burrata Panini in your own kitchen. It’s honestly one of those recipes that never gets old, whether I’m making it for a quick lunch or a casual dinner with friends. So, grab those veggies, fire up the grill, and let me know how your Mediterranean Grilled Veggie and Burrata Panini turns out—I’d love to hear!

Honey Whipped Feta and Cranberry Crostini

I’ll never forget the first time I whipped up a batch of Honey Whipped Feta and Cranberry Crostini for a holiday get-together. It was one of those last-minute ideas, born out of a desperate rummage through my fridge when I realized I had forgotten to plan an appetizer. With some feta, a jar of cranberry sauce, and a stale baguette, I threw together what turned out to be the star of the evening. My family couldn’t stop raving about the sweet-salty magic of Honey Whipped Feta and Cranberry Crostini, and honestly, I was pretty proud of myself for pulling it off! For more recipes like this, check out whipped feta dip with honey pistachios and cranberries. For more recipes like this, check out whipped feta dip with honey pistachios and cranberries. For more recipes like this, check out whipped feta with roasted strawberries 2. For more inspiration, I recommend checking out honey and oat bread recipe. For another great variation, check out flat beans and pork stew recipe. I was inspired by sweet and salty popcorn when creating this recipe. My friend at keep calm and bake printable has a similar recipe that you might enjoy. For another great variation, check out cranberry orange sauce.

Since that chaotic kitchen moment, Honey Whipped Feta and Cranberry Crostini has become my go-to for any gathering. It’s easy, looks fancy without much effort, and always gets a “Wow, you made this?” reaction.

I’m so excited to share this recipe with you because, trust me, if I can make Honey Whipped Feta and Cranberry Crostini on a whim, anyone can. Let’s dive into how this little appetizer can elevate your next party or cozy night in!

Why You’ll Love This Recipe

I’ve found that Honey Whipped Feta and Cranberry Crostini just hits all the right notes. It’s got this creamy, tangy feta base that gets a sweet drizzle of honey, paired with the tart pop of cranberry—it’s like a flavor party in your mouth! And let’s be real, it takes minimal effort for maximum “oohs” and “aahs” at the table.

In my kitchen, this Honey Whipped Feta and Cranberry Crostini recipe is a lifesaver for busy days. Whether I’m hosting friends or just want a quick snack that feels indulgent, it comes together in under 30 minutes. Plus, it’s endlessly customizable, which I’ll get into later, so you can make it your own!

Ingredients List

When it comes to making Honey Whipped Feta and Cranberry Crostini, I’m pretty picky about quality ingredients because they make all the difference. I usually buy a good block of feta from my local market—none of that pre-crumbled stuff if I can help it. Here’s everything you’ll need to whip up this crowd-pleaser, including my personal faves for each component of Honey Whipped Feta and Cranberry Crostini.

For the Crostini Base

  • 1 baguette, sliced into 1/2-inch rounds for that perfect crunch
  • 2 tablespoons (30ml) olive oil, extra virgin if you’ve got it for richer flavor
  • 1 clove garlic, peeled and halved for a subtle rub

For the Honey Whipped Feta

  • 8 oz (225g) feta cheese, at room temperature for easier blending
  • 4 oz (115g) cream cheese, softened to make it silky smooth
  • 2 tablespoons (30ml) honey, raw if possible—I love the floral notes
  • 1 tablespoon (15ml) heavy cream, for that extra lush texture

For the Cranberry Topping

  • 1/2 cup (120g) cranberry sauce, homemade or canned, though I prefer the chunky kind
  • 1/4 cup (30g) dried cranberries, for a chewy contrast
  • 2 tablespoons (10g) chopped fresh thyme, for an herby finish to tie it all together

These ingredients for Honey Whipped Feta and Cranberry Crostini are pretty straightforward, and I bet you’ve got most of ‘em in your pantry already!

Variations

One thing I adore about Honey Whipped Feta and Cranberry Crostini is how easy it is to switch things up depending on the season or what I’ve got on hand. I’ve experimented with this recipe more times than I can count, and it always turns out delicious. Here are some twists on Honey Whipped Feta and Cranberry Crostini that I’ve tried and loved—feel free to play around with them too!

  • Fig and Honey Swap: Replace the cranberry sauce with fig jam for a deeper, jammy sweetness. I tried this once for a fall dinner, and it felt so sophisticated.
  • Spicy Kick: Add a pinch of red pepper flakes to the Honey Whipped Feta and Cranberry Crostini spread for a little heat. My husband loves this version!
  • Pomegranate Pop: Sprinkle pomegranate seeds on top instead of dried cranberries for a burst of color and juice. It’s my go-to for holiday vibes.
  • Nutty Crunch: Toss on some chopped walnuts or pecans for texture. I did this for Thanksgiving, and my kids couldn’t get enough.
  • Balsamic Drizzle: Finish with a tiny drizzle of balsamic reduction alongside the honey. It’s a game-changer, trust me.
  • Herb Switch-Up: Swap thyme for rosemary or sage if you’re feeling experimental. I’ve done rosemary around Christmas, and it’s pure magic.
  • Fruit Fusion: Mix in some chopped dried apricots with the cranberries for a sweet-tart combo. It’s unexpected but works so well.
  • Goat Cheese Blend: Sub half the feta with goat cheese for a tangier take on Honey Whipped Feta and Cranberry Crostini. I stumbled on this by accident and now I’m hooked!

These variations keep Honey Whipped Feta and Cranberry Crostini fresh every time I make it. What’s your twist gonna be?

Servings and Timing

In my experience, timing for Honey Whipped Feta and Cranberry Crostini is a breeze, which is why I keep coming back to it for quick appetizers. It usually takes me just a short bit to prep and assemble, even on a hectic day. Here’s the breakdown for making Honey Whipped Feta and Cranberry Crostini, based on my many kitchen runs.

  • Prep Time: 15 minutes
  • Cook Time: 10 minutes
  • Total Time: 25 minutes
  • Servings: 12-15 crostini

Step-by-Step Instructions

I’m gonna walk you through making Honey Whipped Feta and Cranberry Crostini like I’m right there in the kitchen with you. I’ve made this so many times, I’ve got little tricks to make it foolproof. Let’s get started!

Honey Whipped Feta and Cranberry Crostini recipe step-by-step guide
Delicious Honey Whipped Feta and Cranberry Crostini prepared with love – follow this detailed recipe guide

Step 1: Toast the Baguette

Preheat your oven to 375°F (190°C). Slice your baguette into 1/2-inch rounds, brush both sides with olive oil, and lay them out on a baking sheet.

Pop ‘em in the oven for 8-10 minutes until golden and crispy—I like to flip halfway for even toasting. Once out, rub each slice with a halved garlic clove while they’re still warm; it’s a small step that adds big flavor to Honey Whipped Feta and Cranberry Crostini.

Step 2: Whip the Feta

While the crostini cool, grab your food processor or blender. Toss in the feta, cream cheese, honey, and heavy cream, then blend until it’s super smooth—takes about 2 minutes in my old machine. I’ve learned to scrape down the sides to get every bit creamy. This honey whipped feta is the heart of Honey Whipped Feta and Cranberry Crostini, so don’t skimp on blending!

Step 3: Assemble the Base

Spread a generous dollop of the whipped feta mixture onto each toasted baguette slice. I use a small spoon to get it even, but a piping bag works if you’re feeling fancy (I’m usually not!). Make sure you’ve got a nice thick layer—it’s gotta hold up to the toppings.

Step 4: Add Cranberry Topping

Spoon a small amount of cranberry sauce over the feta on each crostini. I like to spread it lightly so it doesn’t overpower the other flavors in Honey Whipped Feta and Cranberry Crostini. Sprinkle a few dried cranberries on top for that extra chew.

Step 5: Garnish and Serve

Finish each piece with a pinch of fresh thyme for a pop of green and earthy flavor. I’ve sometimes drizzled a tiny bit more honey on top for sweetness—totally optional, though. Arrange your Honey Whipped Feta and Cranberry Crostini on a platter, and watch them disappear!

Step 6: Enjoy the Compliments

Seriously, every time I serve Honey Whipped Feta and Cranberry Crostini, I’m reminded why I love cooking. There’s nothing better than seeing friends dig in and ask for the recipe. So, take a moment to savor your kitchen win!

Nutritional Information

I’m not gonna pretend I’m a nutrition guru, but I do like knowing the basics of what I’m eating with Honey Whipped Feta and Cranberry Crostini. This is an estimate per crostini, based on 15 servings, and it’s a treat, not a diet food. Here’s the breakdown for Honey Whipped Feta and Cranberry Crostini.

  • Calories: 130 per serving
  • Fat: 7g
  • Protein: 3g
  • Carbohydrates: 14g
  • Sodium: 210mg

Healthier Alternatives

If I’m trying to lighten things up, I’ve got a few swaps for Honey Whipped Feta and Cranberry Crostini that still keep the flavor on point. I’ve tried these myself when I’m watching calories or just wanna mix it up. Here are some ideas for a healthier take on Honey Whipped Feta and Cranberry Crostini.

  • Low-Fat Feta: Use reduced-fat feta to cut down on calories without losing too much taste.
  • Greek Yogurt Swap: Replace cream cheese with plain Greek yogurt for a tangy, lighter spread.
  • Whole Grain Base: Swap the baguette for whole grain or gluten-free bread if you’re cutting refined carbs.
  • Less Honey: Cut back on honey or use a sugar-free sweetener for a lower-sugar version of Honey Whipped Feta and Cranberry Crostini.

Serving Suggestions

I love serving Honey Whipped Feta and Cranberry Crostini in different ways depending on the occasion. At my last holiday party, it was the perfect starter, but I’ve also enjoyed it solo with a glass of wine. Here are some ideas to pair with Honey Whipped Feta and Cranberry Crostini.

  • As an Appetizer: Serve alongside a charcuterie board with prosciutto and olives.
  • For Brunch: Pair with a mimosa for a sweet-savory morning bite.
  • Party Platter: Add to a spread with other small bites like stuffed mushrooms.
  • Holiday Snack: Perfect with hot cider for a cozy twist on Honey Whipped Feta and Cranberry Crostini.

Common Mistakes to Avoid

I’ve flubbed Honey Whipped Feta and Cranberry Crostini a few times in my early attempts, so let me save you the headache. Trust me on this one, these little missteps can mess up the vibe. Here are pitfalls to dodge with Honey Whipped Feta and Cranberry Crostini.

  • Overtoasting the Bread: I burned my first batch by leaving it in too long—aim for golden, not charred.
  • Cold Feta Woes: If the feta isn’t at room temp, it won’t whip smooth. Learned that the hard way!
  • Too Much Cranberry: Don’t glob on the sauce; it overpowers the feta balance.
  • Skipping Garlic Rub: I forgot this once, and the Honey Whipped Feta and Cranberry Crostini lacked that subtle punch.

Storing Tips

I’ve found Honey Whipped Feta and Cranberry Crostini doesn’t always keep super well fully assembled, but you can store components separately. In my experience, here’s how to make it last. These tips help with leftovers of Honey Whipped Feta and Cranberry Crostini!

  • Refrigerator: Store whipped feta in an airtight container for 3-4 days.
  • Freezer: Don’t freeze assembled crostini; the bread gets soggy.
  • Toast Fresh: Keep baguette slices untoasted until ready to serve.

Honey Whipped Feta and Cranberry Crostini recipe step-by-step guide
Delicious Honey Whipped Feta and Cranberry Crostini prepared with love – follow this detailed recipe guide

Frequently Asked Questions

Can I make Honey Whipped Feta and Cranberry Crostini ahead of time?

Totally! Whip up the feta spread and store it in the fridge for a few days. Just toast the bread and assemble your Honey Whipped Feta and Cranberry Crostini right before serving to keep it crisp.

What if I don’t have a food processor?

No worries, I’ve been there. Use a hand mixer or even mash it with a fork if you’ve got the elbow grease. It won’t be as smooth, but it still works for Honey Whipped Feta and Cranberry Crostini.

Can I use fresh cranberries instead of sauce?

Sure can! Simmer fresh cranberries with a bit of sugar and water to make a quick compote. I’ve done this for a fresher take on Honey Whipped Feta and Cranberry Crostini, and it’s awesome.

Is there a dairy-free option?

Yup, try a dairy-free feta or cashew cheese. I haven’t perfected this yet, but it’s doable with some tweaking.

What’s the best bread for this?

I’m partial to a crusty baguette, but ciabatta or sourdough works great too. Just make sure it’s sturdy enough for the toppings.

Can I serve this warm?

You could, though I usually don’t. Toast the bread warm, then add cold or room-temp toppings for contrast.

How do I make it less sweet?

Cut back on the honey or use a tart cranberry sauce. I sometimes skip extra honey if I want a savory vibe.

Is this kid-friendly?

In my house, yes! My kids love the sweet-tart mix, though I go light on thyme for their picky palates.

Conclusion

I hope you’re as excited as I am to try Honey Whipped Feta and Cranberry Crostini at your next gathering. It’s such a simple way to impress without spending hours in the kitchen, and I’m betting you’ll get the same rave reviews I always do. So, grab that baguette, whip up some Honey Whipped Feta and Cranberry Crostini, and let me know how it turns out—I’d love to hear!

Creamy Ricotta and Sun-Dried Tomato Stuffed Shells

Hey there, friends! I’ve gotta share something that’s become a total game-changer in my kitchen: Creamy Ricotta and Sun-Dried Tomato Stuffed Shells. For more recipes like this, check out spinach and ricotta stuffed chicken breasts. For more recipes like this, check out spinach and ricotta stuffed chicken breasts. For more recipes like this, check out spinach and ricotta stuffed chicken easy delicious recipe. For another great variation, check out how to make dried tomato powder. For more inspiration, I recommend checking out cooked flat beans and tomato sidedish. I was inspired by avocado corn and tomato salad when creating this recipe. For more inspiration, I recommend checking out guacamole stuffed tomato recipe. If you love this recipe, you’ll also enjoy creamy pesto sauce recipe.

I stumbled upon this recipe a few years back when I was desperate to impress my in-laws at a family dinner, and let me tell ya, it was a hit from the first bite. My mother-in-law, who’s notoriously picky, couldn’t stop raving about these Creamy Ricotta and Sun-Dried Tomato Stuffed Shells, and I’ve been making them ever since.

Honestly, there’s something magical about the way the creamy ricotta pairs with those tangy, chewy bits of sun-dried tomato. I’ve tweaked this recipe over time to make it just right, and I’m so excited to walk you through how to whip up these Creamy Ricotta and Sun-Dried Tomato Stuffed Shells in your own kitchen. Trust me, it’s easier than it looks!

If you’re anything like me, you’re always on the hunt for a dish that feels fancy but doesn’t have you slaving away for hours. Well, this is it, and I can’t wait for you to fall in love with Creamy Ricotta and Sun-Dried Tomato Stuffed Shells just like my family did.

Why You’ll Love This Recipe

I’ve found that Creamy Ricotta and Sun-Dried Tomato Stuffed Shells are the perfect blend of comfort and sophistication. They’ve got this rich, indulgent filling that makes you feel like you’re dining at a fancy Italian restaurant, but they’re surprisingly simple to pull together. In my kitchen, this dish is a go-to for weeknight dinners or when I’m hosting friends.

Seriously, who doesn’t love a meal that looks like you put in tons of effort but actually didn’t break a sweat? These Creamy Ricotta and Sun-Dried Tomato Stuffed Shells deliver big on flavor with minimal fuss. Plus, they’re super customizable, which I’ll get into later, so you can make ‘em your own!

Ingredients List

Let’s talk about what you’ll need to make Creamy Ricotta and Sun-Dried Tomato Stuffed Shells. I’m pretty picky about my ingredients because I’ve learned that quality matters, especially with something as simple yet flavorful as this dish. Here’s my rundown of everything I use, with a few notes on what I prefer and why for these Creamy Ricotta and Sun-Dried Tomato Stuffed Shells.

For the Shells and Base

  • 20 jumbo pasta shells, uncooked (I usually grab Barilla or De Cecco for their sturdy texture)
  • 1 tablespoon (15ml) olive oil, for coating the pan to prevent sticking
  • 3 cups (720ml) marinara sauce, store-bought or homemade (I’m a fan of Rao’s for a quick option)

For the Filling

  • 2 cups (480g) whole milk ricotta cheese, for that silky smoothness (I avoid low-fat here; it just doesn’t hit the same)
  • 1/2 cup (50g) grated Parmesan cheese, for a nutty depth
  • 1 large egg, to bind the filling together
  • 1/2 cup (75g) sun-dried tomatoes packed in oil, drained and finely chopped (I usually buy Bella Sun Luci for the best flavor punch)
  • 1 cup (100g) shredded mozzarella cheese, divided for filling and topping
  • 2 cloves garlic, minced (fresh is non-negotiable in my book)
  • 1 teaspoon dried Italian seasoning, for that herby goodness
  • 1/2 teaspoon salt, to taste
  • 1/4 teaspoon black pepper, freshly ground if you’ve got it

I’ve gotta say, getting the right sun-dried tomatoes makes all the difference in Creamy Ricotta and Sun-Dried Tomato Stuffed Shells. Don’t skimp on that tangy kick!

Variations

One thing I adore about Creamy Ricotta and Sun-Dried Tomato Stuffed Shells is how versatile they are. I’ve played around with this recipe so many times, tweaking it based on what’s in my pantry or who’s coming over for dinner. Here are some of my favorite spins on these Creamy Ricotta and Sun-Dried Tomato Stuffed Shells that you might wanna try.

  • Meat Lovers’ Delight: Toss in 1/2 pound of cooked ground Italian sausage or beef to the filling for a hearty twist. I tried this once for my husband, who’s a total carnivore, and now it’s his fave way to eat Creamy Ricotta and Sun-Dried Tomato Stuffed Shells.
  • Spinach Boost: Mix in 1 cup of chopped, cooked spinach to the ricotta filling for extra nutrients and a pop of color. My kids always ask for this version!
  • Pesto Power: Swirl 2 tablespoons of basil pesto into the ricotta mix for a fresh, garlicky vibe. It’s a game-changer.
  • Cheesy Overload: Add an extra 1/2 cup of shredded fontina to the filling for ultimate gooeyness. I did this for a party once, and folks couldn’t stop scooping up seconds.
  • Mushroom Magic: Sauté 1 cup of chopped mushrooms and fold them into the filling for an earthy depth. It’s a cozy twist I love in the fall.
  • Spicy Kick: Sprinkle in 1/2 teaspoon of red pepper flakes to the filling if you’re craving heat. I’m a bit of a spice wimp, but my brother swears by this.
  • Artichoke Addition: Chop up 1/2 cup of marinated artichoke hearts and mix them in for a Mediterranean flair. This one’s a personal fave for Creamy Ricotta and Sun-Dried Tomato Stuffed Shells when I want something different.

Honestly, there’s no wrong way to customize these. What’s your go-to twist?

Servings and Timing

When I whip up a batch of Creamy Ricotta and Sun-Dried Tomato Stuffed Shells, I’m usually cooking for my family of four with a few leftovers in mind. In my experience, this recipe is spot-on for a decent-sized crowd or meal prep. Here’s the breakdown for making these Creamy Ricotta and Sun-Dried Tomato Stuffed Shells, based on how it usually goes down in my kitchen.

  • Prep Time: 25 minutes
  • Cook Time: 35 minutes
  • Total Time: 1 hour
  • Servings: 5-6 portions (about 3-4 shells per person)

Step-by-Step Instructions

Alright, let’s get into the nitty-gritty of making Creamy Ricotta and Sun-Dried Tomato Stuffed Shells. I’ve made this recipe dozens of times, so I’ve got a few tricks up my sleeve to keep things smooth. Follow along, and you’ll have a pan of these beauties ready in no time!

Creamy Ricotta and Sun-Dried Tomato Stuffed Shells recipe step-by-step guide
Delicious Creamy Ricotta and Sun-Dried Tomato Stuffed Shells prepared with love – follow this detailed recipe guide

Step 1: Cook the Shells

First things first, boil those jumbo shells according to the package instructions, but shave off a minute or two so they’re al dente. I’ve overcooked them before, and trust me, mushy shells are a nightmare to stuff. Drain ‘em and rinse with cold water to stop the cooking, then set aside.

A little drizzle of olive oil helps keep ‘em from sticking together while you prep the filling for Creamy Ricotta and Sun-Dried Tomato Stuffed Shells.

Step 2: Mix the Filling

In a big bowl, combine the ricotta, Parmesan, half the mozzarella, egg, chopped sun-dried tomatoes, garlic, Italian seasoning, salt, and pepper. Stir it up until it’s nice and creamy. I like to use a fork to really mash everything together—makes the filling for Creamy Ricotta and Sun-Dried Tomato Stuffed Shells super smooth.

Step 3: Stuff the Shells

Grab a spoon (or a piping bag if you’re feeling fancy—I’m usually too lazy for that) and stuff each shell with about 2 tablespoons of the ricotta mix. It’s a bit messy, but that’s half the fun, right? Lay them in a greased 9×13 baking dish with a thin layer of marinara on the bottom.

Step 4: Add Sauce and Cheese

Pour the rest of your marinara over the stuffed shells, making sure they’re mostly covered. Sprinkle the remaining mozzarella on top for that golden, bubbly finish we all crave in Creamy Ricotta and Sun-Dried Tomato Stuffed Shells. I sometimes sneak in a bit extra cheese because, well, why not?

Step 5: Bake to Perfection

Pop the dish into a preheated 375°F (190°C) oven and bake for 30-35 minutes, until the cheese is melty and slightly browned. I usually check around the 25-minute mark to make sure the sauce isn’t bubbling over. The smell of Creamy Ricotta and Sun-Dried Tomato Stuffed Shells baking is pure heaven!

Step 6: Let It Rest

Pull it out and let it sit for 5 minutes before serving. I know it’s tempting to dive right in, but giving it a quick rest helps the flavors settle. Now you’ve got a gorgeous pan of Creamy Ricotta and Sun-Dried Tomato Stuffed Shells ready to impress!

Nutritional Information

I’m no dietician, but I like to keep an eye on what I’m serving my family, especially with something as rich as Creamy Ricotta and Sun-Dried Tomato Stuffed Shells. Here’s a rough breakdown per serving (based on 6 portions) for these Creamy Ricotta and Sun-Dried Tomato Stuffed Shells. It’s a hearty dish, but totally worth the splurge in my opinion!

  • Calories: 410 per serving
  • Fat: 22g
  • Protein: 18g
  • Carbohydrates: 35g
  • Sodium: 680mg

Healthier Alternatives

If you’re looking to lighten up Creamy Ricotta and Sun-Dried Tomato Stuffed Shells, I’ve got a few swaps that I’ve tried over the years. They still deliver on flavor, even if they tweak the indulgence factor. Here are my go-to options for making Creamy Ricotta and Sun-Dried Tomato Stuffed Shells a bit guilt-free.

  • Low-Fat Ricotta: Swap in part-skim ricotta instead of whole milk to cut down on fat. I’ve done this when I’m watching calories, and it’s still pretty creamy.
  • Whole Wheat Shells: Use whole wheat jumbo shells for added fiber and nutrients. They’ve got a nuttier taste, which I actually kinda like.
  • Less Cheese: Reduce the mozzarella by half and skip the Parmesan topping. It’s not as decadent, but still tasty for Creamy Ricotta and Sun-Dried Tomato Stuffed Shells.
  • Veggie Sauce: Opt for a marinara with no added sugar or make your own with extra veggies blended in. I’ve pureed carrots into mine before, and no one noticed!

Serving Suggestions

I love getting creative with how I serve Creamy Ricotta and Sun-Dried Tomato Stuffed Shells, depending on the occasion. Whether it’s a cozy family night or a dinner with friends, these pair beautifully with a few sides. Here are my favorite ways to plate up Creamy Ricotta and Sun-Dried Tomato Stuffed Shells.

  • With a Salad: A crisp Caesar or simple green salad with balsamic dressing cuts through the richness. It’s my go-to balance.
  • Garlic Bread on the Side: Nothing beats sopping up extra marinara with a buttery slice of garlic bread. My kids fight over the last piece!
  • Steamed Veggies: Broccoli or green beans add a healthy, colorful touch. I steam ‘em quick while the Creamy Ricotta and Sun-Dried Tomato Stuffed Shells bake.
  • Glass of Wine: Pair with a light red like Pinot Noir. It’s my little indulgence when serving this dish.

Common Mistakes to Avoid

I’ve flubbed my fair share of dishes, and Creamy Ricotta and Sun-Dried Tomato Stuffed Shells were no exception when I started out. Trust me on this one, avoiding these pitfalls will save you some kitchen heartache. Here’s what I’ve learned the hard way about making Creamy Ricotta and Sun-Dried Tomato Stuffed Shells.

  • Overcooking Shells: Boil them just to al dente or they’ll turn to mush when baked. I ruined a whole batch once by not paying attention.
  • Skimping on Sauce: Don’t be shy with the marinara; dry shells are a bummer. I’ve had to learn to coat ‘em generously.
  • Overstuffing: Too much filling and they’ll burst or spill. I got overzealous early on and made a mess!
  • Not Greasing the Dish: Skip the oil or spray, and you’ll be scraping shells off the pan. Been there, done that with Creamy Ricotta and Sun-Dried Tomato Stuffed Shells.

Storing Tips

I’ve found that Creamy Ricotta and Sun-Dried Tomato Stuffed Shells are awesome for leftovers, which is a win in my busy household. Here’s how I keep ‘em fresh so we can enjoy round two (or three) of Creamy Ricotta and Sun-Dried Tomato Stuffed Shells without losing that just-baked magic.

  • Refrigerator: Store in an airtight container for up to 4 days. I just reheat in the microwave with a splash of water to loosen the sauce.
  • Freezer: Freeze unbaked shells in a single layer, then transfer to a freezer bag for up to 2 months. Thaw overnight before baking.

Creamy Ricotta and Sun-Dried Tomato Stuffed Shells recipe step-by-step guide
Delicious Creamy Ricotta and Sun-Dried Tomato Stuffed Shells prepared with love – follow this detailed recipe guide

Frequently Asked Questions

I get a bunch of questions about Creamy Ricotta and Sun-Dried Tomato Stuffed Shells, especially from folks trying them for the first time. Here are some common ones I’ve answered over the years about making Creamy Ricotta and Sun-Dried Tomato Stuffed Shells.

Can I make this ahead of time?

Absolutely! I often assemble Creamy Ricotta and Sun-Dried Tomato Stuffed Shells a day ahead, cover, and refrigerate. Just bake when you’re ready, adding 5-10 extra minutes if it’s cold from the fridge.

Can I use fresh tomatoes instead of sun-dried?

I wouldn’t recommend it. Fresh tomatoes are too watery and lack the intense flavor of sun-dried. Stick with the jarred stuff for the best results.

What if I don’t have jumbo shells?

No worries! You can use manicotti or even roll lasagna noodles around the filling. I’ve done this in a pinch, and it works fine.

Is this recipe vegetarian?

Yup, as long as your marinara and cheeses are meat-free, it’s 100% vegetarian. I’ve served it to veggie friends with no complaints.

Can I skip the egg in the filling?

You can, though the filling might be a bit looser. The egg helps bind it, but I’ve skipped it before and still enjoyed the dish.

How do I reheat leftovers?

I usually microwave individual portions with a damp paper towel over them to keep ‘em moist. You can also reheat in the oven at 350°F for about 15 minutes.

Can I use a different cheese?

Sure thing. I’ve swapped ricotta for cottage cheese for a lighter texture, or added provolone for extra melt. Play around and see what you like!

Do these freeze well?

They do! Freeze before baking, as I mentioned earlier, and you’ve got a freezer meal ready for a busy night. Just don’t bake twice, or they’ll get soggy.

Conclusion

Well, there you have it, folks—everything I’ve learned about making Creamy Ricotta and Sun-Dried Tomato Stuffed Shells! I hope you’re as pumped as I am to get into the kitchen and give this recipe a whirl.

Whether it’s for a special occasion or just a cozy night in, these Creamy Ricotta and Sun-Dried Tomato Stuffed Shells always hit the spot. Drop a comment if you try ‘em—I’d love to hear how it goes!

Cheesy Burrata Crostini with Prosciutto and Peaches

I still remember the first time I stumbled upon the idea of making Cheesy Burrata Crostini with Prosciutto and Peaches. It was a scorching summer afternoon, and I was flipping through a stack of old food magazines at my grandma’s house, desperate for something light but fancy to whip up for a last-minute get-together. For more recipes like this, check out sweet potato rounds with burrata roasted beets and walnut sage pesto. For more recipes like this, check out italian basil chicken cutlets with tomato and burrata topping. For more recipes like this, check out italian basil chicken cutlets with tomato and burrata topping. I was inspired by streusel cake topped with peaches when creating this recipe. For more inspiration, I recommend checking out one pot cheesy pasta and ham recipe. If you love this recipe, you’ll also enjoy chicken and dumplings with a homemade dumpling recipe. For another great variation, check out reindeer noses with printable. My friend at au jus sauce with or without drippings has a similar recipe that you might enjoy.

When I saw a photo of creamy burrata paired with sweet peaches and salty prosciutto, I knew I had to try it. Honestly, that first batch of Cheesy Burrata Crostini with Prosciutto and Peaches was a game-changer, and now it’s a go-to in my kitchen whenever I want to impress without breaking a sweat.

Since then, I’ve made Cheesy Burrata Crostini with Prosciutto and Peaches more times than I can count, tweaking it here and there to get that perfect balance of flavors. My family can’t get enough of it, especially my husband, who swears it’s the best appetizer I’ve ever made (and he’s brutally honest, so I’ll take the win!). I’m beyond excited to share this recipe with y’all today, complete with my little tips and tricks to make your own batch of Cheesy Burrata Crostini with Prosciutto and Peaches absolutely drool-worthy.

Why You’ll Love This Recipe

I’ve found that Cheesy Burrata Crostini with Prosciutto and Peaches is one of those dishes that just hits all the right notes. It’s got creamy, dreamy burrata that oozes with every bite, the savory kick of prosciutto, and a burst of sweetness from ripe peaches. In my kitchen, it’s become the ultimate crowd-pleaser, whether I’m hosting a fancy dinner or just throwing together a quick snack for friends.

And let’s be real, it’s ridiculously easy to make. You don’t need to be a pro chef to nail Cheesy Burrata Crostini with Prosciutto and Peaches; it’s all about simple ingredients coming together in a magical way. Plus, it looks so darn pretty on a platter that you’ll get all the oohs and ahhs without spending hours slaving over a hot stove!

Ingredients List

When it comes to making Cheesy Burrata Crostini with Prosciutto and Peaches, I’m super picky about using fresh, high-quality ingredients. I usually buy my burrata from a local Italian market because it’s creamier than the stuff at the big grocery stores, but whatever you can find works. Here’s everything you’ll need to whip up this stunning appetizer.

For the Crostini Base

  • 1 baguette, sliced into ½-inch thick pieces (about 12-14 slices)
  • 2 tablespoons (30ml) olive oil, for brushing (I prefer extra virgin for that rich flavor)
  • 1 garlic clove, peeled and halved, for rubbing on the toast

For the Toppings

  • 8 oz (225g) burrata cheese, at room temperature for easy spreading
  • 4 oz (115g) prosciutto, thinly sliced (I love getting the good imported stuff when I can)
  • 2 medium ripe peaches, thinly sliced (look for ones that are fragrant and slightly soft)
  • 1 tablespoon (15ml) honey, for drizzling (local honey adds a nice touch, in my opinion)
  • 1 handful fresh basil leaves, torn or whole, for garnish
  • Pinch of flaky sea salt, for a fancy finishing touch
  • Freshly ground black pepper, to taste

I’ve gotta say, the peaches are the star of Cheesy Burrata Crostini with Prosciutto and Peaches, so don’t skimp on finding ripe ones. And if you’re tempted to swap the burrata for something else, trust me, it’s worth splurging for that creamy texture in every bite of Cheesy Burrata Crostini with Prosciutto and Peaches.

Variations

One thing I adore about Cheesy Burrata Crostini with Prosciutto and Peaches is how easy it is to switch things up based on what’s in season or what I’m craving. Over the years, I’ve played around with different twists on this recipe, and my friends and family always have opinions on their favorite versions.

Here are a few variations I’ve tried that might just inspire you to make Cheesy Burrata Crostini with Prosciutto and Peaches your own.

  • Nectarine Swap: Use nectarines instead of peaches for a slightly tangier bite. I tried this once when peaches were out of season, and it was a pleasant surprise.
  • Fig Fusion: Swap peaches for fresh figs when they’re available. My kids always ask for this version because it feels extra fancy.
  • Spicy Kick: Drizzle a tiny bit of hot honey instead of regular honey for some heat. I’m a spice lover, so this one’s often on my table.
  • Herby Twist: Add a sprinkle of fresh thyme along with the basil for an earthy note. It’s a subtle change but packs a punch.
  • Balsamic Glaze: Drizzle a balsamic reduction over the top for a sweet-tart finish. I did this for a dinner party, and everyone raved about it.
  • Arugula Addition: Toss a few peppery arugula leaves on top for a fresh, green contrast. This one’s great if you want a bit more bite.
  • Goat Cheese Switch: If burrata’s not your thing, try a creamy goat cheese instead. I’ve done this in a pinch, and it still works beautifully with Cheesy Burrata Crostini with Prosciutto and Peaches.

I think playing with these variations keeps Cheesy Burrata Crostini with Prosciutto and Peaches exciting, especially if you’re making it often like I do. Got a favorite twist of your own? I’d love to hear about it!

Servings and Timing

In my experience, Cheesy Burrata Crostini with Prosciutto and Peaches is perfect for a small gathering or as a starter for a family meal. It’s quick to put together, which I love when I’m juggling a million things. Here’s how the timing usually breaks down for me.

  • Prep Time: 10 minutes
  • Cook Time: 5 minutes (just for toasting the bread)
  • Total Time: 15 minutes
  • Servings: 12-14 crostini, enough for 4-6 people as an appetizer

I’ve noticed Cheesy Burrata Crostini with Prosciutto and Peaches disappears fast, so if you’ve got a bigger crowd, you might wanna double the recipe. It’s that addictive!

Step-by-Step Instructions

Making Cheesy Burrata Crostini with Prosciutto and Peaches is a breeze, and I’m gonna walk you through it like I’m right there in your kitchen. I’ve got a few little tricks up my sleeve to make sure yours turns out just as tasty as mine. Let’s get started!

Cheesy Burrata Crostini with Prosciutto and Peaches recipe step-by-step guide
Delicious Cheesy Burrata Crostini with Prosciutto and Peaches prepared with love – follow this detailed recipe guide

Step 1: Toast the Baguette

Preheat your oven to 400°F (200°C) or fire up a grill pan if you’re feeling fancy (I love the grill marks!). Brush both sides of your baguette slices with olive oil, then lay them on a baking sheet or grill pan. Toast for about 2-3 minutes per side until they’re golden and crisp—don’t walk away, ‘cause they burn fast, as I’ve learned the hard way!

Step 2: Rub with Garlic

While the bread’s still warm, rub one side of each slice with the cut side of a garlic clove. This little step gives Cheesy Burrata Crostini with Prosciutto and Peaches a subtle garlicky kick without overpowering the other flavors. I always keep a garlic clove handy for this—it’s my secret weapon.

Step 3: Assemble the Burrata

Tear or spoon a generous dollop of burrata onto each crostini. I like to let the cheese sit at room temp for a bit before spreading; it’s easier to work with that way. Spread it out nice and even so every bite of Cheesy Burrata Crostini with Prosciutto and Peaches is creamy heaven.

Step 4: Add Prosciutto and Peaches

Layer a small slice or fold of prosciutto over the burrata, then top with a couple of thin peach slices. I’ve found arranging the peaches in a fan shape looks extra pretty, but do whatever feels right to you. This combo is what makes Cheesy Burrata Crostini with Prosciutto and Peaches so irresistible.

Step 5: Drizzle and Garnish

Drizzle a tiny bit of honey over each crostini for a touch of sweetness, then sprinkle on some flaky sea salt and a grind of black pepper. Toss a few torn basil leaves on top for color and freshness. Honestly, this final touch takes Cheesy Burrata Crostini with Prosciutto and Peaches from good to gourmet in seconds.

Step 6: Serve Immediately

Serve these babies right away while the bread’s still crisp and the burrata’s oozy. I’ve made the mistake of letting them sit too long, and the bread gets soggy—not cute. Trust me, Cheesy Burrata Crostini with Prosciutto and Peaches is best enjoyed fresh out of the oven!

Nutritional Information

I’m not gonna lie, Cheesy Burrata Crostini with Prosciutto and Peaches isn’t exactly diet food, but it’s a treat worth savoring in moderation. I’ve crunched the numbers (well, sorta), and here’s a rough breakdown per crostini based on my recipe. Keep in mind portions can vary!

  • Calories: 180 per crostini
  • Fat: 10g
  • Protein: 6g
  • Carbohydrates: 16g
  • Sodium: 320mg

For me, the richness of Cheesy Burrata Crostini with Prosciutto and Peaches is part of the charm, but if you’re watching your intake, I’ve got some lighter options coming up next. A little indulgence never hurt anyone, right?

Healthier Alternatives

If I’m trying to keep things on the lighter side, I’ve swapped a few things in Cheesy Burrata Crostini with Prosciutto and Peaches without sacrificing flavor. It’s all about balance, and these tweaks have worked for me when I’m watching calories or just wanna feel a bit less guilty. Here are my go-to alternatives for a healthier take on Cheesy Burrata Crostini with Prosciutto and Peaches.

  • Lower-Fat Cheese: Use part-skim ricotta instead of burrata. It’s still creamy but cuts down on fat.
  • Less Prosciutto: Halve the amount of prosciutto or use turkey bacon for a leaner protein option. I’ve tried this, and it’s still tasty.
  • Whole-Grain Bread: Swap the baguette for a whole-grain version to add fiber and nutrients. I like the nutty flavor it brings to Cheesy Burrata Crostini with Prosciutto and Peaches.
  • No Honey: Skip the honey drizzle if you’re cutting sugar. The peaches are sweet enough on their own, in my opinion.

These swaps let me enjoy Cheesy Burrata Crostini with Prosciutto and Peaches without overdoing it, especially during swimsuit season. What healthier twists have you tried?

Serving Suggestions

I love serving Cheesy Burrata Crostini with Prosciutto and Peaches in a bunch of different ways, depending on the vibe I’m going for. It’s such a versatile dish, and at my last dinner party, these disappeared in minutes with any pairing I chose. Here are a few ideas to make Cheesy Burrata Crostini with Prosciutto and Peaches shine on your table.

  • As an Appetizer: Plate alongside a crisp white wine like Pinot Grigio for a refreshing start to a meal.
  • Brunch Bite: Pair with a mimosa and some fresh fruit for a luxe morning spread.
  • Party Platter: Serve on a big wooden board with other charcuterie items for a stunning display. My guests always love this setup with Cheesy Burrata Crostini with Prosciutto and Peaches.
  • Light Lunch: Add a side salad with arugula and balsamic for a balanced, summery meal.

Honestly, you can’t go wrong with how you present Cheesy Burrata Crostini with Prosciutto and Peaches—it’s a stunner no matter what!

Common Mistakes to Avoid

I’ve made my fair share of blunders while perfecting Cheesy Burrata Crostini with Prosciutto and Peaches, so let me save you some trouble with a few lessons I’ve learned the hard way. Trust me on this one, avoiding these pitfalls will make your crostini so much better. Here’s what to watch out for when making Cheesy Burrata Crostini with Prosciutto and Peaches.

  • Overtoasting Bread: Don’t let the baguette get too hard; it should be crisp, not a jawbreaker. I’ve ruined a batch or two this way.
  • Unripe Peaches: Using underripe peaches kills the sweetness. I’ve made this mistake, and it threw off the whole balance of Cheesy Burrata Crostini with Prosciutto and Peaches.
  • Assembling Too Early: Don’t put it together until right before serving, or the bread gets soggy. Learned this during a party prep disaster!
  • Skipping Salt: Forgetting that pinch of flaky salt seems minor, but it really ties the flavors together. Don’t skip it like I did once.

Avoid these, and your Cheesy Burrata Crostini with Prosciutto and Peaches will turn out picture-perfect every time. What slip-ups have you run into?

Storing Tips

I’ve found that Cheesy Burrata Crostini with Prosciutto and Peaches is best eaten fresh, but if you’ve got leftovers or wanna prep ahead, here’s how to store things. In my experience, it’s all about keeping components separate until serving. Check out these tips for keeping Cheesy Burrata Crostini with Prosciutto and Peaches as tasty as possible.

  • Refrigerator: Store unassembled ingredients (toasted bread, burrata, peaches, prosciutto) separately in airtight containers for up to 2 days.
  • Freezer: Don’t freeze assembled crostini; it ruins the texture. Toast can be frozen for up to a month, though!
  • Reassembly: Only assemble right before serving to avoid soggy bread.

These tricks help me keep Cheesy Burrata Crostini with Prosciutto and Peaches ready for a quick snack or unexpected guests. How do you store yours?

Cheesy Burrata Crostini with Prosciutto and Peaches recipe step-by-step guide
Delicious Cheesy Burrata Crostini with Prosciutto and Peaches prepared with love – follow this detailed recipe guide

Frequently Asked Questions

I get a ton of questions about making Cheesy Burrata Crostini with Prosciutto and Peaches, so I’ve rounded up the most common ones I hear. Here’s the scoop on everything you might be wondering about. Let’s dive into these FAQs for Cheesy Burrata Crostini with Prosciutto and Peaches!

Can I make this recipe ahead of time?

Yup, you can prep parts of Cheesy Burrata Crostini with Prosciutto and Peaches ahead. Toast the bread and store it in an airtight container for a day or two, and keep the toppings ready in the fridge. Just assemble right before serving to keep everything crisp and fresh.

Can I use canned peaches?

I wouldn’t recommend it, honestly. Fresh peaches give that juicy sweetness that canned ones just can’t match. If you’re in a pinch, drain them really well, but the texture won’t be the same.

What if I can’t find burrata?

No worries! Fresh mozzarella or even a creamy ricotta can step in for burrata. It won’t be quite as oozy, but it’ll still taste amazing on Cheesy Burrata Crostini with Prosciutto and Peaches.

Is there a vegetarian option?

Absolutely, just skip the prosciutto. You could add a sprinkle of chopped walnuts or a drizzle of balsamic glaze for extra flavor. I’ve done this for veggie friends, and they loved it.

Can I grill the peaches?

Oh, heck yes! Grilling peaches adds a smoky caramelization that’s to die for. Just grill for 1-2 minutes per side before slicing.

What bread works best?

I’m partial to a crusty baguette because it holds up well under the toppings. But any sturdy artisan bread will do the trick. Experiment and see what you like best!

How do I keep the bread from getting soggy?

The key is assembling Cheesy Burrata Crostini with Prosciutto and Peaches right before eating. Don’t let it sit too long once it’s put together. Also, make sure your peaches aren’t overly juicy—pat them dry if needed.

Can I make this gluten-free?

For sure! Use a gluten-free baguette or crackers as your base. Just toast them lightly, and you’re good to go with a gluten-free version of Cheesy Burrata Crostini with Prosciutto and Peaches.

Conclusion

I hope you’re as pumped as I am to try making Cheesy Burrata Crostini with Prosciutto and Peaches at home. It’s honestly one of those recipes that looks way fancier than it is, and I can’t wait for you to see the smiles it brings to your table. Give this a shot for your next gathering, and let me know how it turns out—I’m rooting for ya with every bite of Cheesy Burrata Crostini with Prosciutto and Peaches!